This guide explains all Omamori in Silent Hill f and where to obtain them.
It covers everything from those drawn through the Draw Omamori feature to items found in the field, including their effects and how to acquire them.
Please use this guide to assist you throughout your playthrough.
What Is the Draw Omamori?
Purchased at a Hokora Using Faith
It's possible that each Hokora has its own fixed pool of Omamori it can draw from. I'm still testing this, so the details may change—sorry for the back-and-forth.
Also, the amount of Faith required increases each time you draw.
Should You Keep Drawing?
I don’t really recommend spending all your Faith on Draw Omamori.
The reason is that strengthening Hinako’s stats through Ema also consumes Faith. Try to balance these two uses, and draw only when you have some room to spare.
Omamori Obtained from Draw Omamori
There are 23 types in total.
Completing the full set unlocks an Achievement. The total Faith required is 20,200.
| Required Faith | |
| 1st Draw Faith: 300 | 2nd Draw Faith: 400 |
| 3rd Draw Faith: 500 | 4th Draw Faith: 600 |
| 5th Draw Faith: 700 | 6th Draw Faith: 800 |
| 7th Draw Faith: 900 | 8th Draw and onward Faith: 1000 (fixed) |
| List of Omamori Obtained | |
| The ones toward the bottom appear to be rarer. 【Plum】Increases maximum Stamina. 【Clam】Reduces enemy detection range. 【Owl】Greatly reduces Sanity consumed while in Focus. 【Bear】Lower-durability weapons are more likely to inflict Stagger. 【Bamboo】Increases maximum Sanity. 【Sakura】Boosts the effectiveness of Health recovery items and Omamori. 【Mantis】Slightly restores Health when performing a Counter after a Perfect Dodge. 【Otter】Restores durability for unequipped weapons when taking down enemies. 【Crab】Weapon durability does not decrease while in Focus. 【Turtle】Greatly reduces damage taken while at full Health. 【Willow】Boosts the effectiveness of items and Omamori that restore Sanity. 【Butterfly】Greatly reduces Stamina consumed when dodging, but disables consecutive dodges. 【Boar】Greatly increases Stamina recovery speed and reduces exhaustion recovery time. 【Kudzu Leaf】Increases maximum Health, Sanity, and Stamina. 【Dolphin】Slightly restores maximum Sanity when performing a Perfect Dodge. 【Swordfish】After performing a Counter, Stamina will not be consumed for a short duration. 【Camel】Reduces the maximum Sanity consumed when using Focus Attack. 【Beetle】Greatly increases damage dealt to Staggered enemies. 【Serpent】Automatically performs Counters, but reduces maximum Sanity and slows Sanity recovery. 【Tanuki】Converts incoming Health damage into Sanity damage. 【Elephant】You will not Stagger when hit, but damage taken is greatly increased. 【Weasel】Greatly increases damage dealt, but enemies will no longer Stagger. 【Daisy】Stamina and Sanity become unlimited, but any damage taken results in instant death. | |
Hidden Omamori List
These Omamori are not drawn from Draw Omamori — they are found within each area.
Collecting all of them unlocks an Achievement. (Separate from Draw Omamori)
【Peony】
Restores a small amount of Health when picking up food items.
Edition Bonus
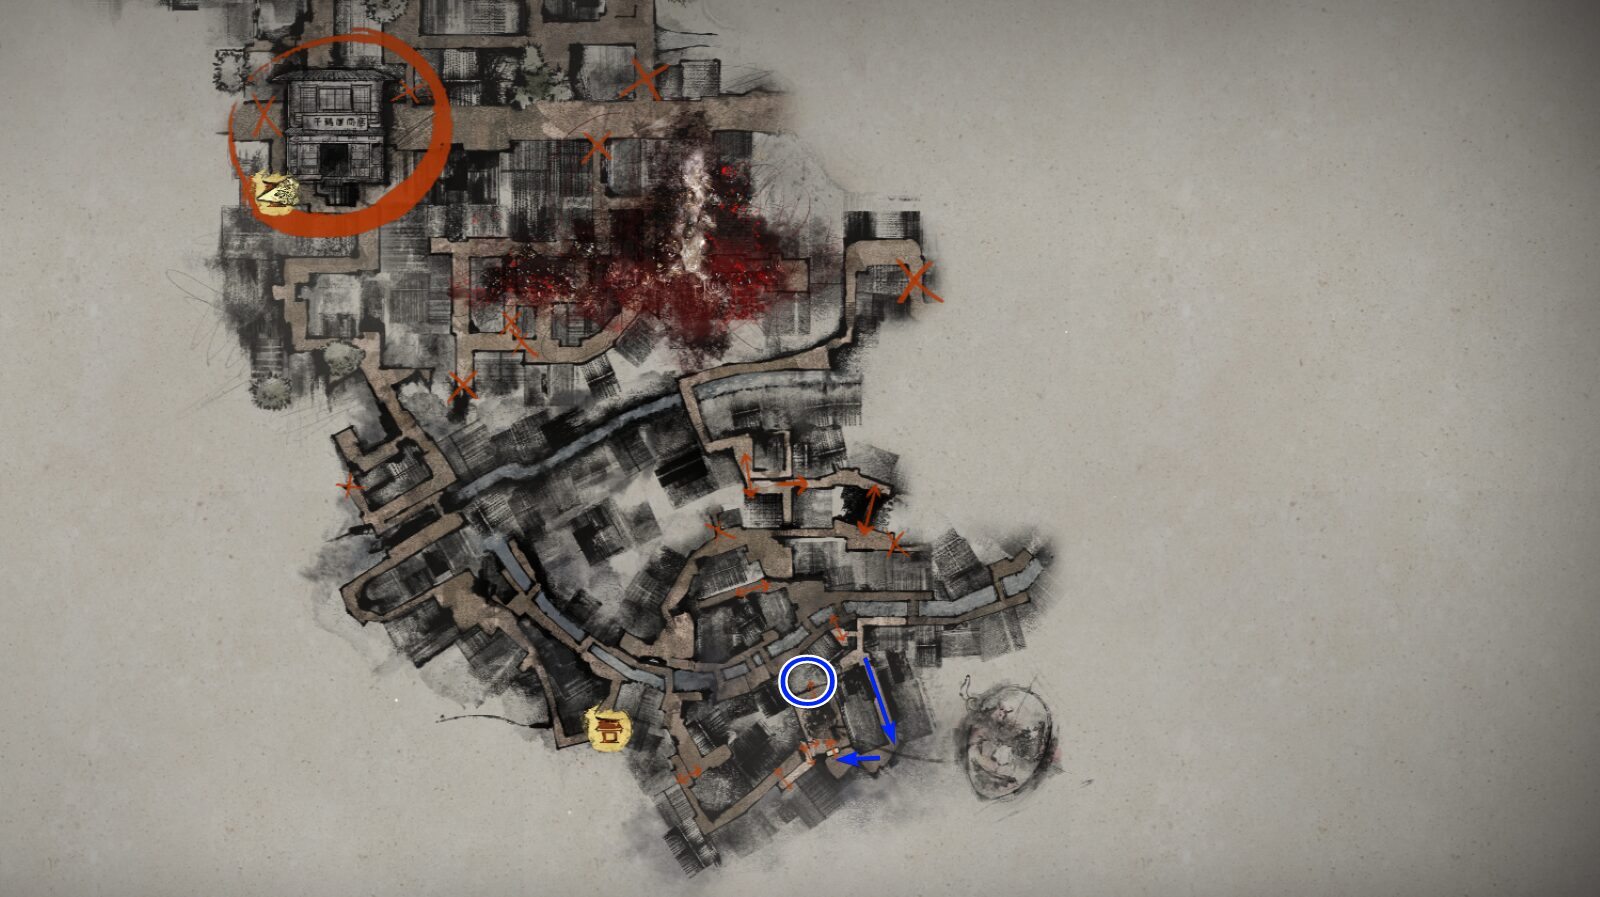
【Whale】Location: Ebisugaoka
Healing is not interrupted when taking damage. Certain attacks are nullified.
【Cat】Location: Shrine Path
Greatly reduces damage taken while dodging.
【Pine】Location: Amida-Shirakawa
Increases maximum Health.
【Spider】Location: Ebisugaoka
Reduces weapon durability loss while attacking.
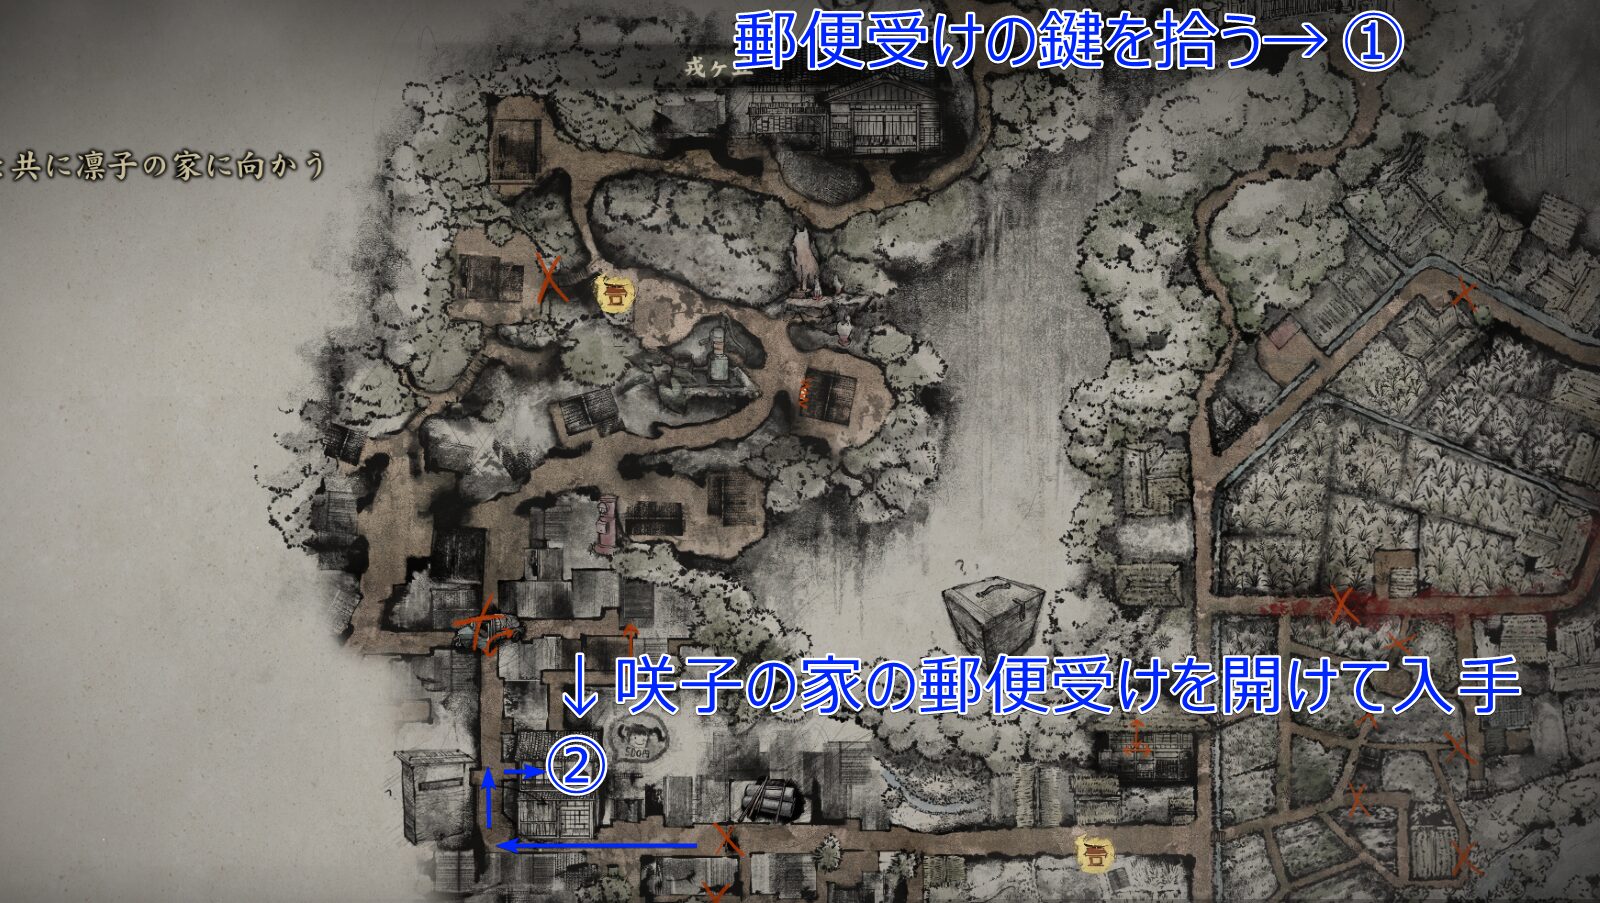
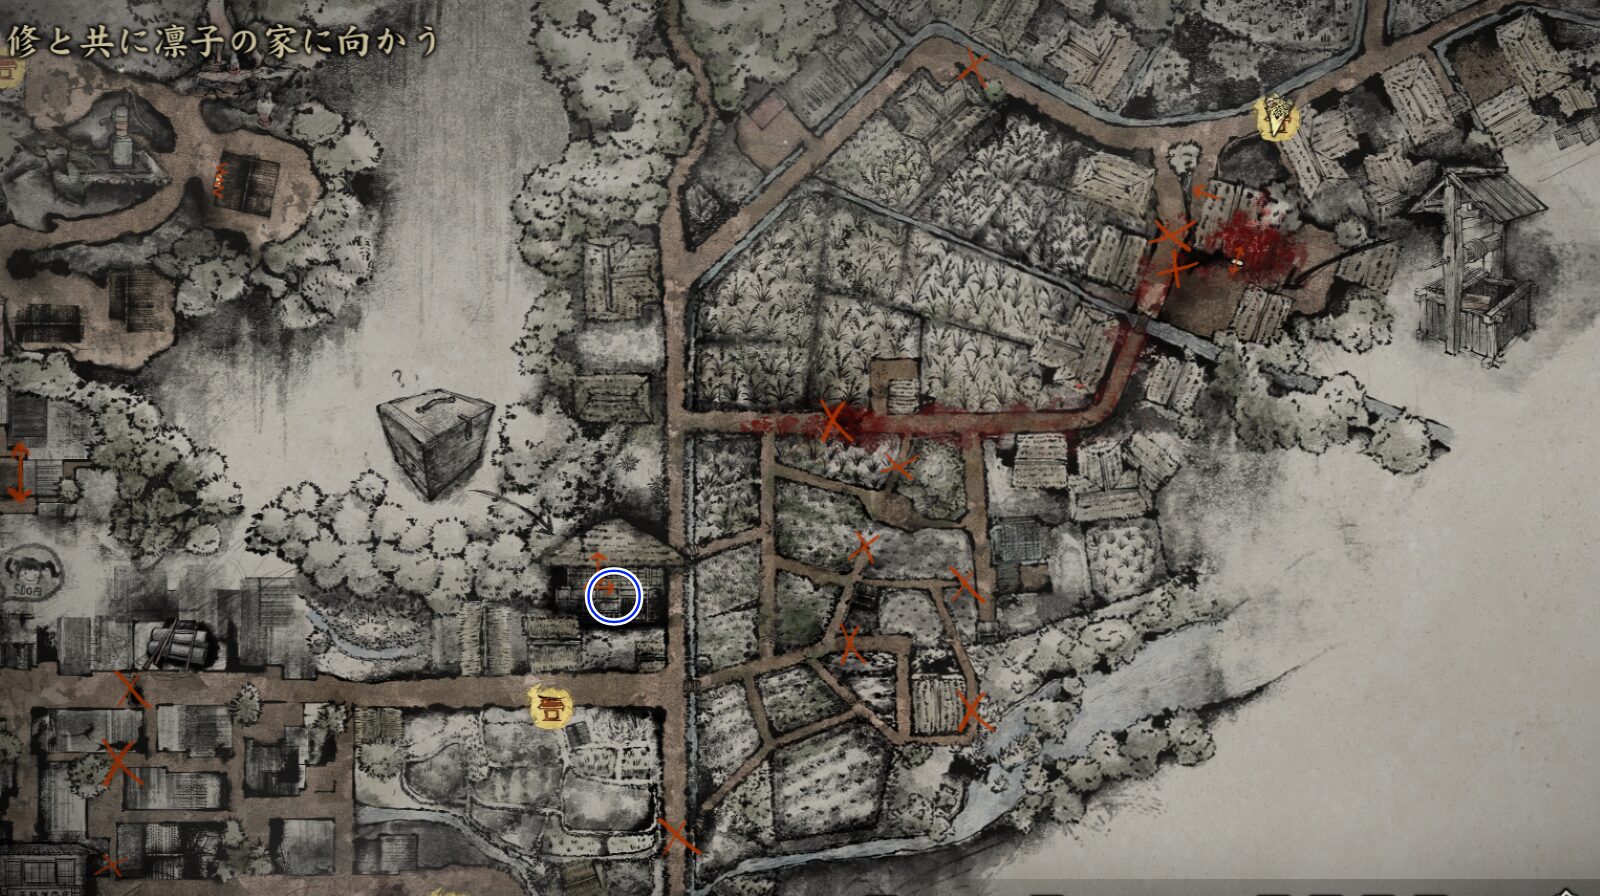
Amida-Shirakawa Walkthrough
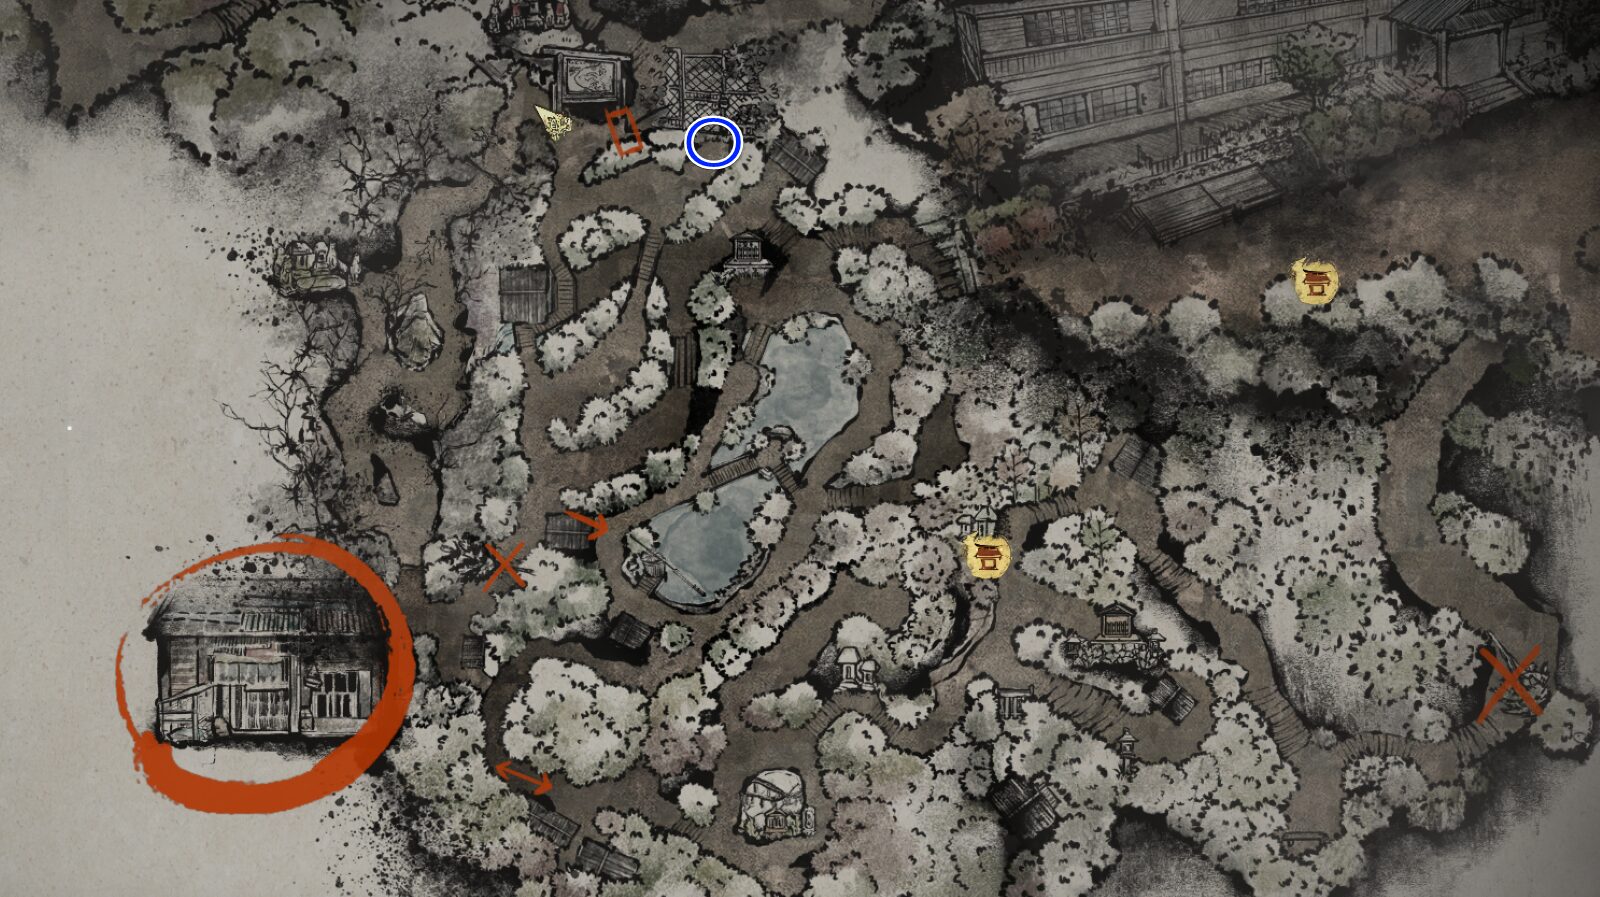
【Hawk】Location: Corridor
Greatly increases Focus Gauge accumulation speed.
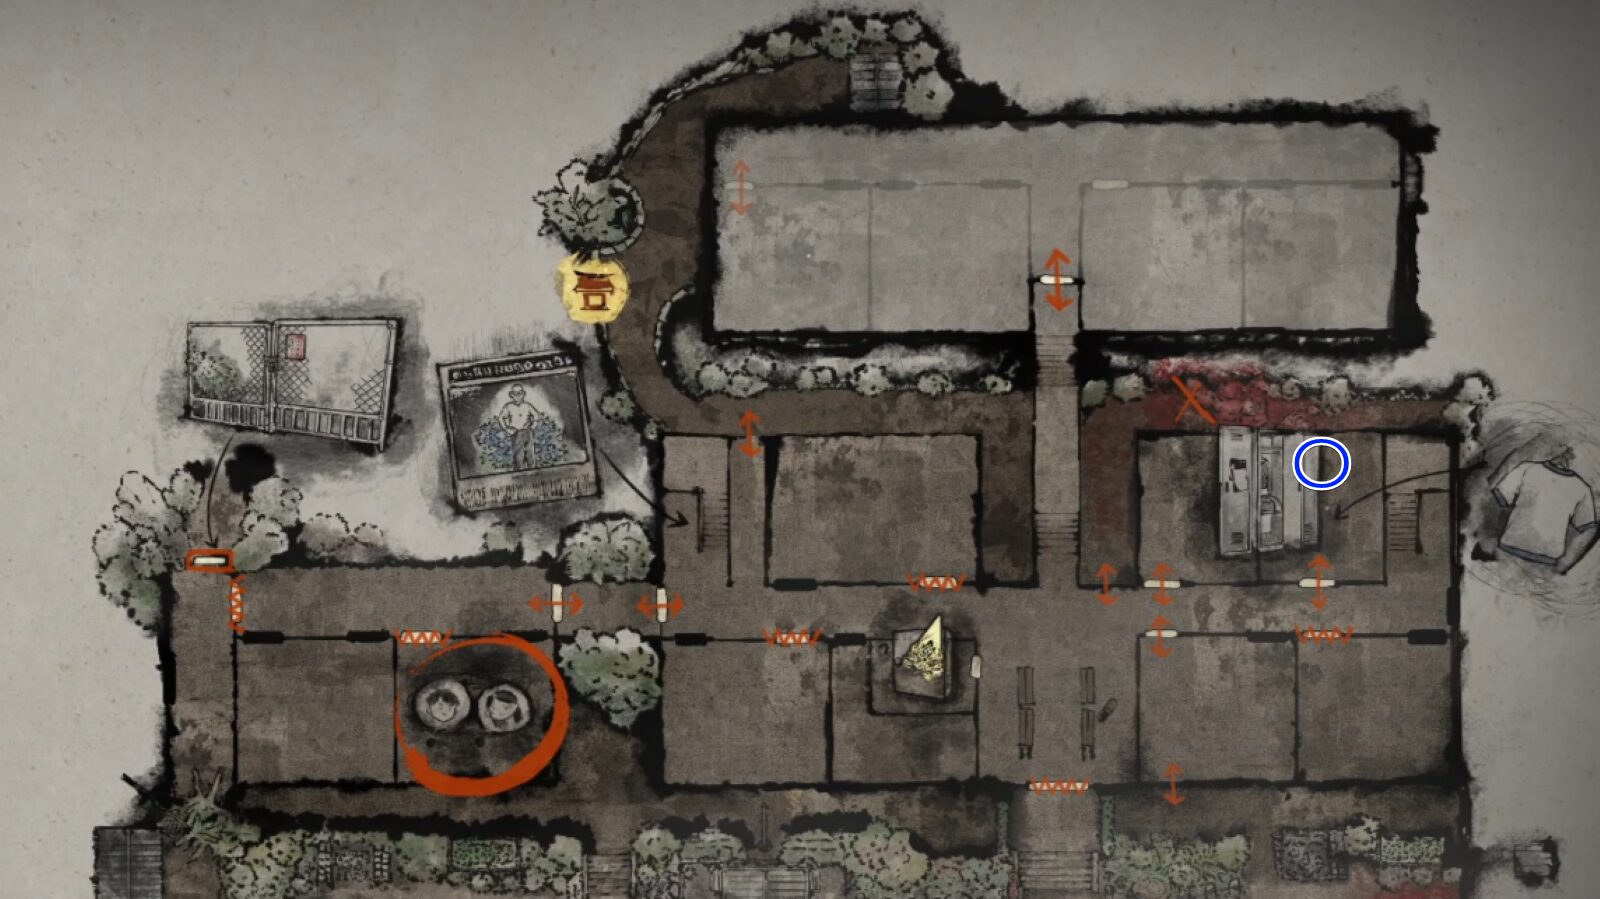
【Wolf】Location: Ebisugaoka Middle School – Girls’ Locker
The higher your remaining weapon durability, the more damage you deal.
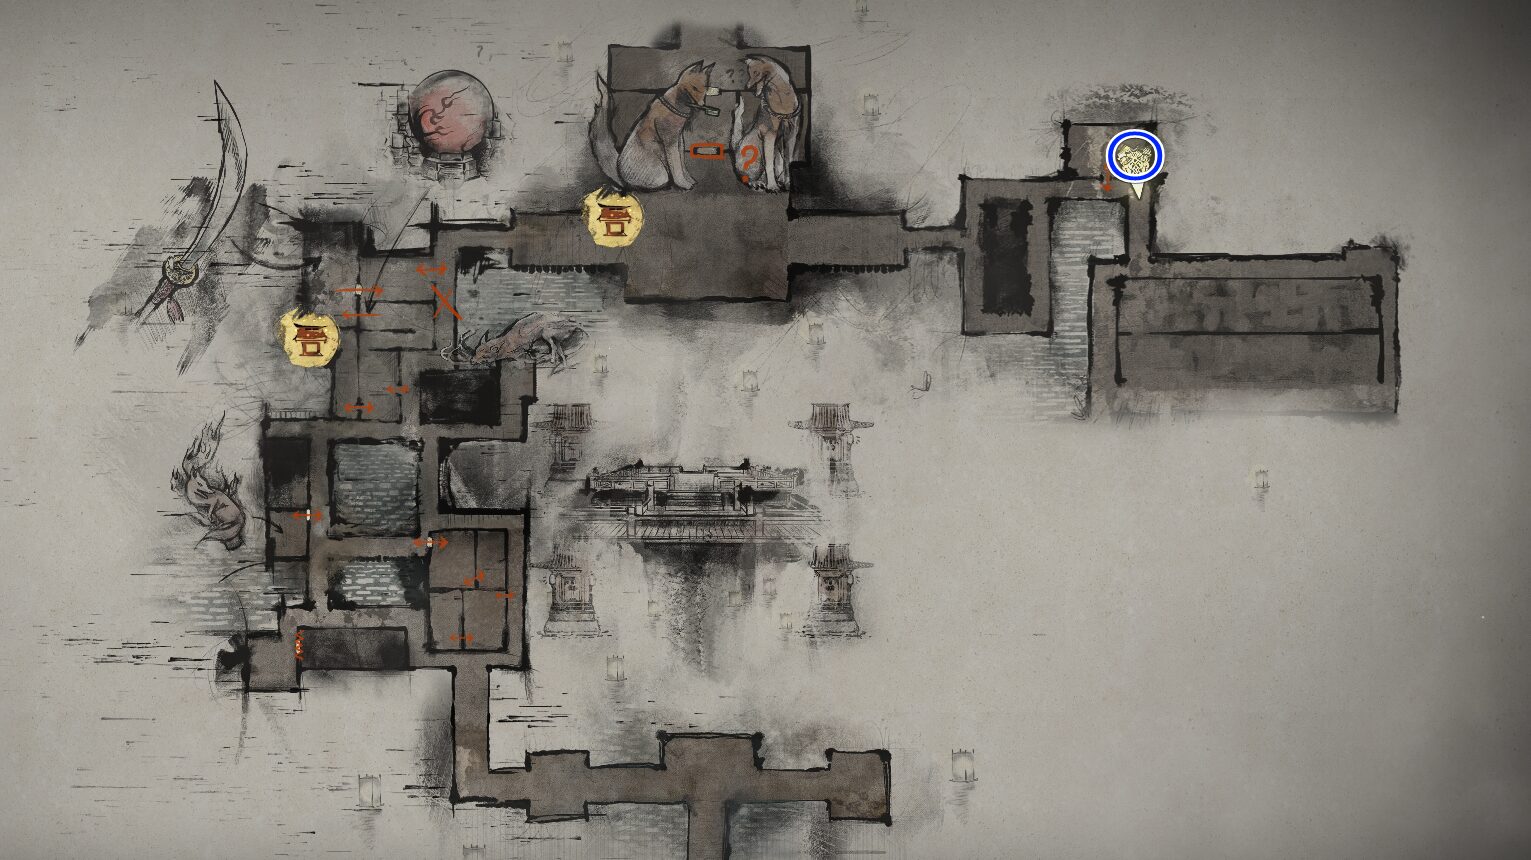
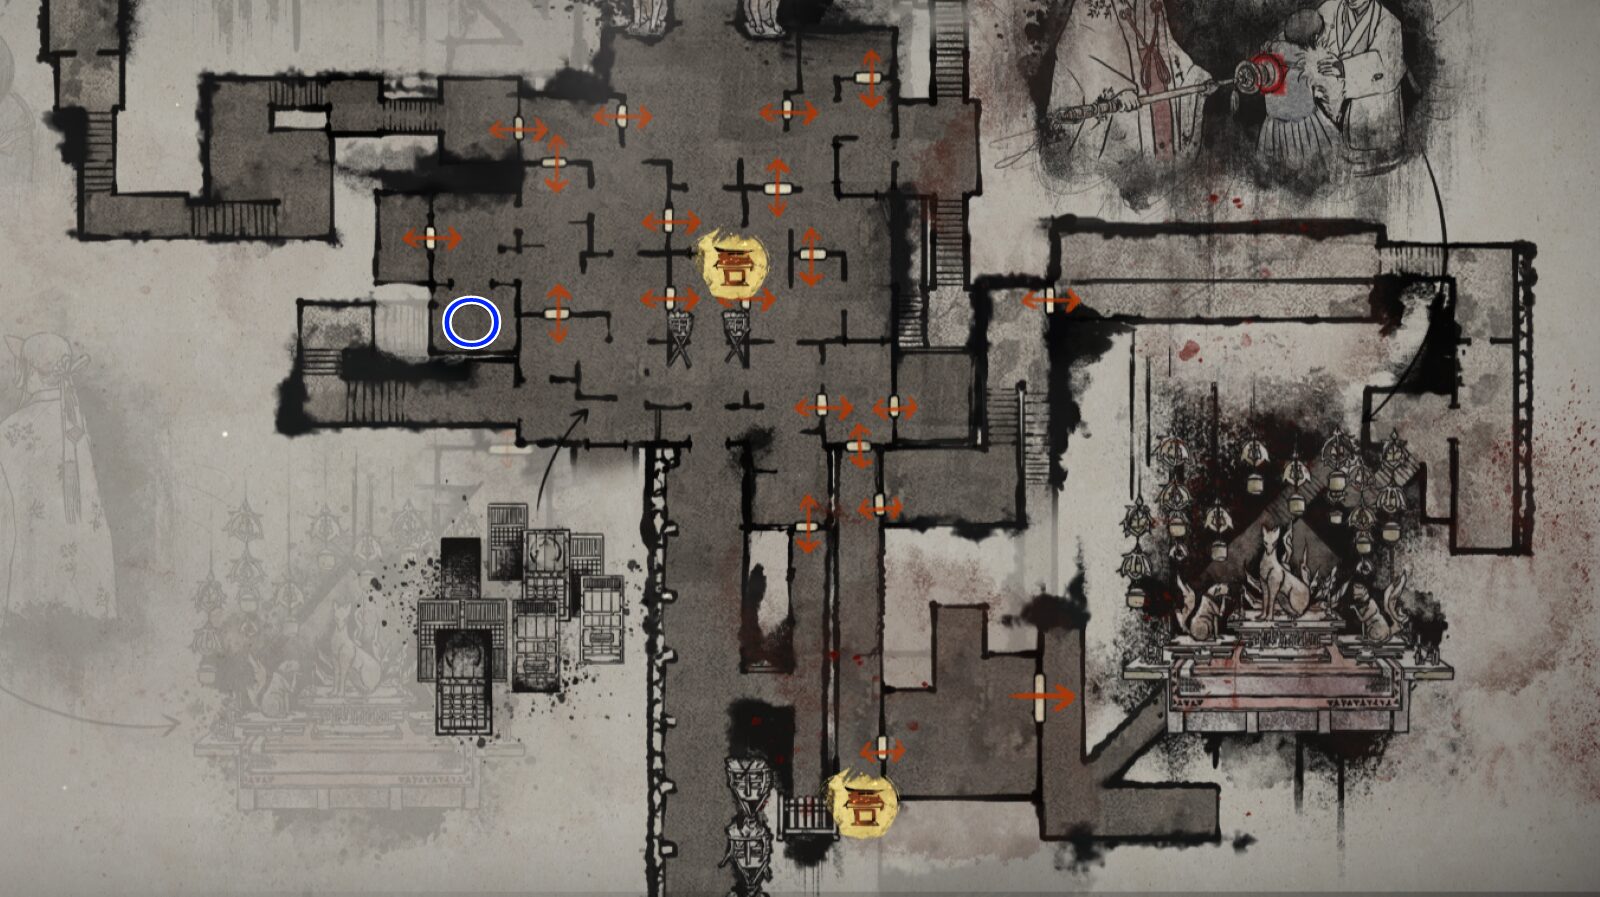
【Bull】Location: Worship Hall – East Floor
Greatly reduces Stamina consumption for Heavy Attacks and Focus Attacks.
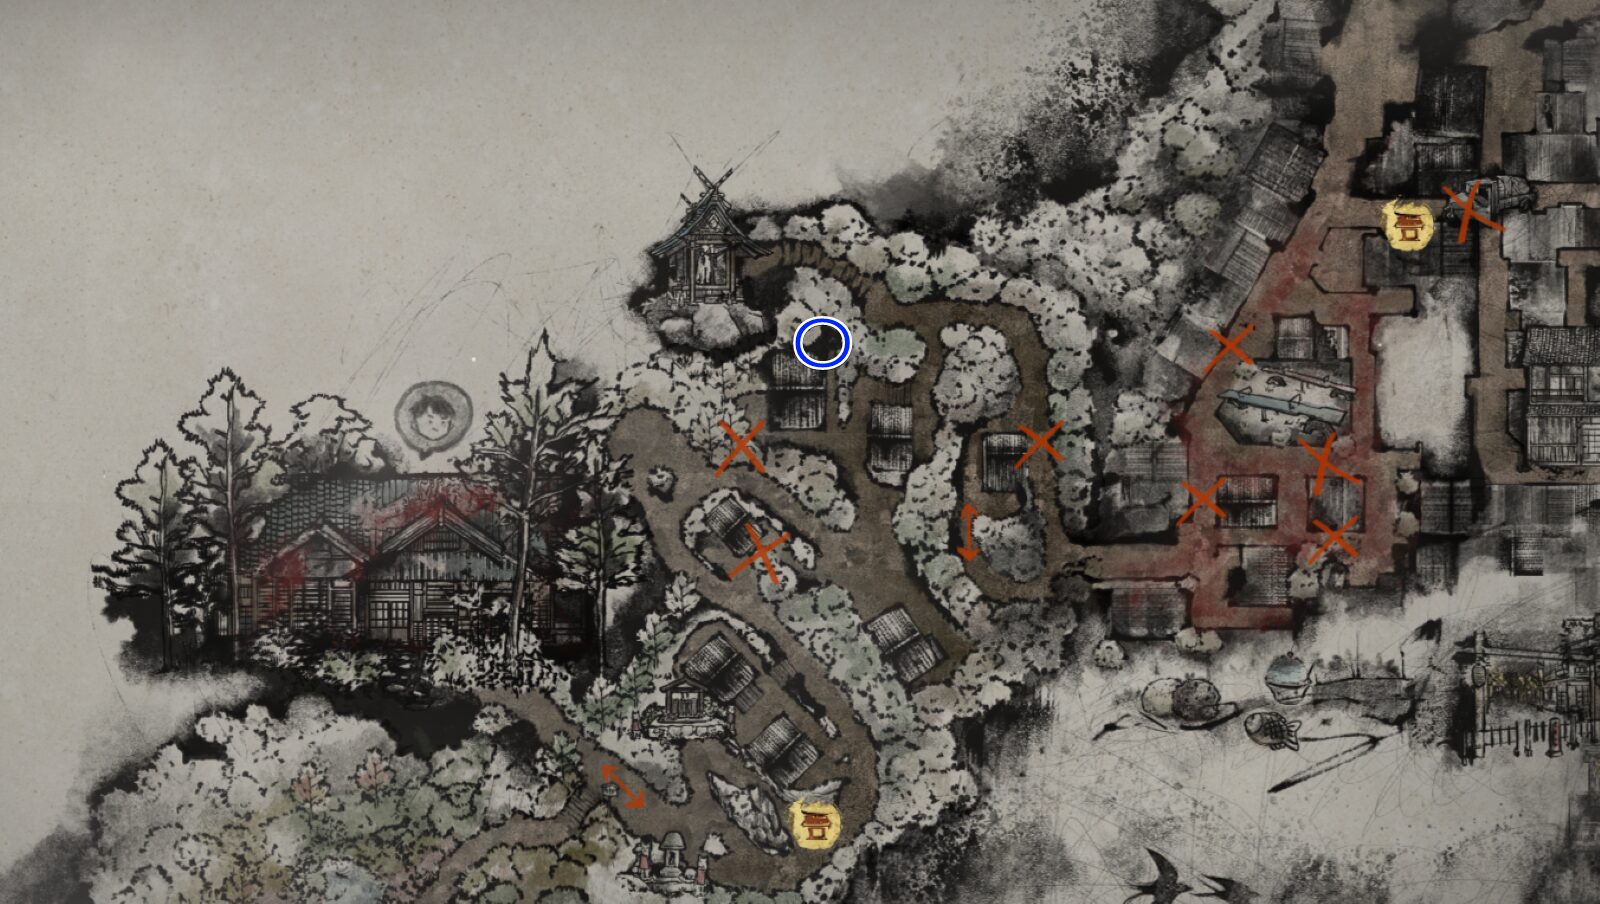
【Horse】Location: Sugisato
Greatly reduces Stamina consumption while running during combat.
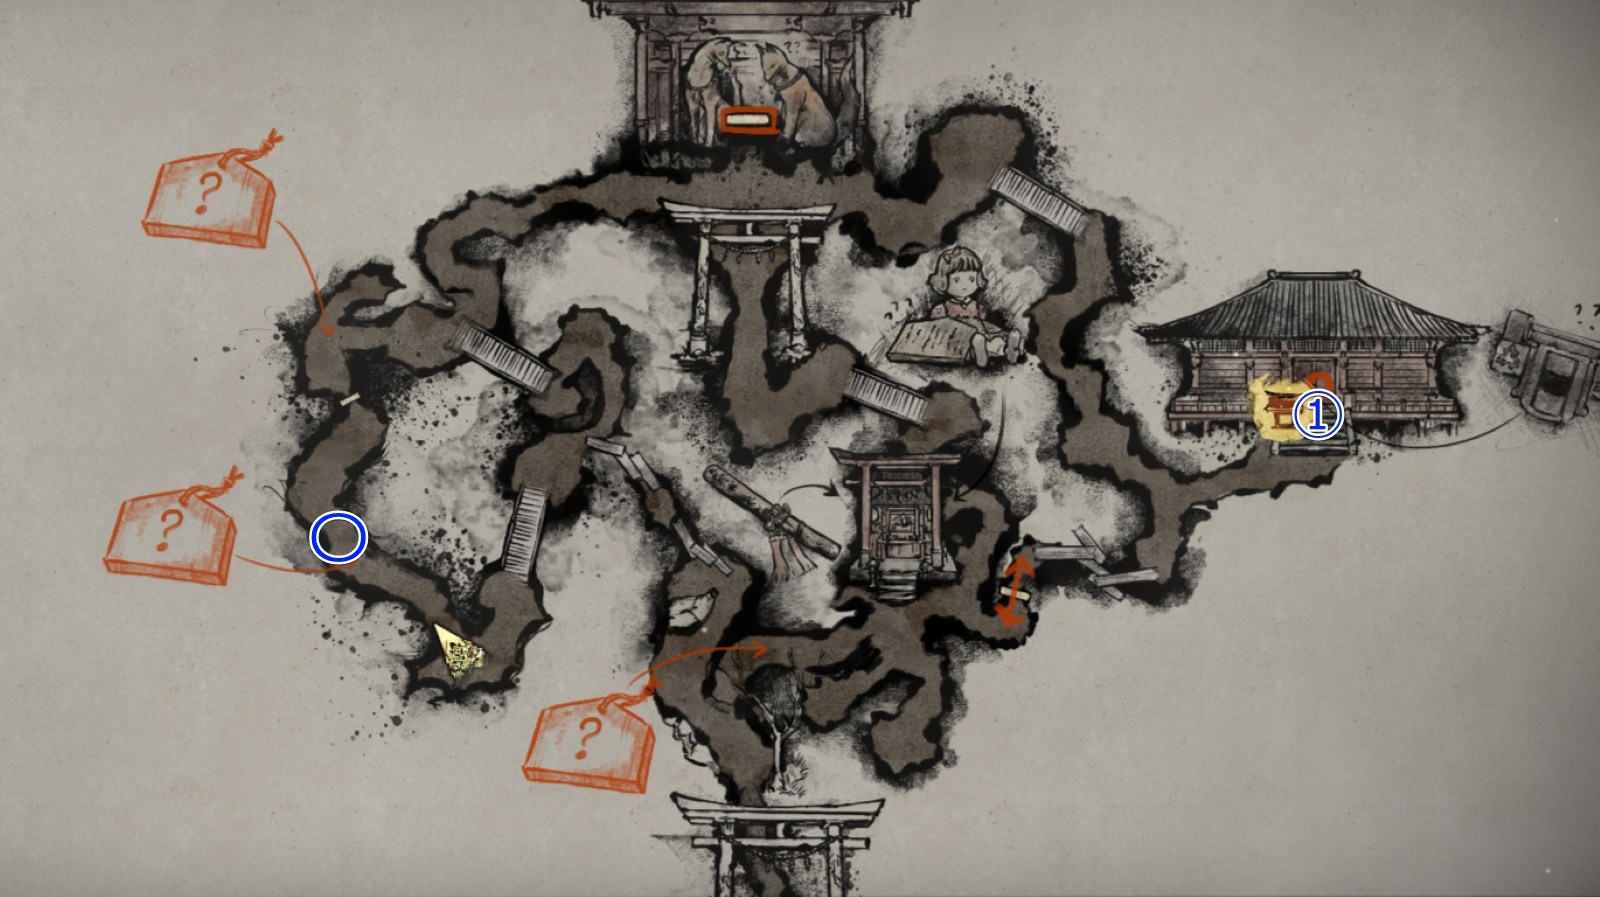
【Crow】Location: Main Hall
Restores a small amount of Health upon defeating an enemy.
【Suzuran】Location: Iwashimizu
Increases the likelihood of performing a Perfect Dodge.
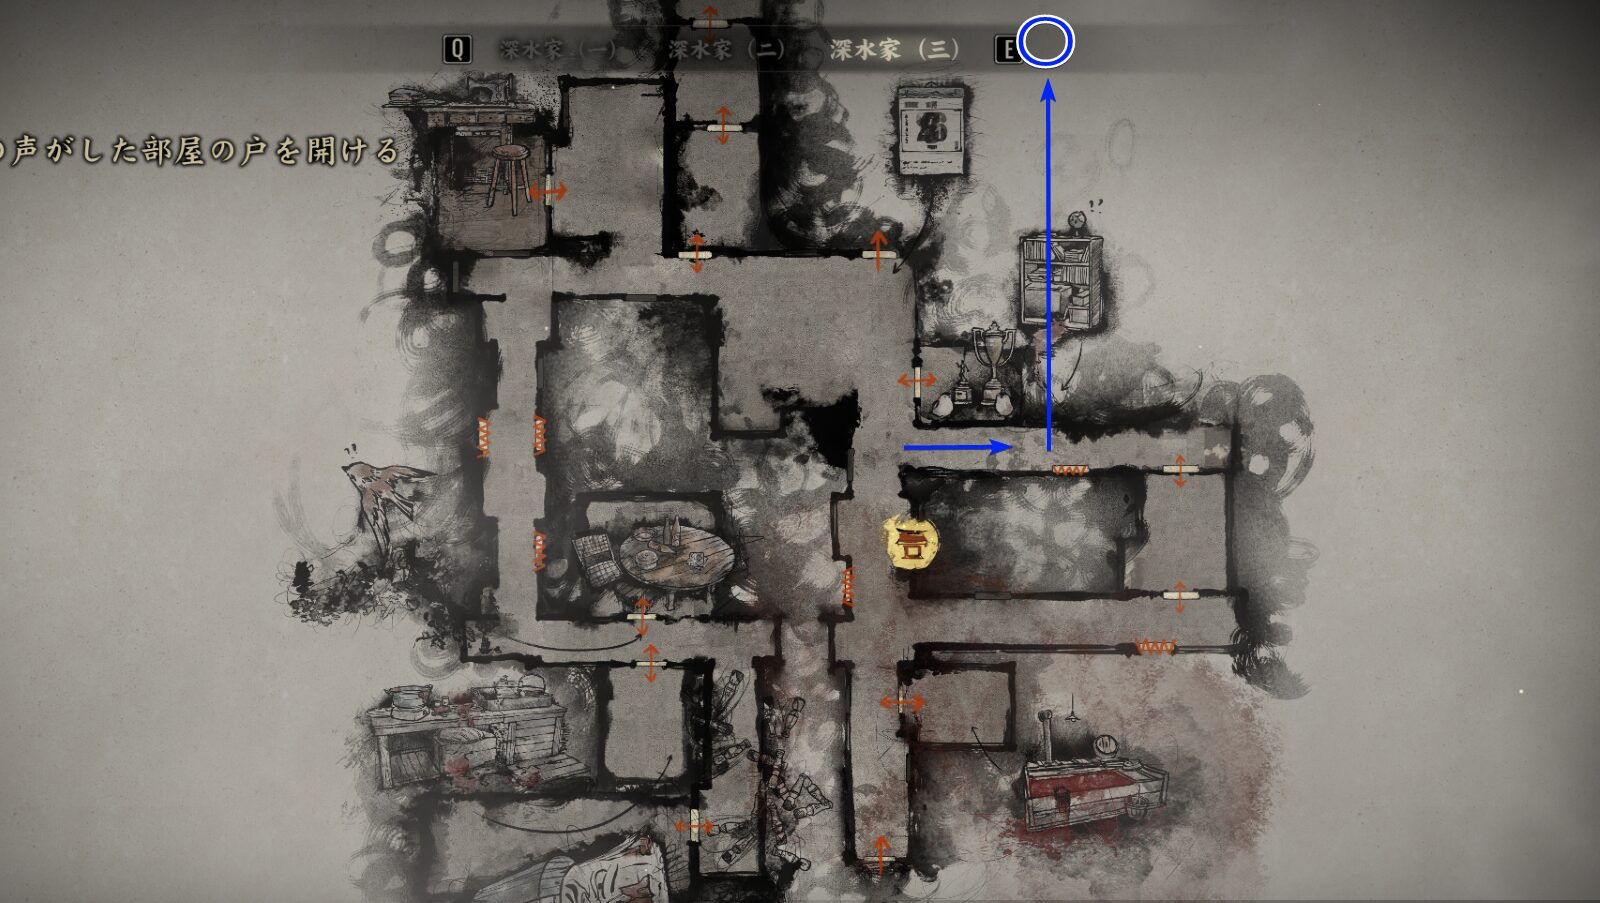
【Cuckoo】Location: Shimizu Residence
Greatly increases damage dealt while at critical Health.
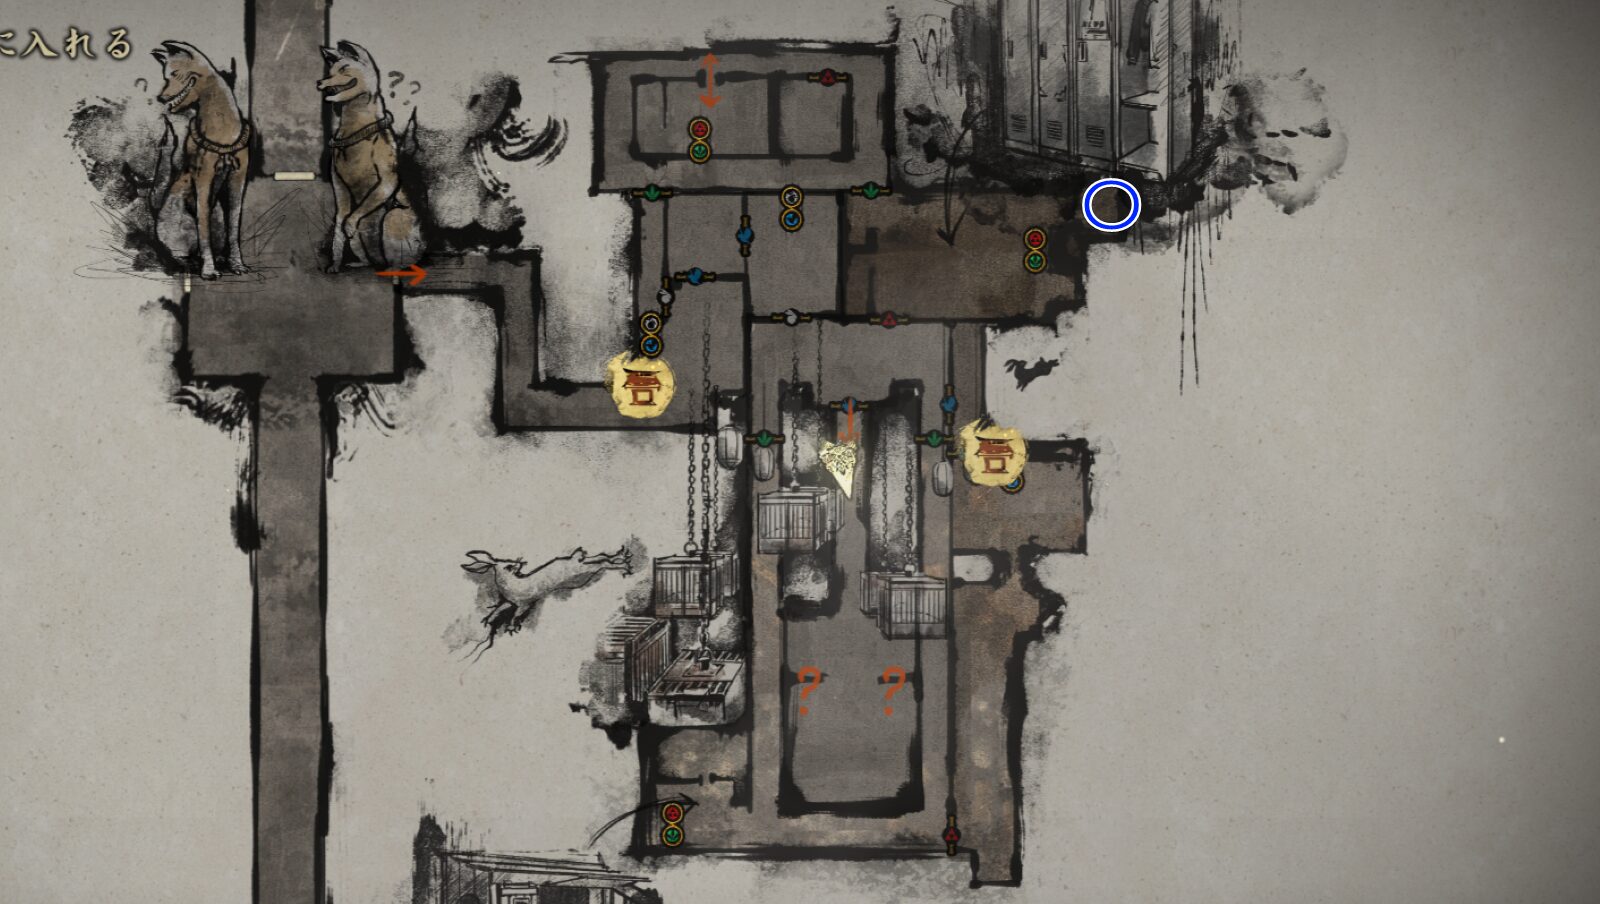
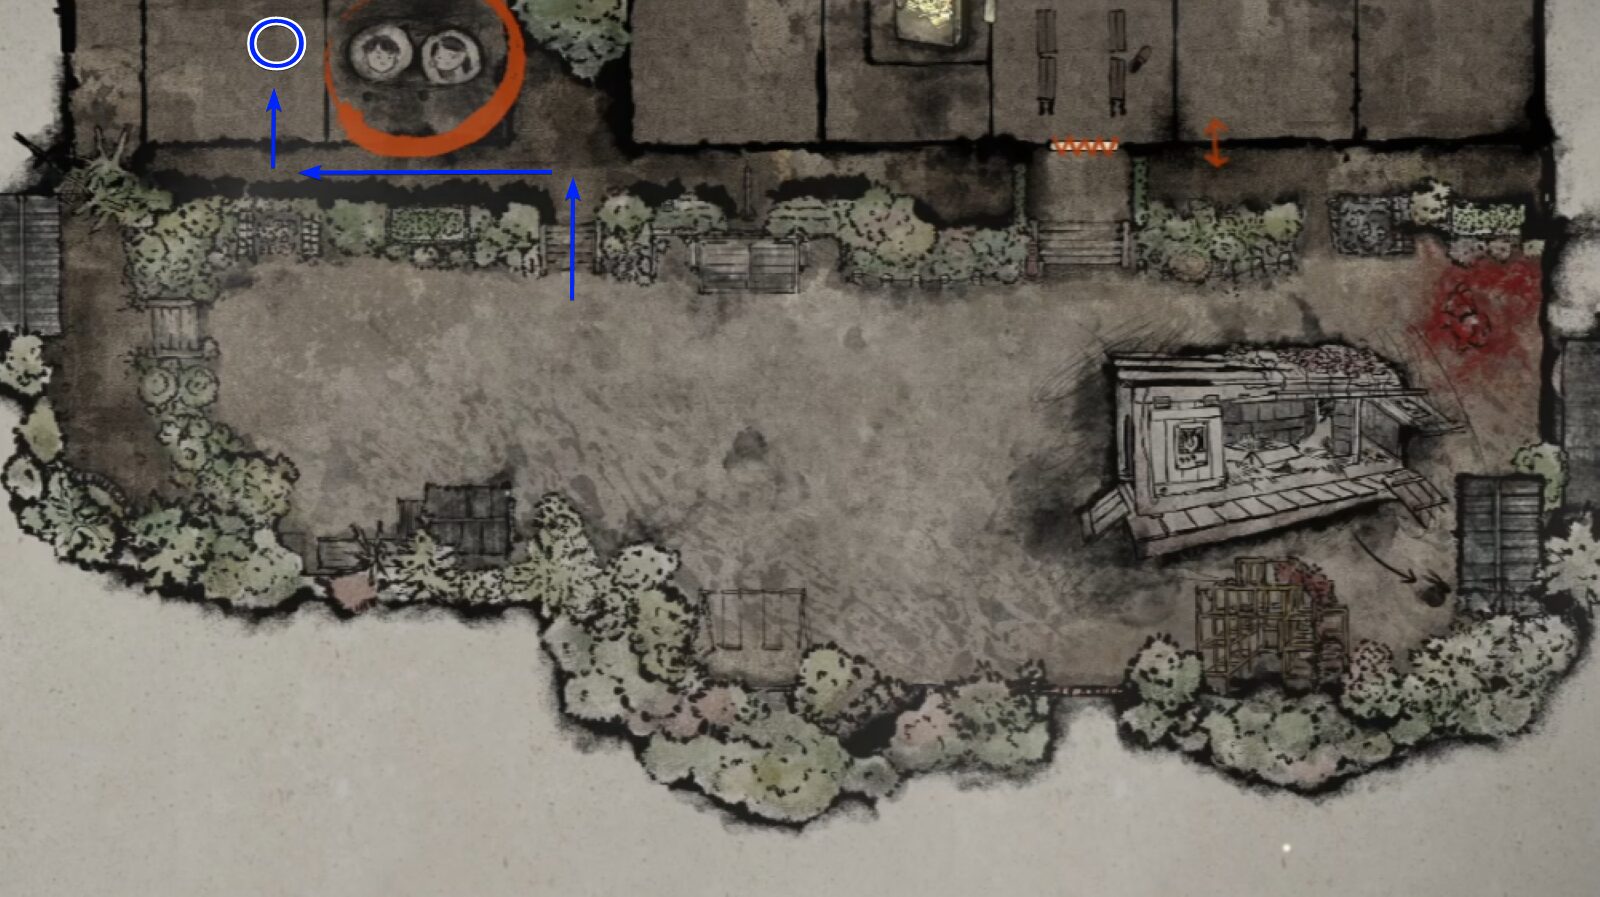
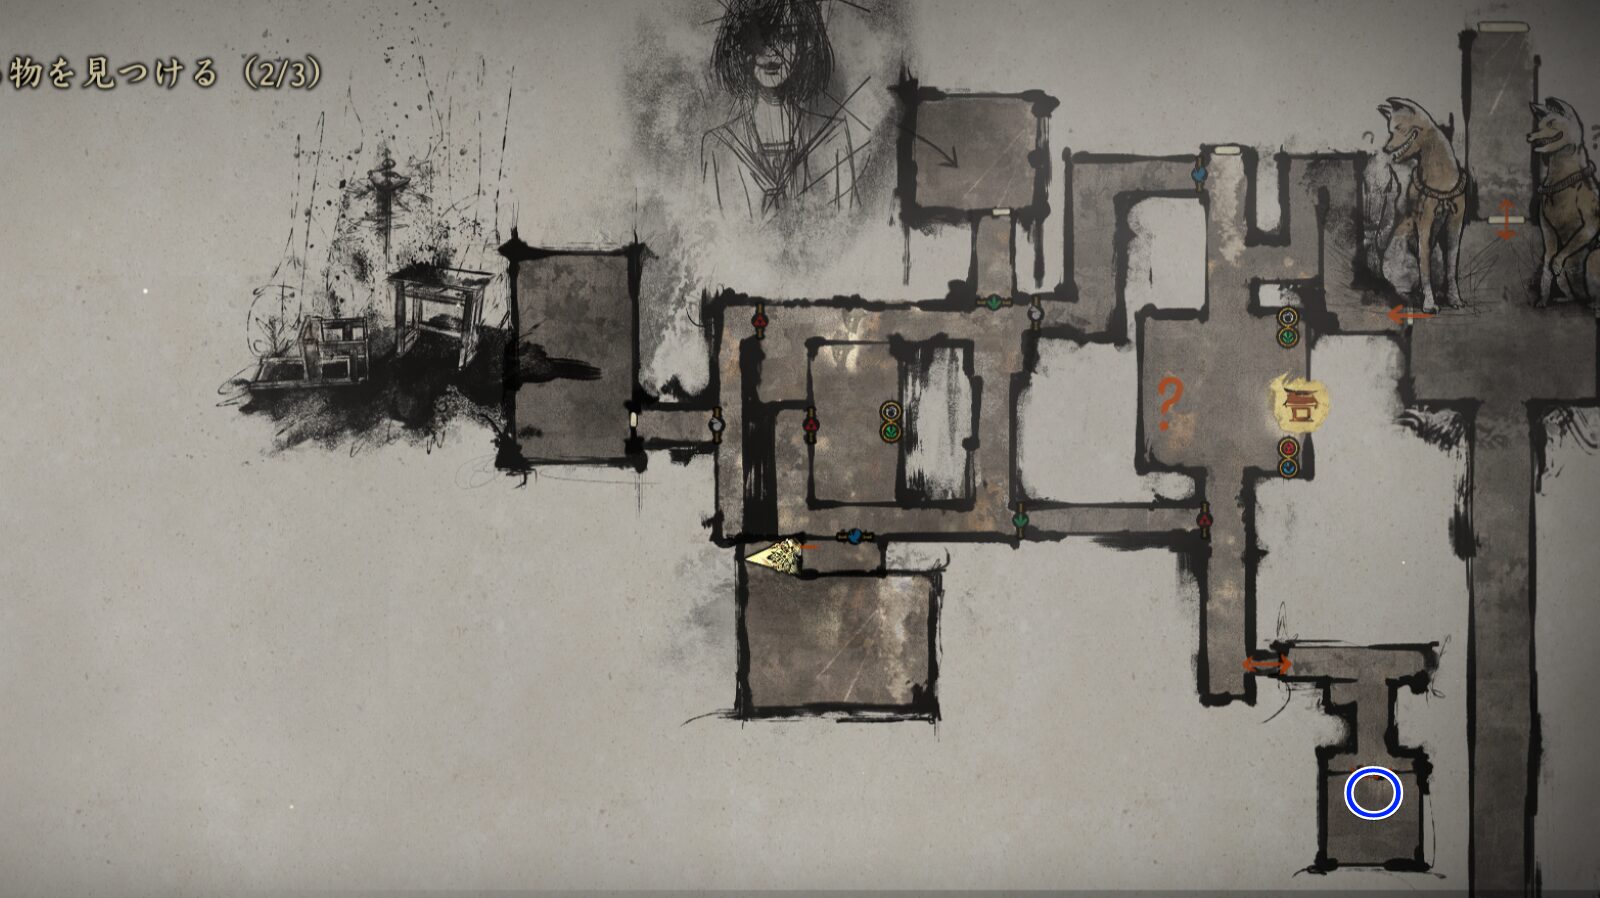
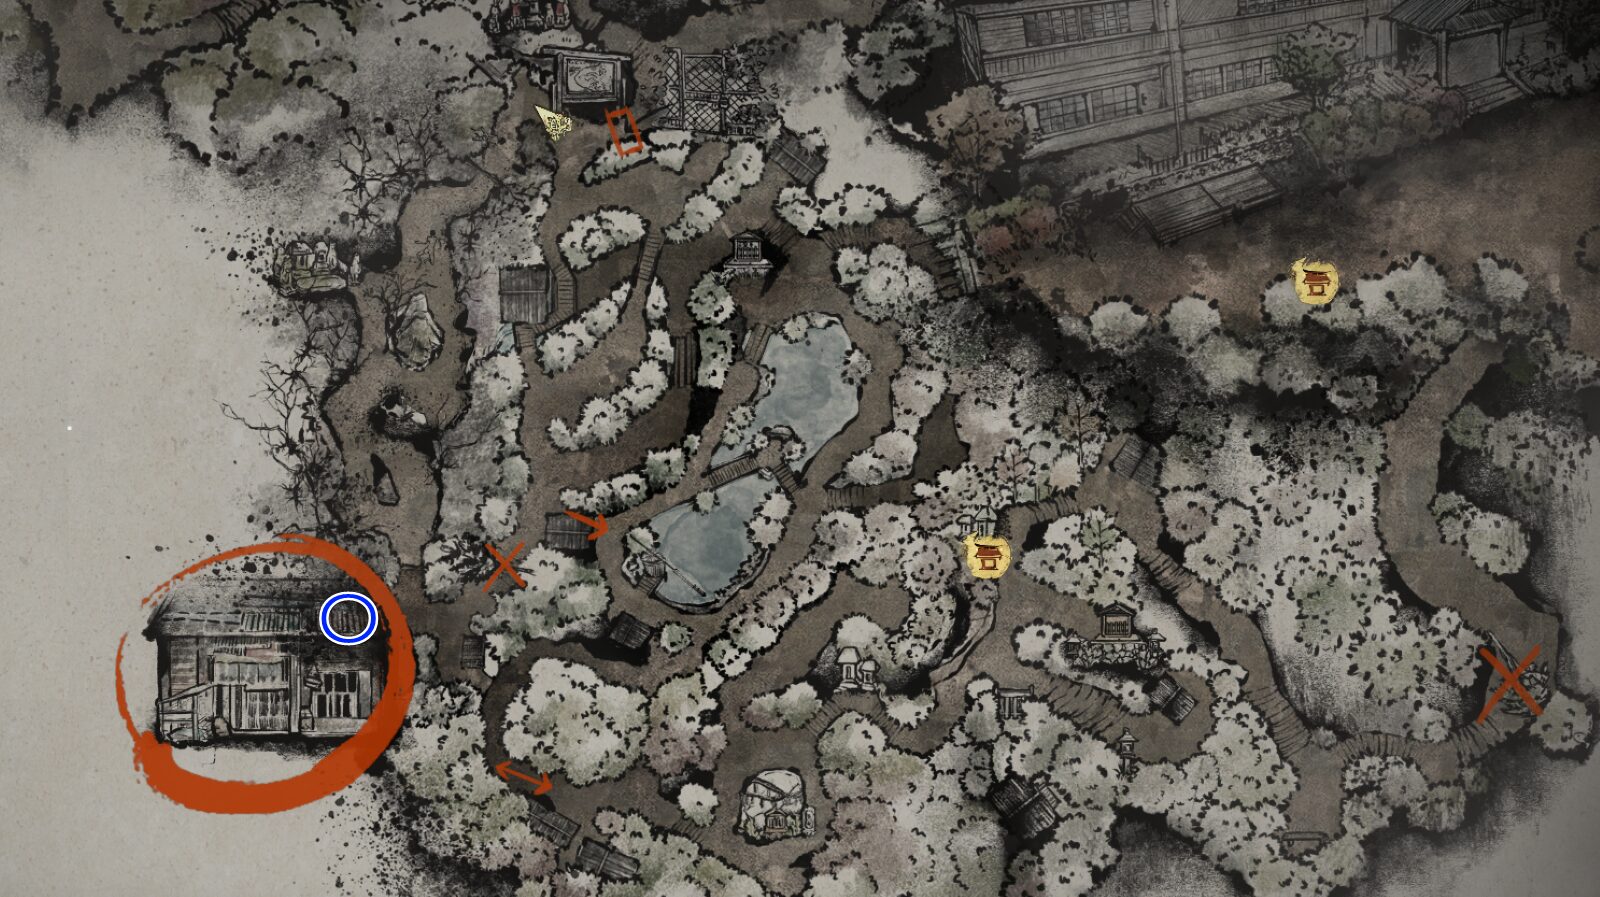
【Hound】Location: Treasure Hall
Slightly restores maximum Sanity when defeating enemies.
No Map Image
【Shrew Mole】Location: Shrine Path (New Game+)
Dodging while at critical Health does not consume Stamina.

【Rabbit】Location: Middle School (New Game+)
Allows performing a Counter with a Heavy Attack during a Perfect Dodge.
Stamina drops to 0 when successful.
【Swallow】Location: Worship Hall (New Game+)
Each Counter performed without entering Focus increases all damage dealt.
Bonus resets upon taking damage.
【Goat】Location: Sugisato (New Game+)
Reduces damage taken while fighting multiple enemies.
Related Guides
Here are my other SILENT HILL f guides. Feel free to check out anything that catches your eye.
