Chapter 3【Carnevale】First Half Walkthrough.
This guide is written from a single-player perspective, but the explanations include floor-by-floor mechanics, Dolls and other collectibles, as well as combat details with images, so it should still be helpful for co-op players.
Use this guide to help you on your journey.
| ←PREV Candy Factory (Late) | NEXT→ Carnevale (Late) |
Things to Know
Collecting 10 Dolls Unlocks an Achievement
A total of 10 Dolls are hidden throughout Carnevale, and collecting all of them will unlock the Token Gestures trophy.
In this early walkthrough, you can obtain seven of them at points ②⑥⑧⑨×2⑬⑰, so why not collect them as you progress? (You can find the remaining three in the late walkthrough.)
Hugging 6 Nomes Unlocks an Achievement
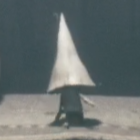 ← Nome
You can discover six Nomes—white, pointy-headed spirits—throughout Carnevale, and hugging them all (grab button) unlocks the Home Sweet Nome trophy.
In this early walkthrough, you can hug every Nome at points ②③⑤⑧⑨⑩, so be sure to search for them.
Destroying 10 Statues Unlocks an Achievement
A total of 10 Statues are hidden throughout Carnevale, and destroying them all unlocks the Omnipresence trophy.
There are no Statues in the early walkthrough, but you can find all ten in the late walkthrough.
Carnevale (Early) Walkthrough
①
A Nome appears right away. Pull out the drawer at ①, jump several times on the sofa at ②, then shoot the pot on the desk from ③ using your bow.
Doing so lowers the ladder at ④. Pull out the cart together at ⑤, then jump from the desk at ⑥ and climb the ladder to reach the upper floor.
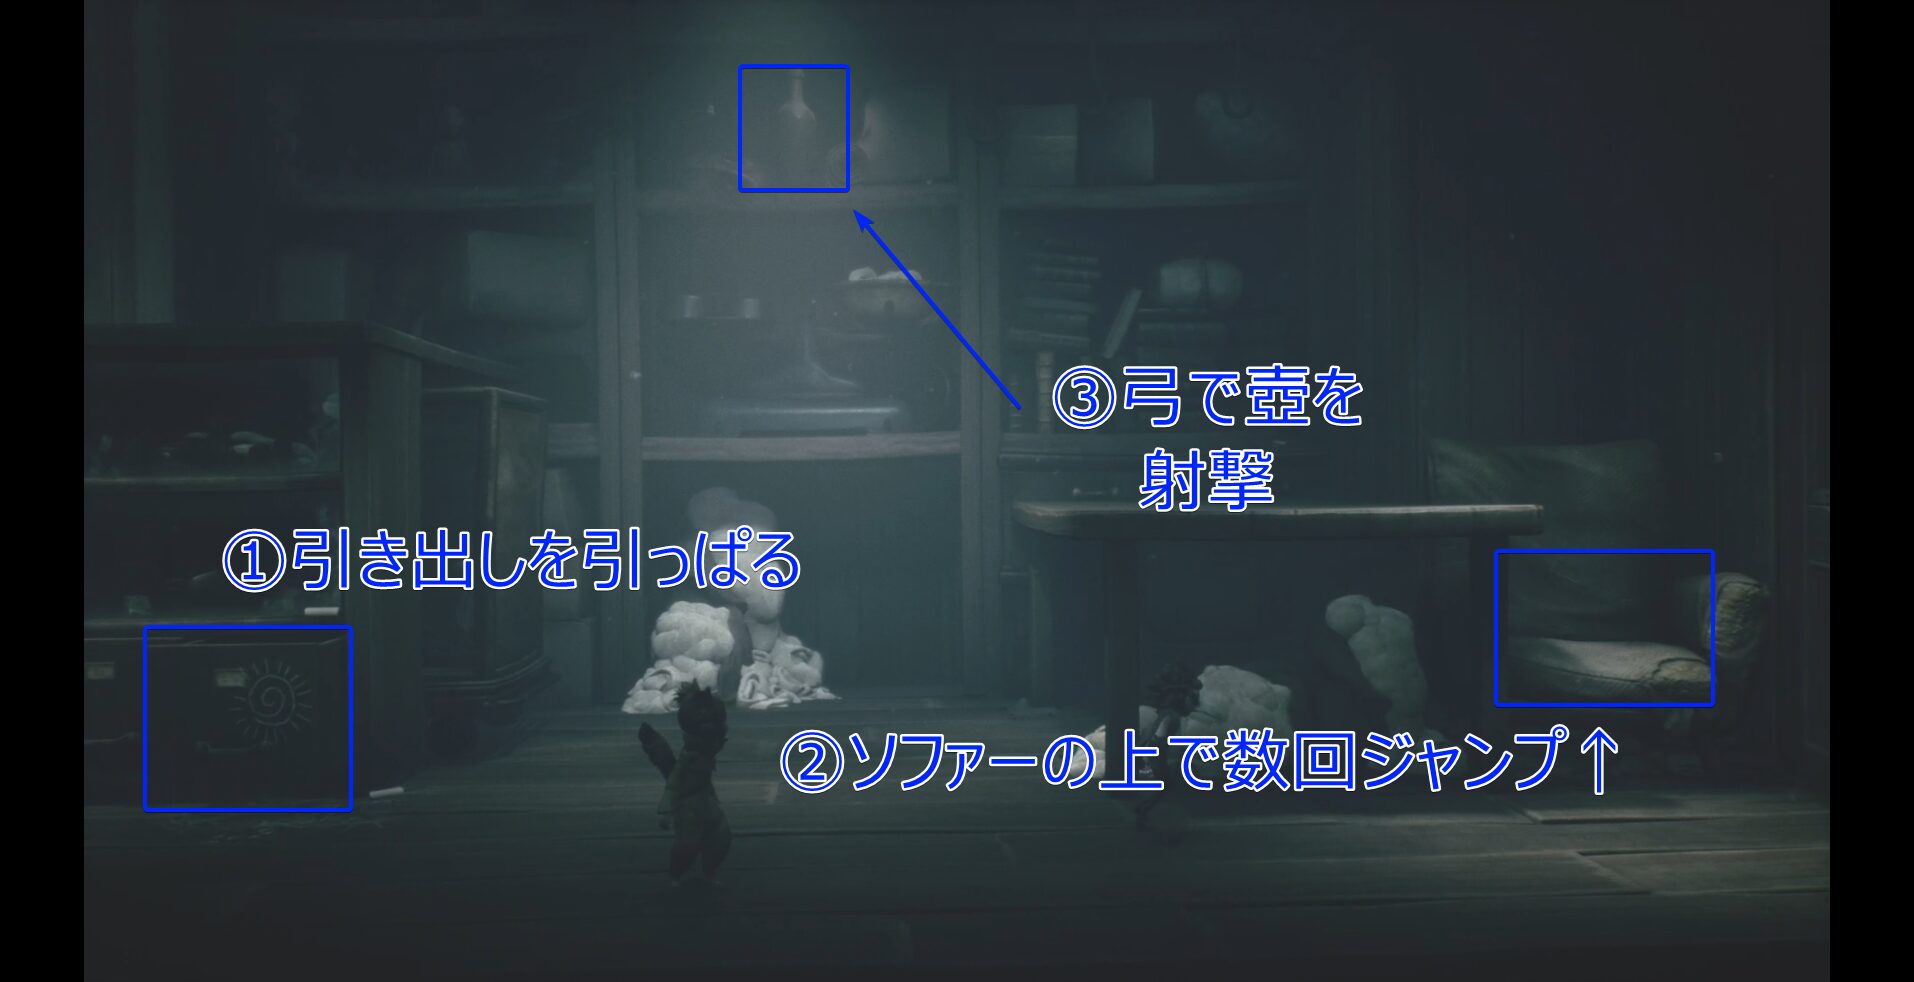
①Pull out the drawer
②Jump several times on the sofa↑
③Shoot the vase with the bow
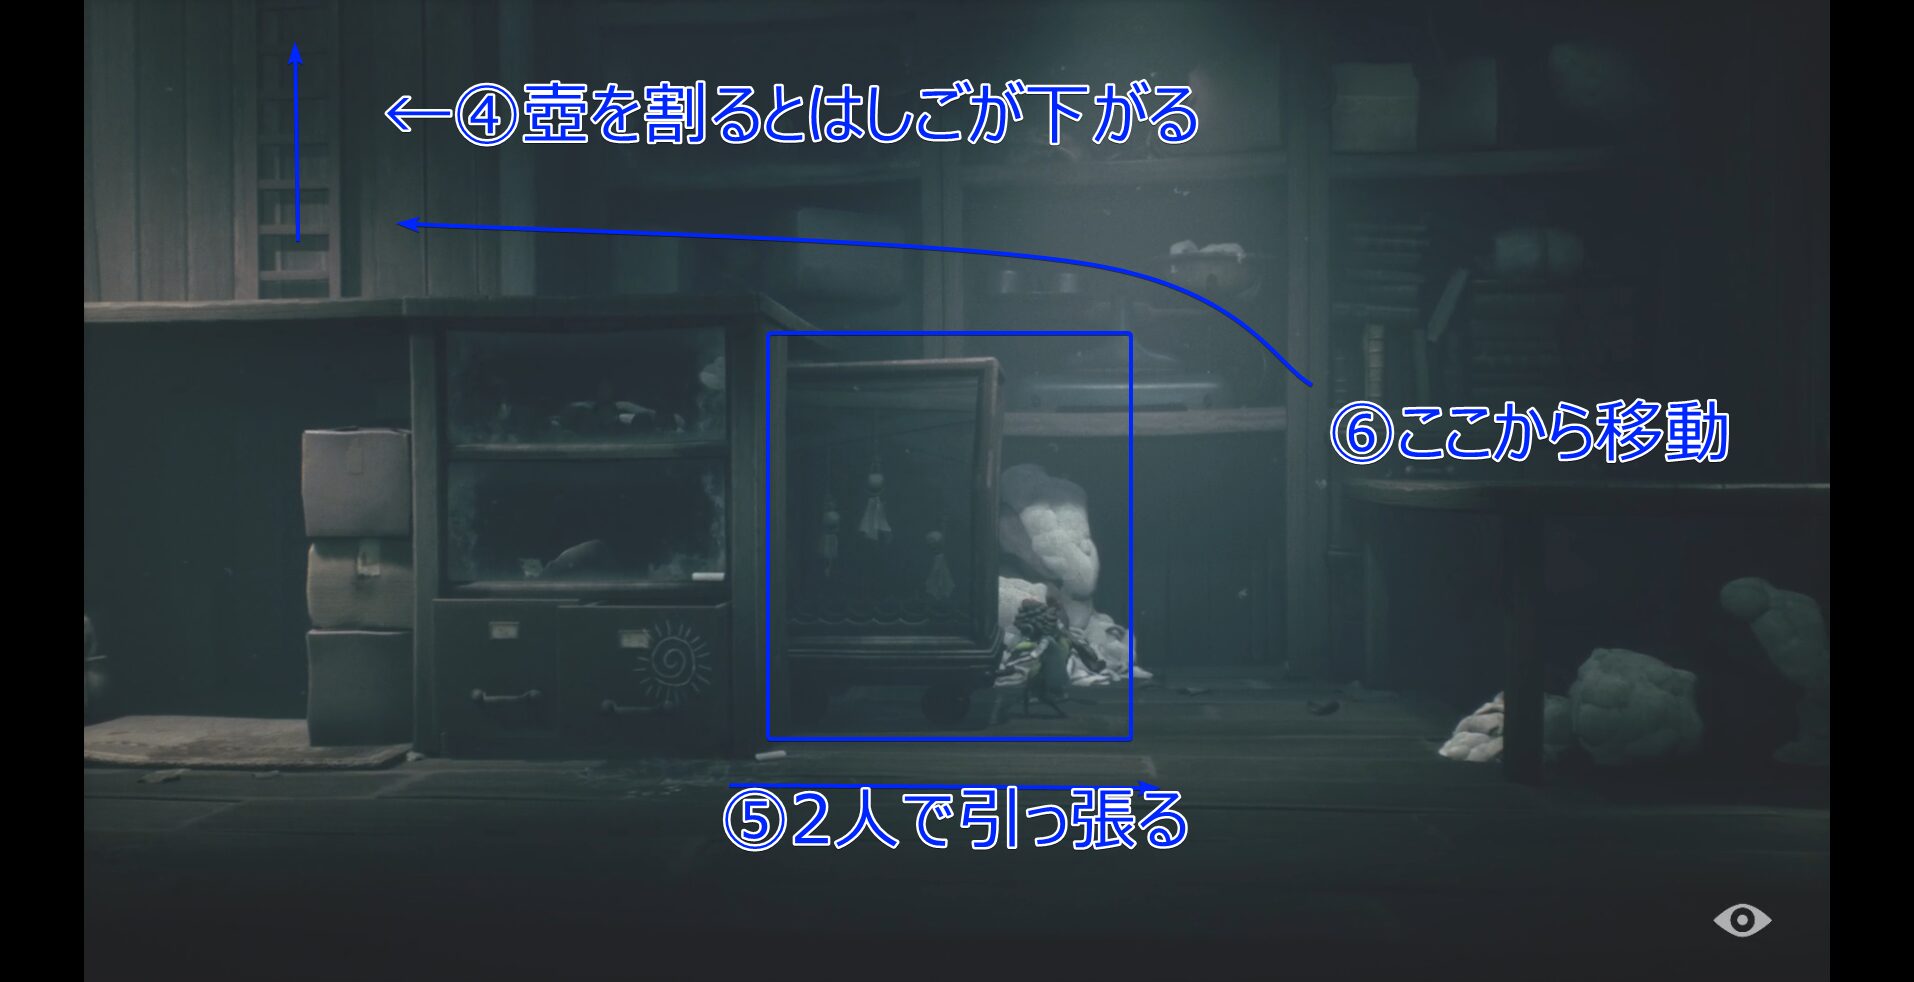
←④Break the vase to lower the ladder
⑤Pull together with both players
⑥Move from here
② (Doll Point & Nome Point)
After dropping down from the attic into the hallway, head into the room slightly to the right. There’s a Doll inside, so break the glass on the door using a wrench or your bow to enter.
Then proceed to the room on the right at the end of the hallway. Turn on the switch on the wall with the wrench, and a Nome carrying a fuse will appear—hug it.
Carry the fuse to the elevator room and insert it into the socket, then pull the lever to reach the upper floor.
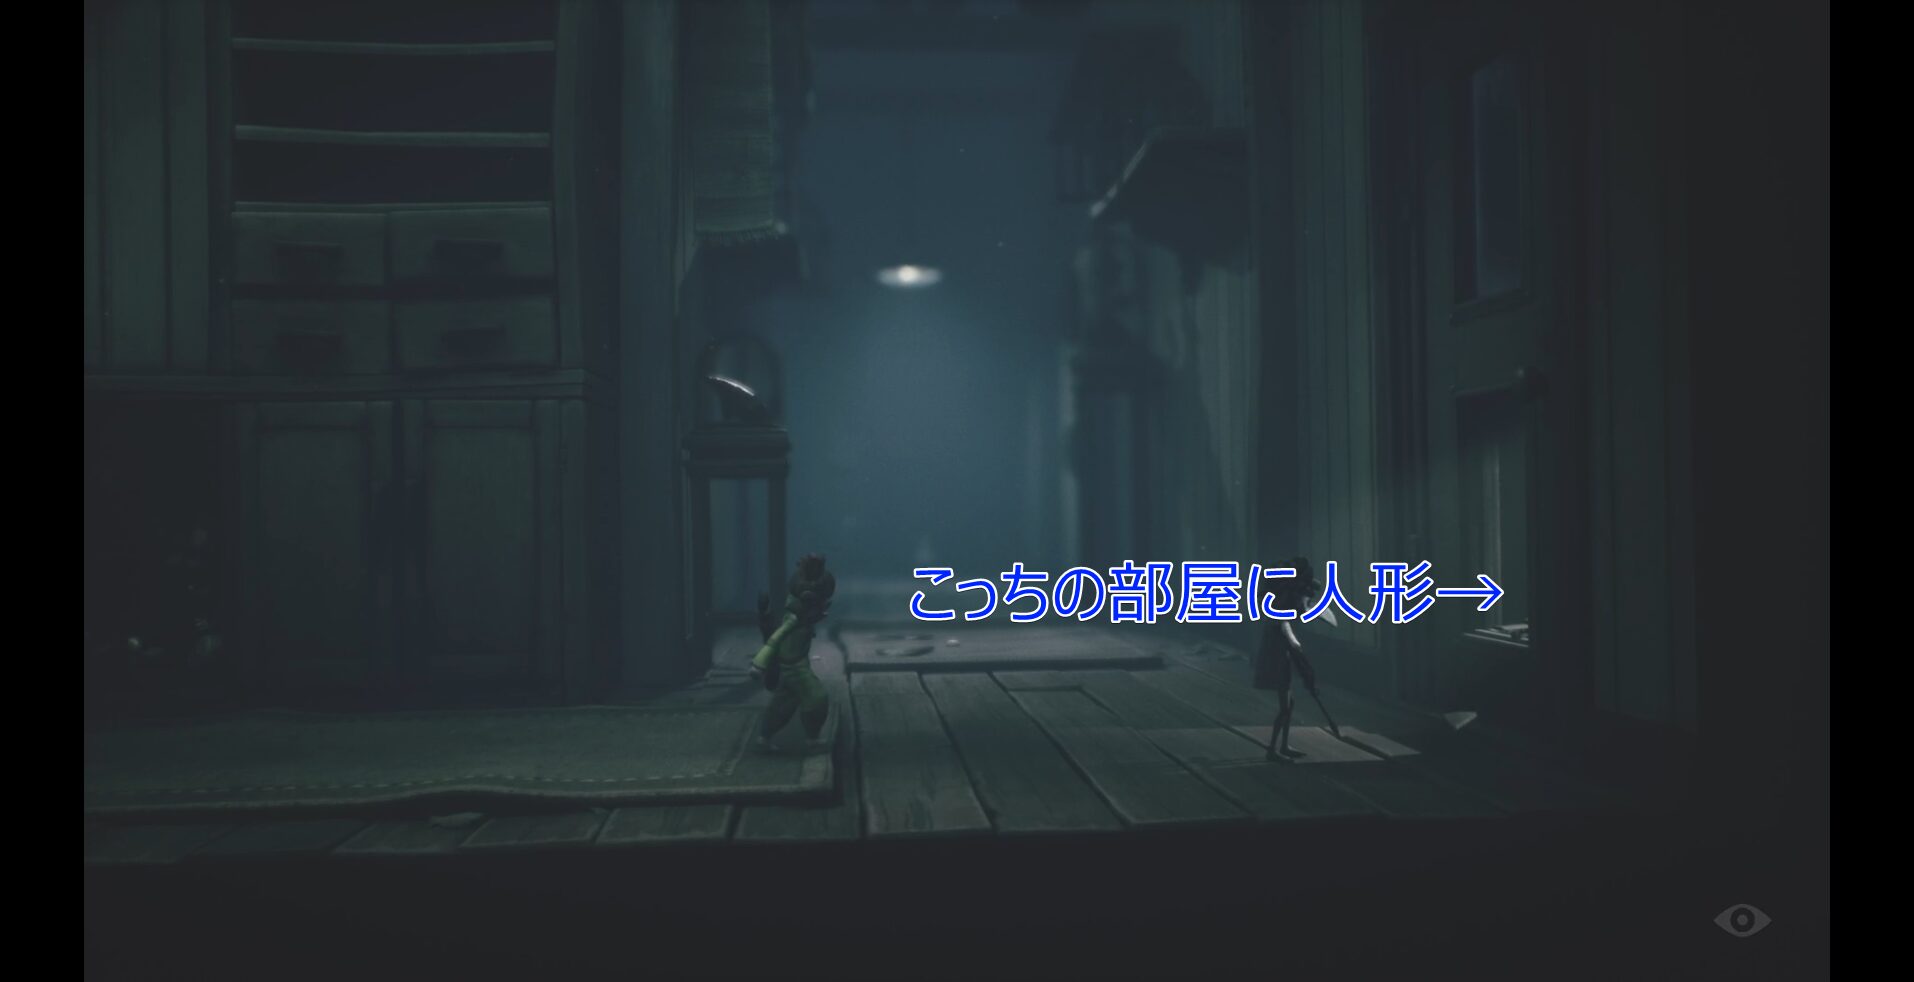
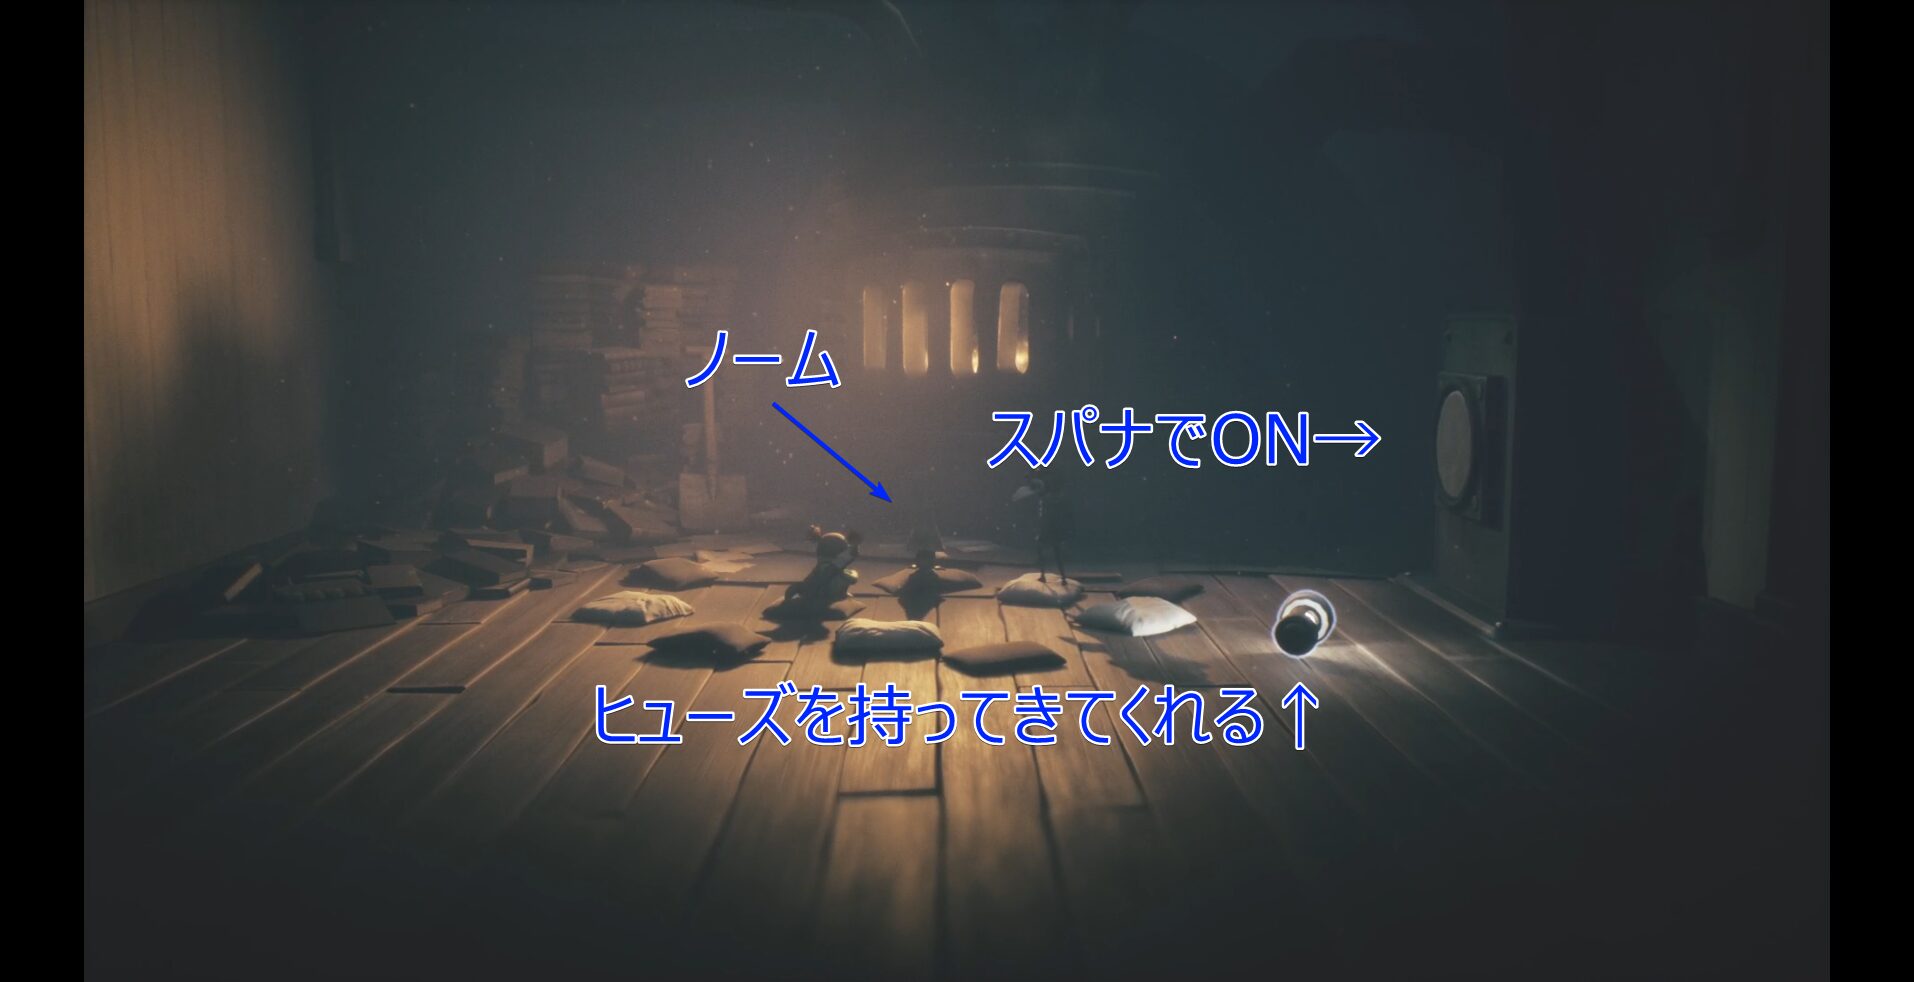
Turn it ON with the wrench→
Nome will bring you a fuse↑
③ (Nome Point)
Pick up the flashlight after getting off the elevator. Doing so unlocks the Light or Flight trophy. Also, turn on the switch on the left using your bow.
The right side leads to a large outdoor area. Climb the ladder to the left, and you’ll find another switch—shoot it with your bow to unlock the Capital Punishment trophy.
There’s no image here, but shine your flashlight behind the ladder after descending—you’ll find a Nome waiting for a hug.
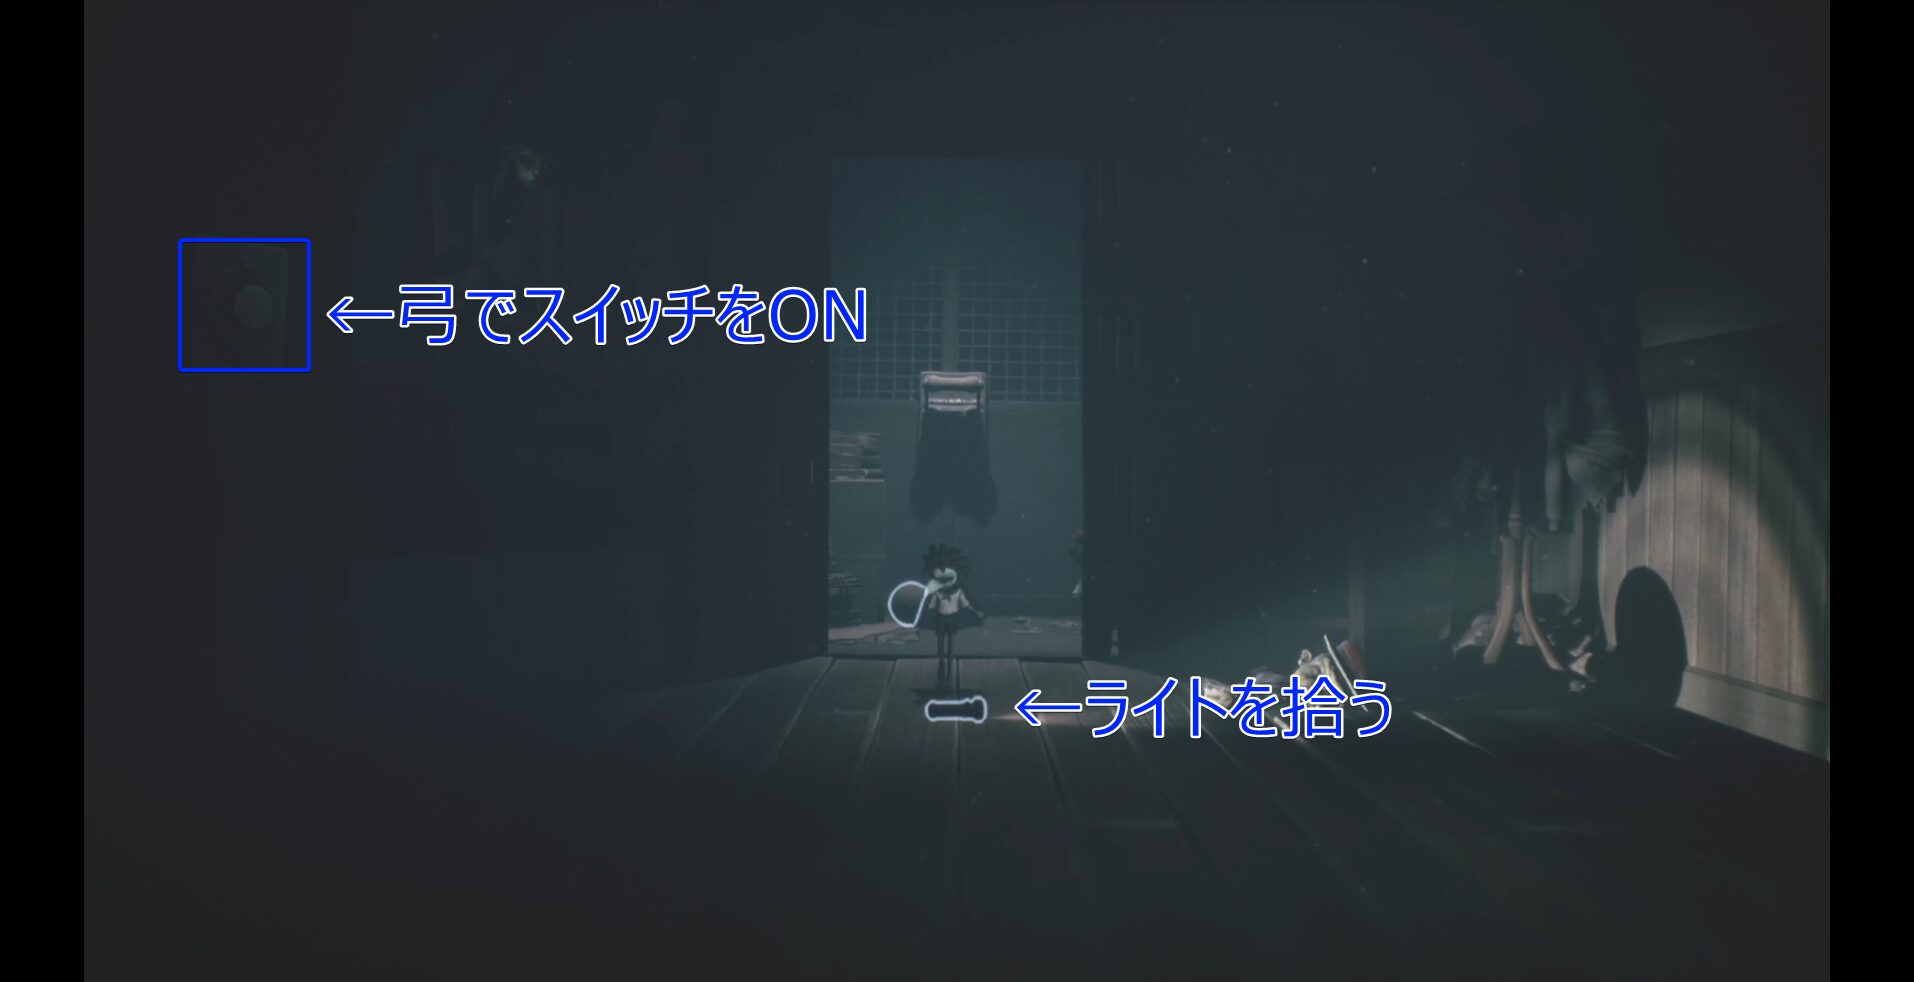
←Turn the switch ON with the bow
←Pick up the flashlight
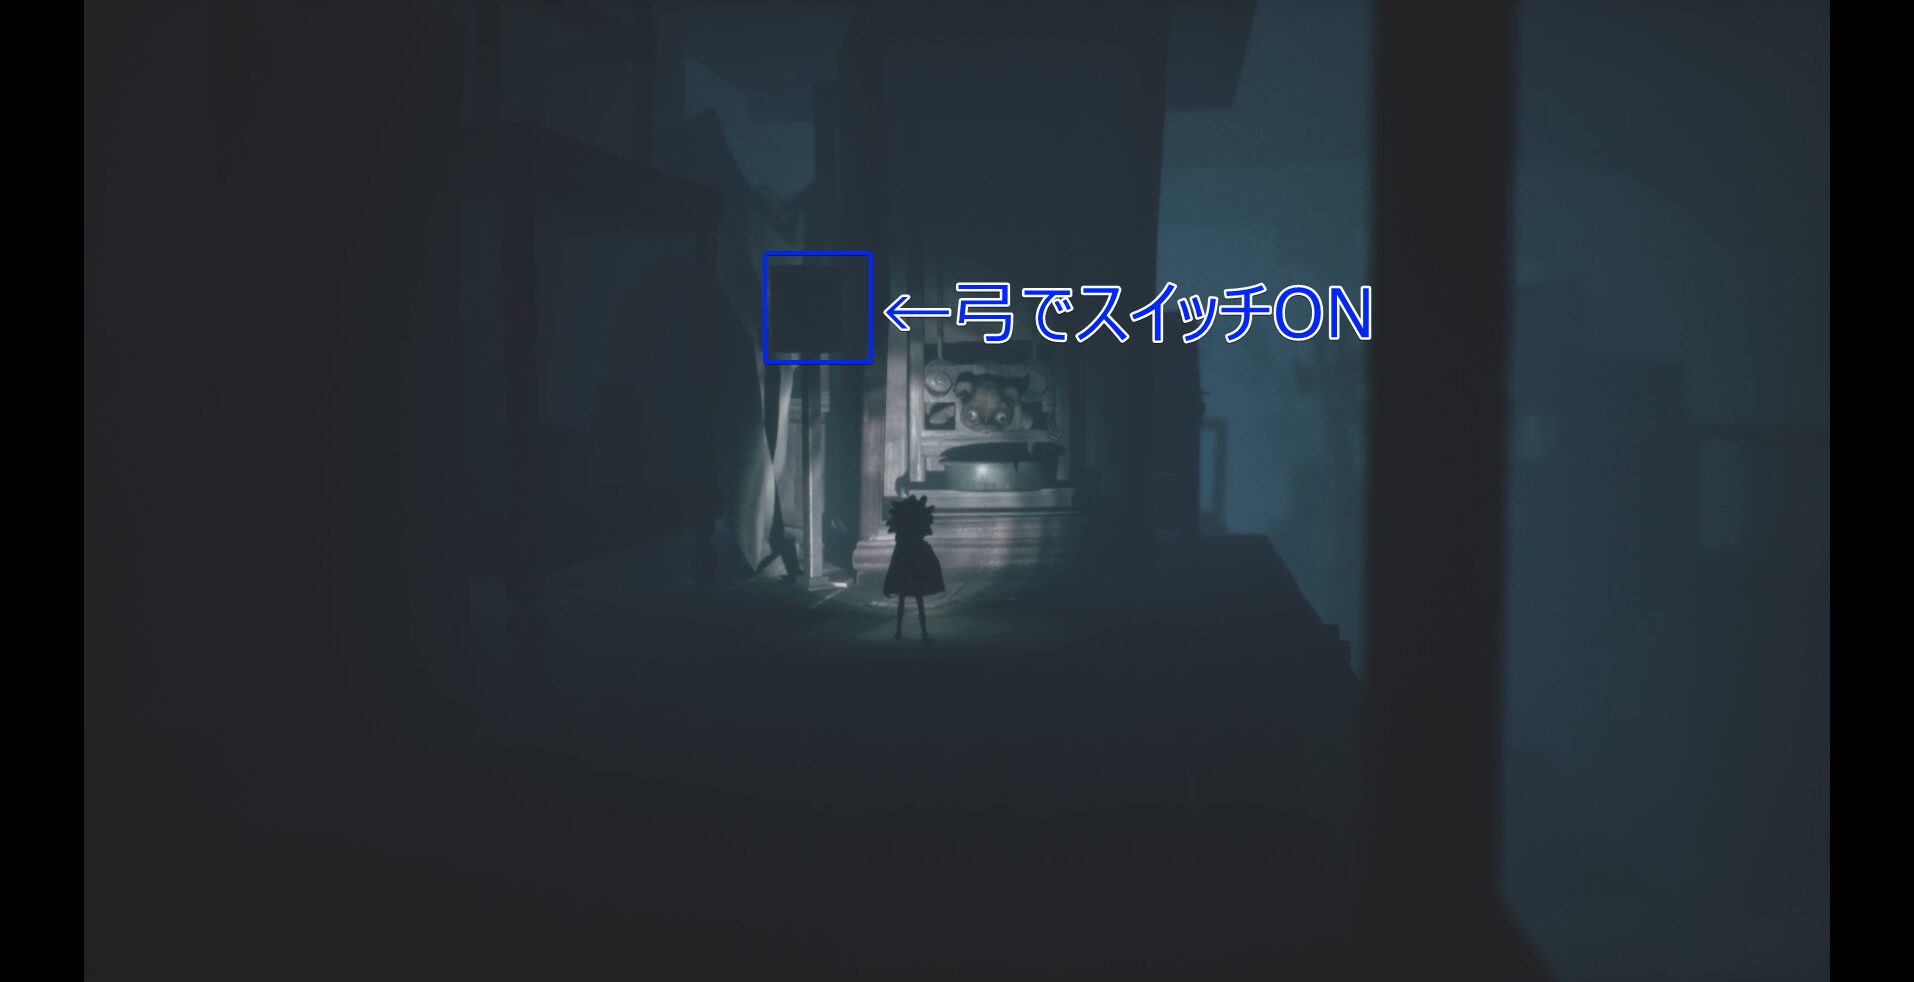
④
Proceed to the right side of the outdoor plaza, climb across the tables, and enter the mechanical room through the duct.
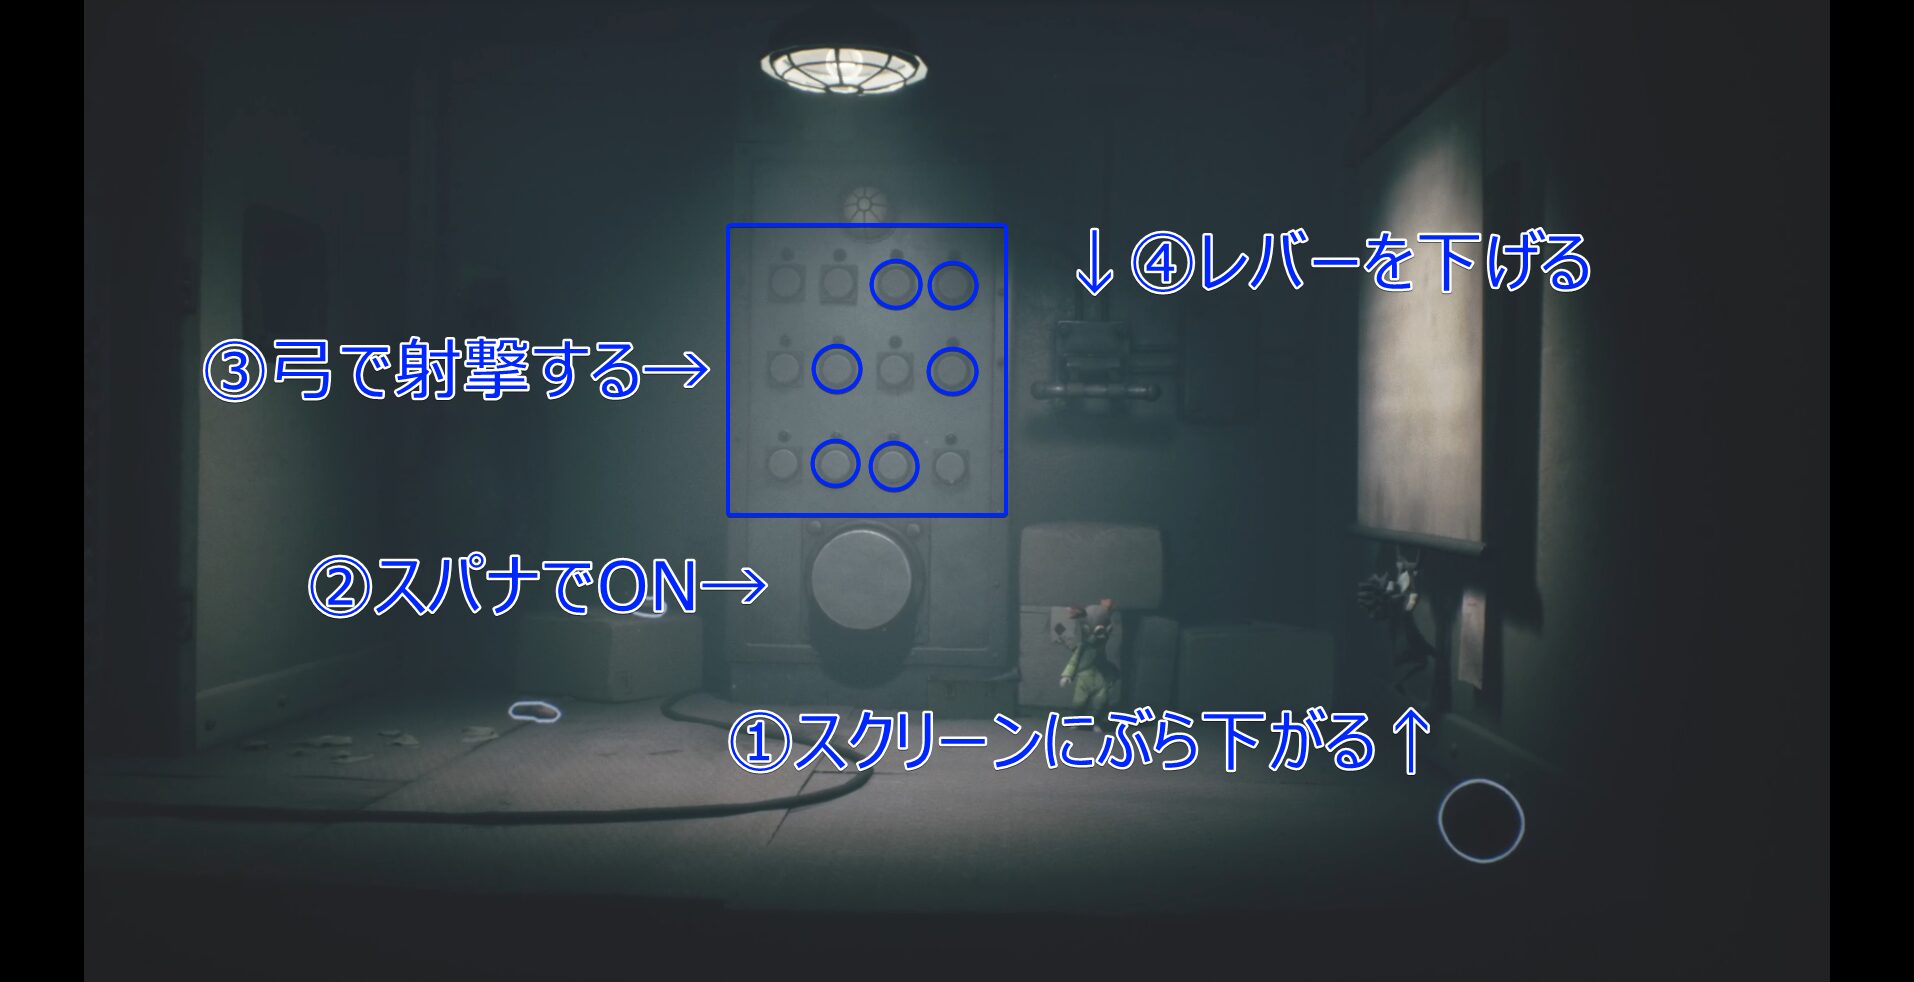
In the mechanical room, hang from ① to lift the roll screen. Then, hit the button at ② with your wrench to turn it on. The control panel at ③ will begin lighting up from the upper-left to the lower-right.
Just like the schematic posted on the bulletin board behind the screen, shoot the darkened sections of the panel using your bow. In short, follow the blue circle order of the ③ control panel.
Once the lights start from the upper-left, shoot when it reaches the blue circle sequence.
If successful, pull the lever at ④ together to complete the process. Return to the outdoor plaza.
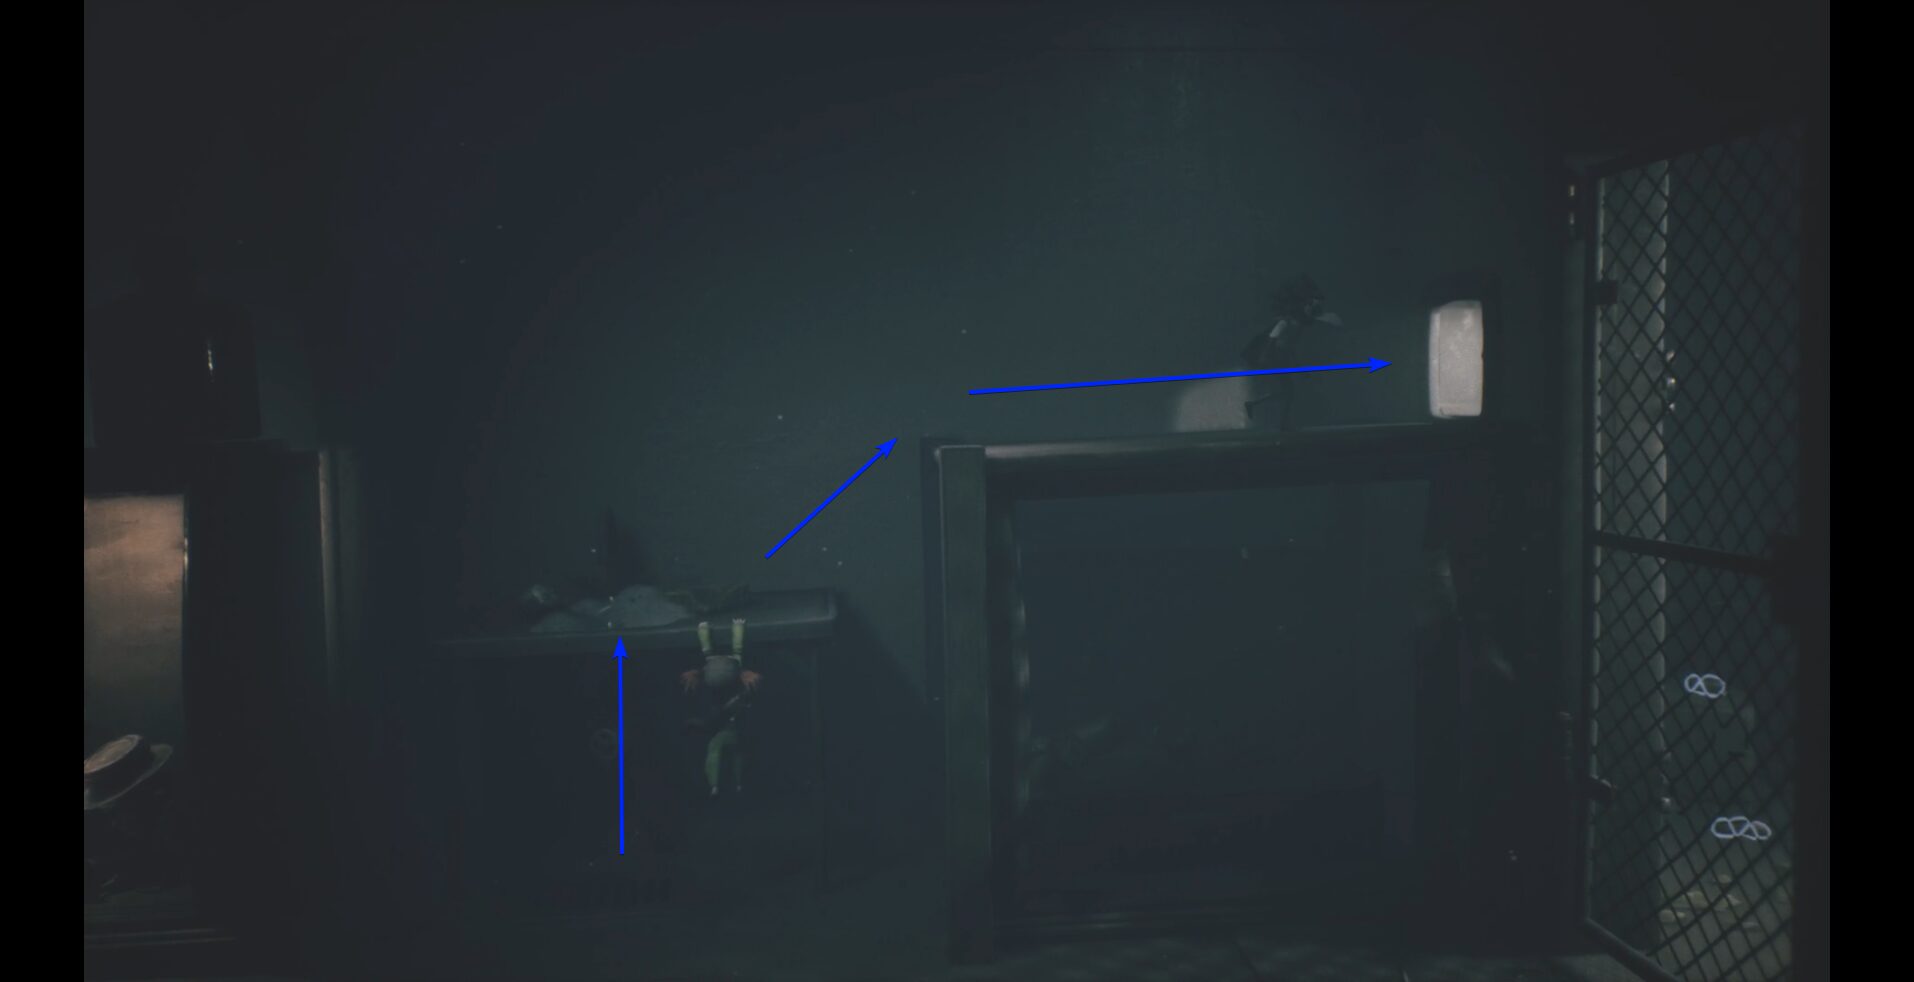
①Hang onto the screen↑
②Turn it ON with the wrench→
③Shoot with the bow→
↓④Pull the lever down
⑤ (Nome Point)
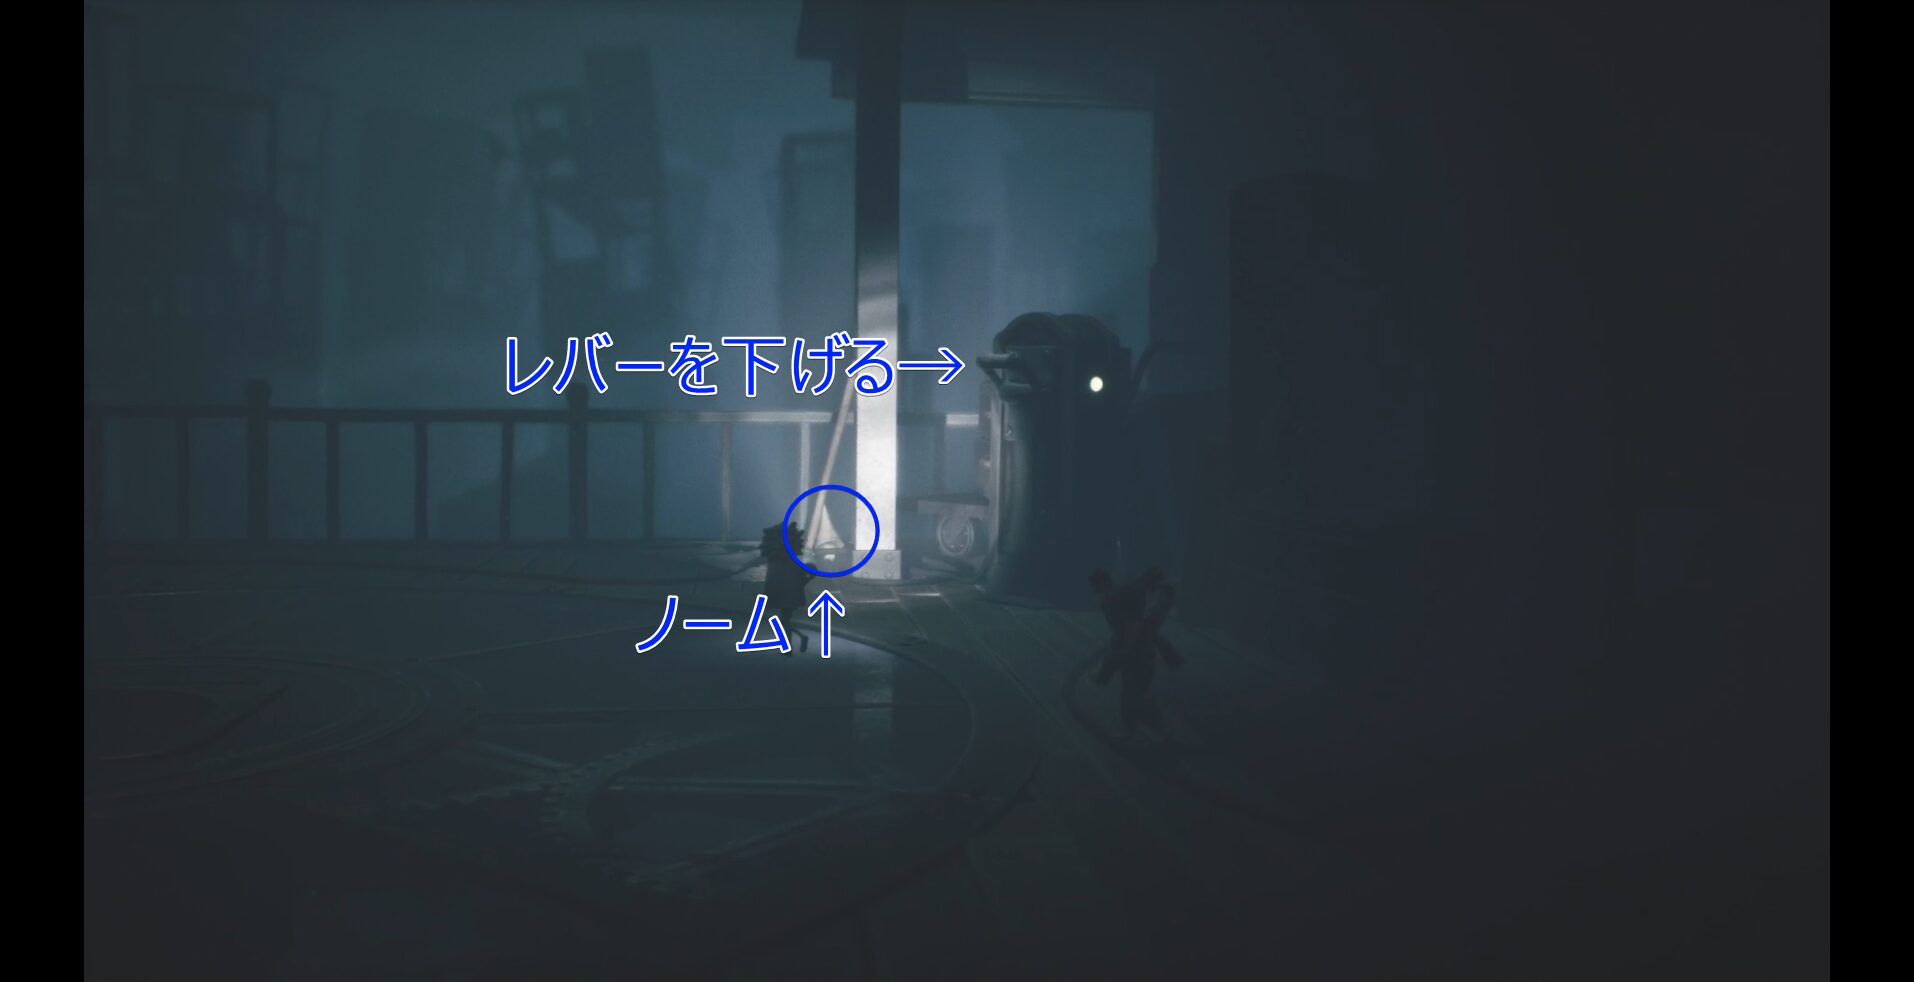
Now that the electricity is restored in the outdoor plaza, you can pull the lever. But before that, be sure to hug the Nome near the lever.
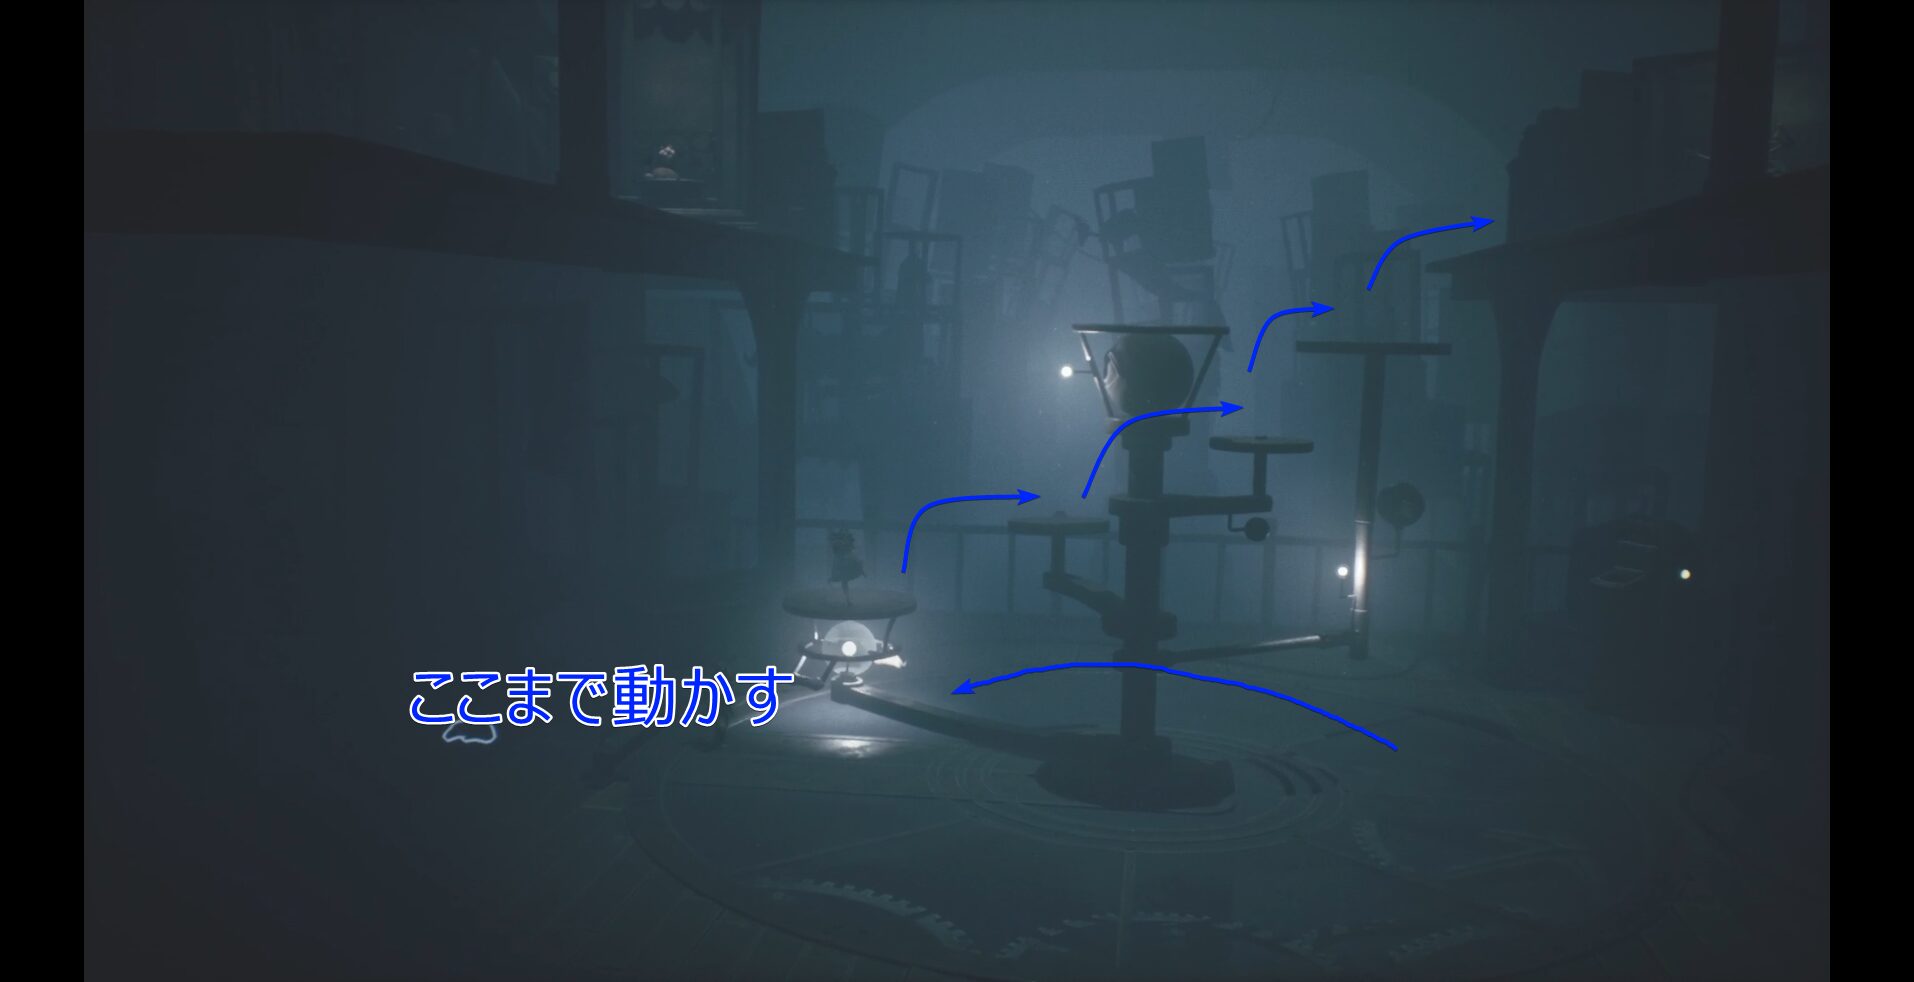
Once you pull the lever, a contraption resembling a celestial chart rises from the floor. Move it to the position shown in the images below, then climb across the platforms to head upward on the right.
Pull the lever down→
The Nome↑
⑥ (Doll Point)
Right after climbing up from the celestial device, ignore the main path and instead use the shelves as makeshift steps to reach the small window above. Inside, you'll find a Doll waiting to be collected.

⑦
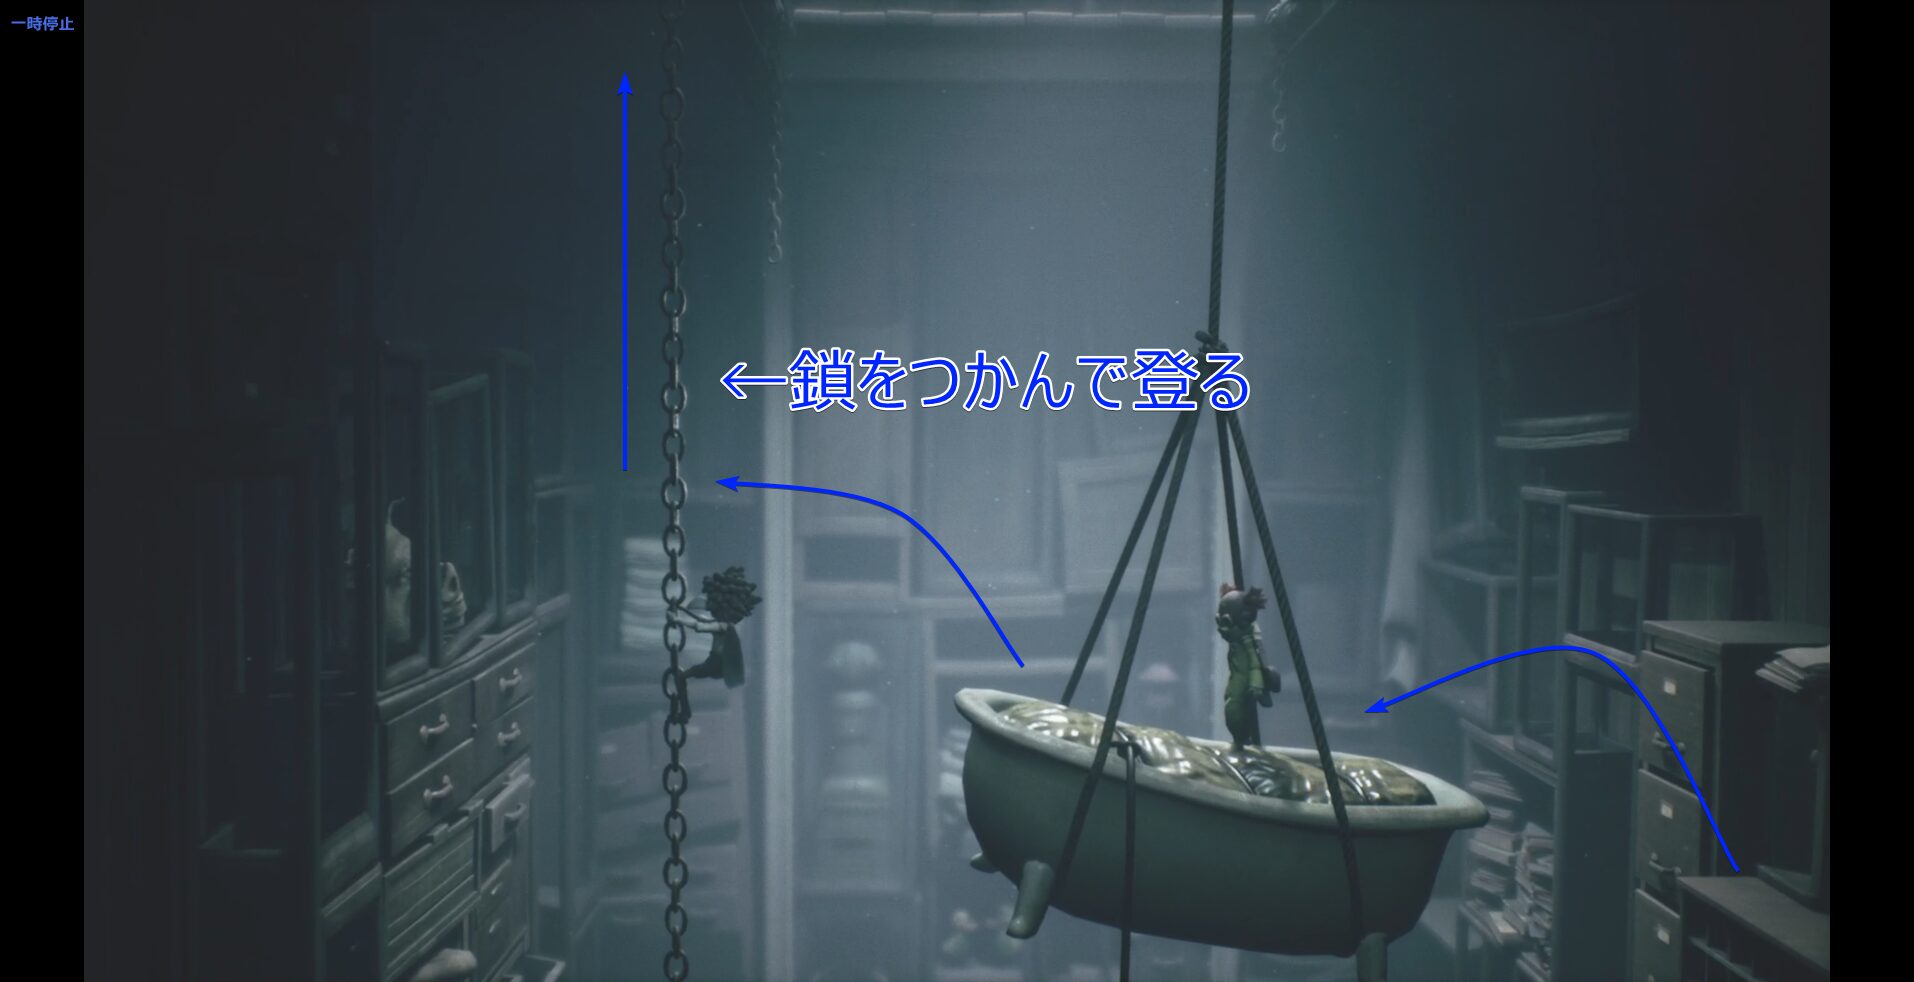
After climbing up using the shelves as a ladder, cross over to the hanging bathtub, grab the chain, and climb up.
⑧(Doll Point & Nome Point)
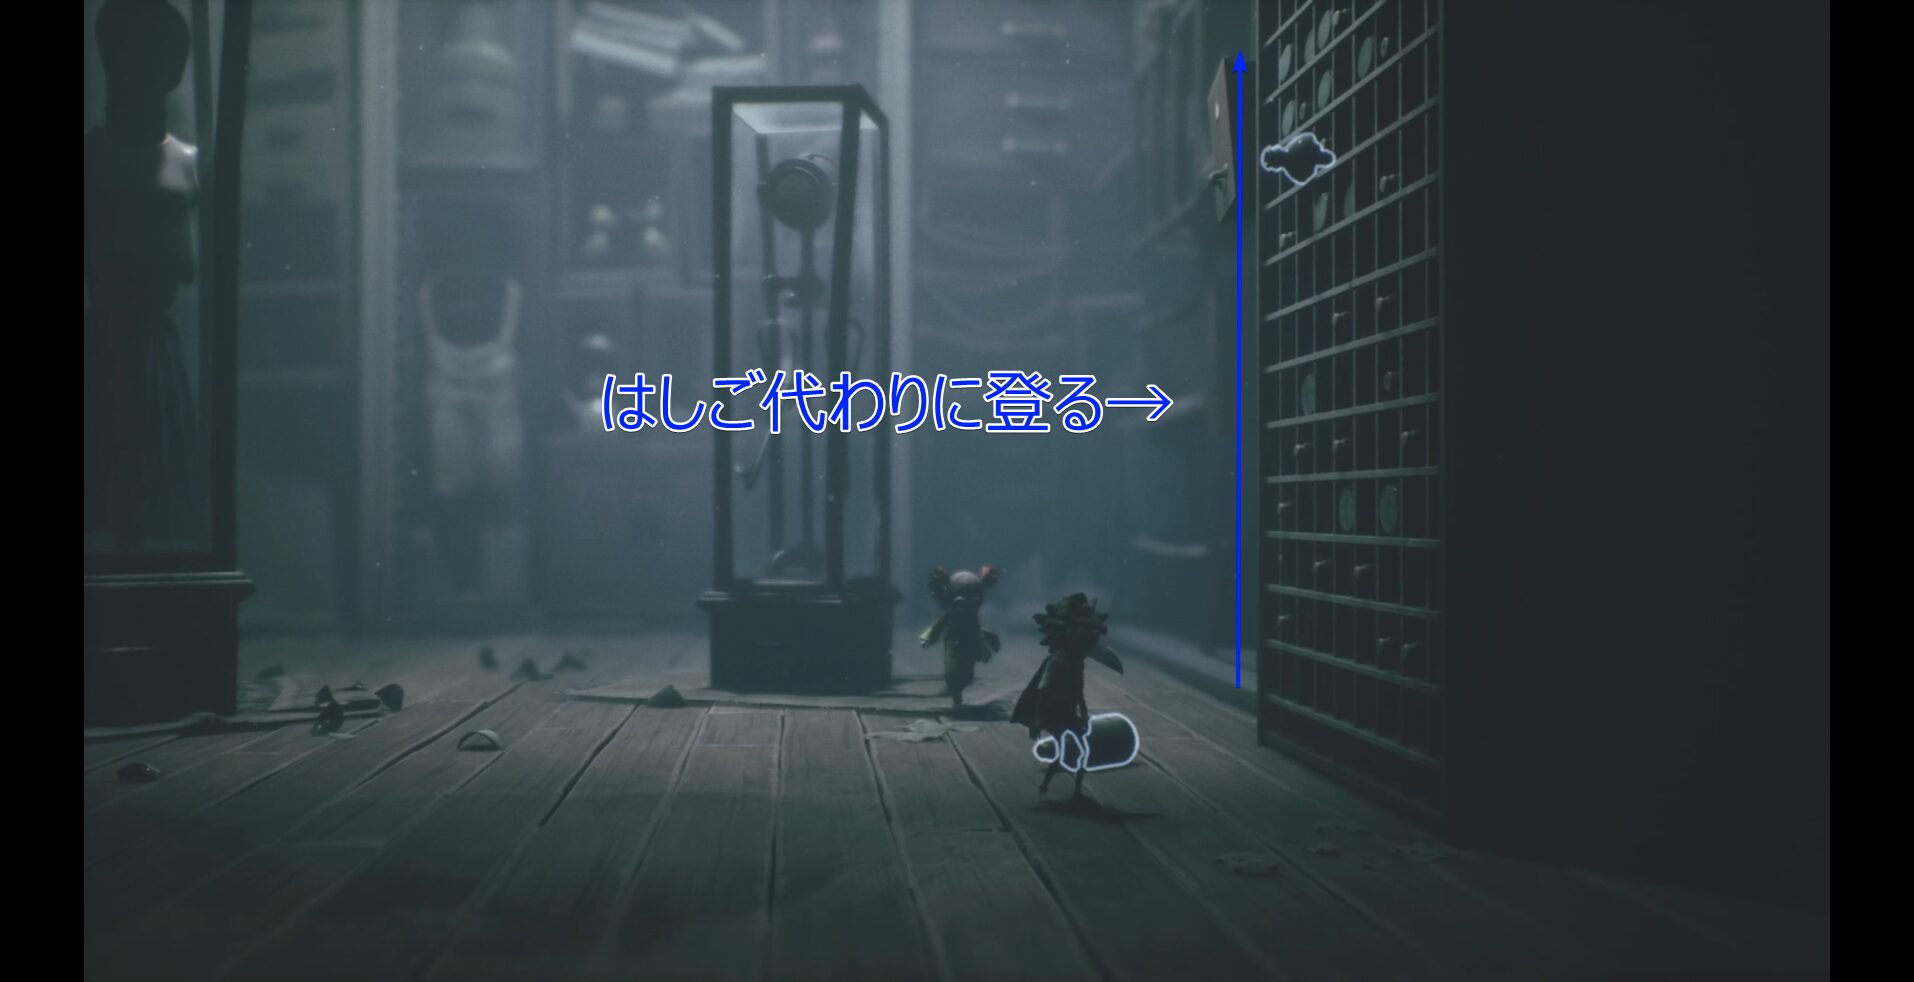
After climbing the chain, before heading left, take the long way around and slip through the gap on the far right to reach a room where a Doll is lying on the floor.
Pull open the drawer in the Doll’s room and a Nome will pop out. It runs away, but if you head back to the main route, you’ll find it in the next room looking completelywornout, so go give it a hug.

←Main route
Doll room→

⑨(Doll Point ×2 & Nome Point)
In the extremely dark hallway, before heading all the way to the end, go up the stairs on the left.
At the very back, you’ll find a Doll on the floor, and if you use your bow to turn on the switch near the entrance, a Nome will appear. The Nome then moves to the piano room at the far end of the dark hallway, so follow it there.
In the piano room, walk across the keys at ① and a Nome will burst out from the hidden door at ②–③. It quickly runs out of energy, so give it a hug.
You can also pick up another Doll behind the hidden door at ④. There’s a lot going on here.

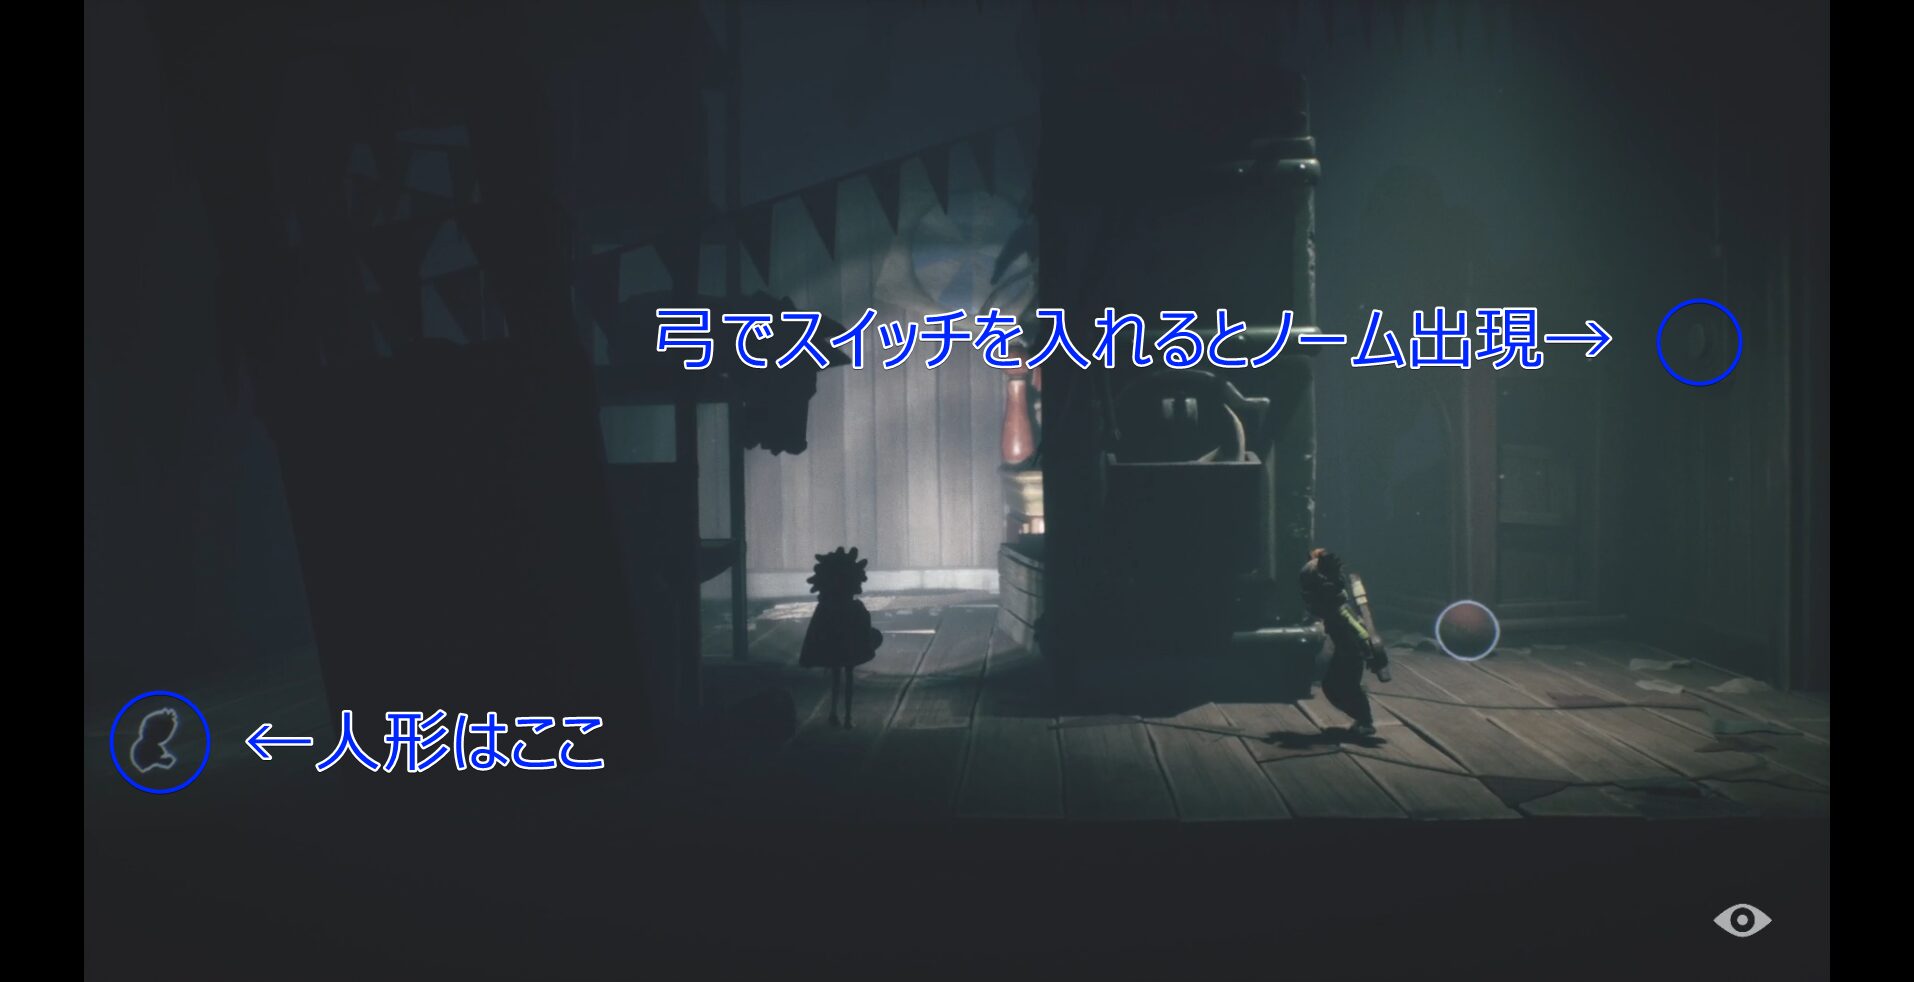
←Doll is here
Turn the switch ON with the bow to make the Nome appear→

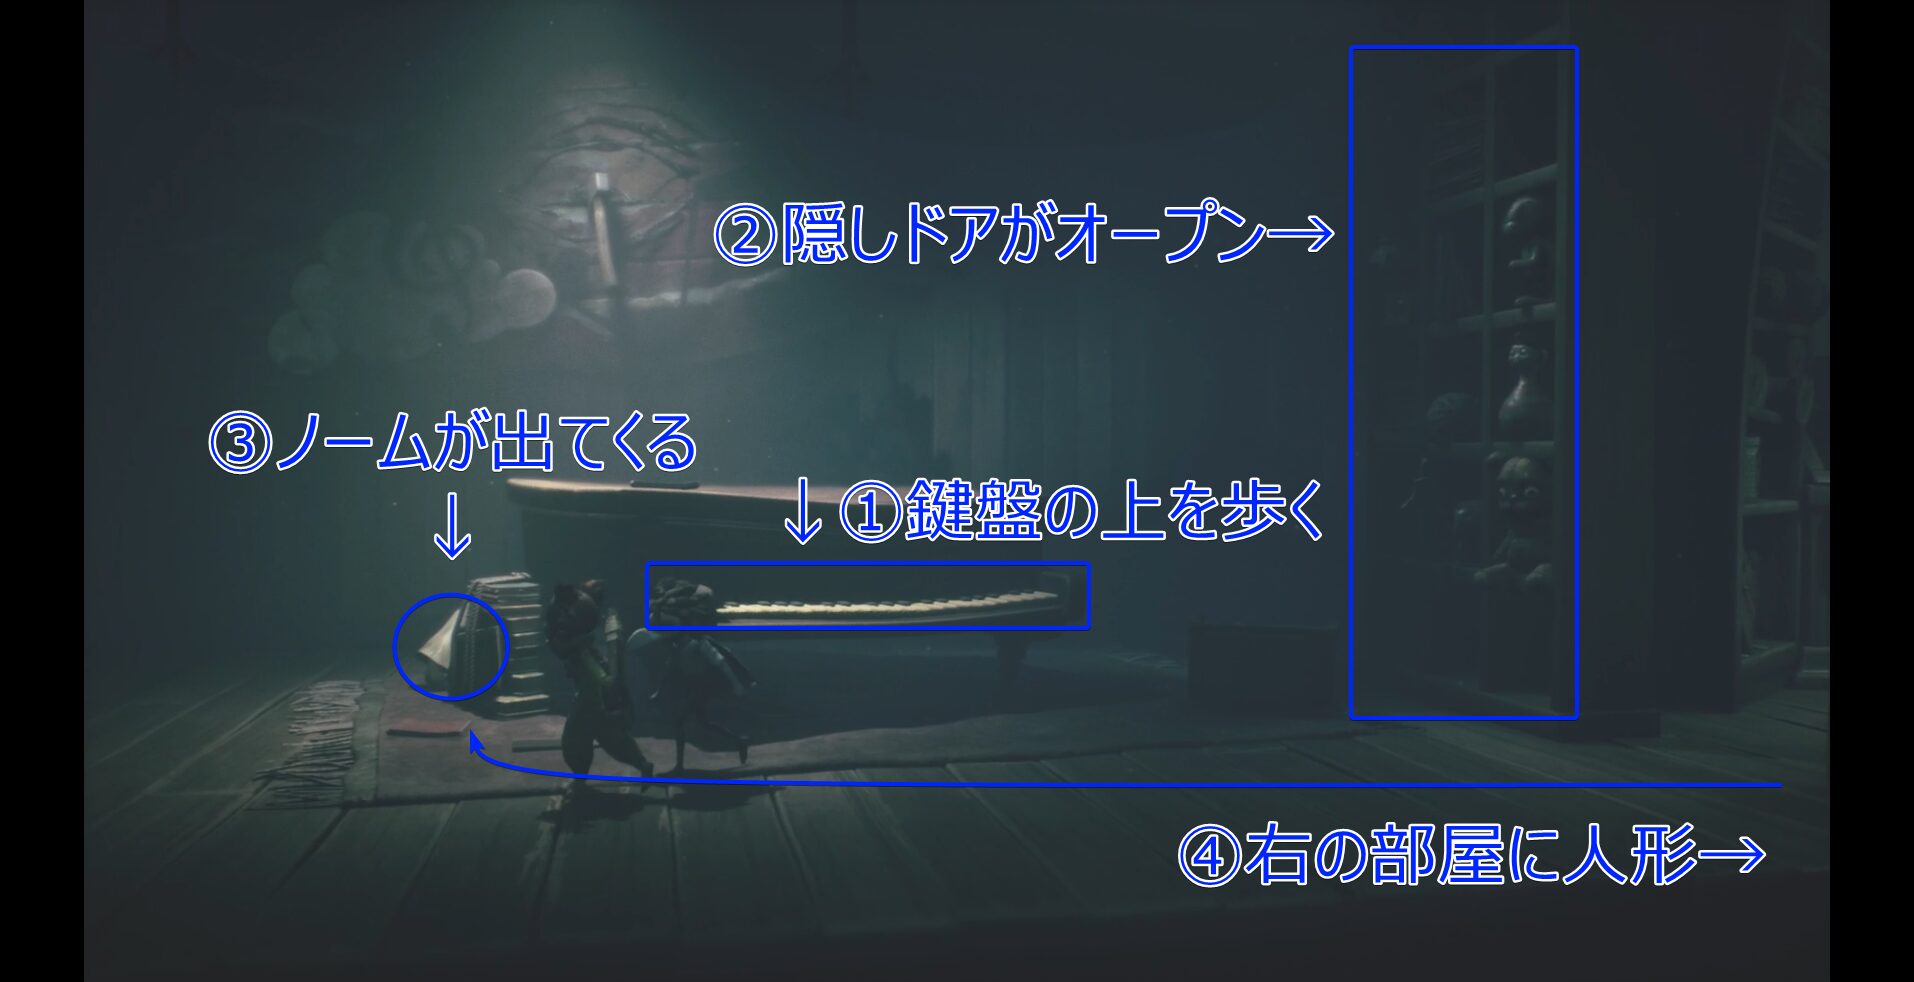
↓①Walk on the keys
②Hidden door opens→
③The Nome appears
④Doll in the room on the right→
⑩(Nome Point)
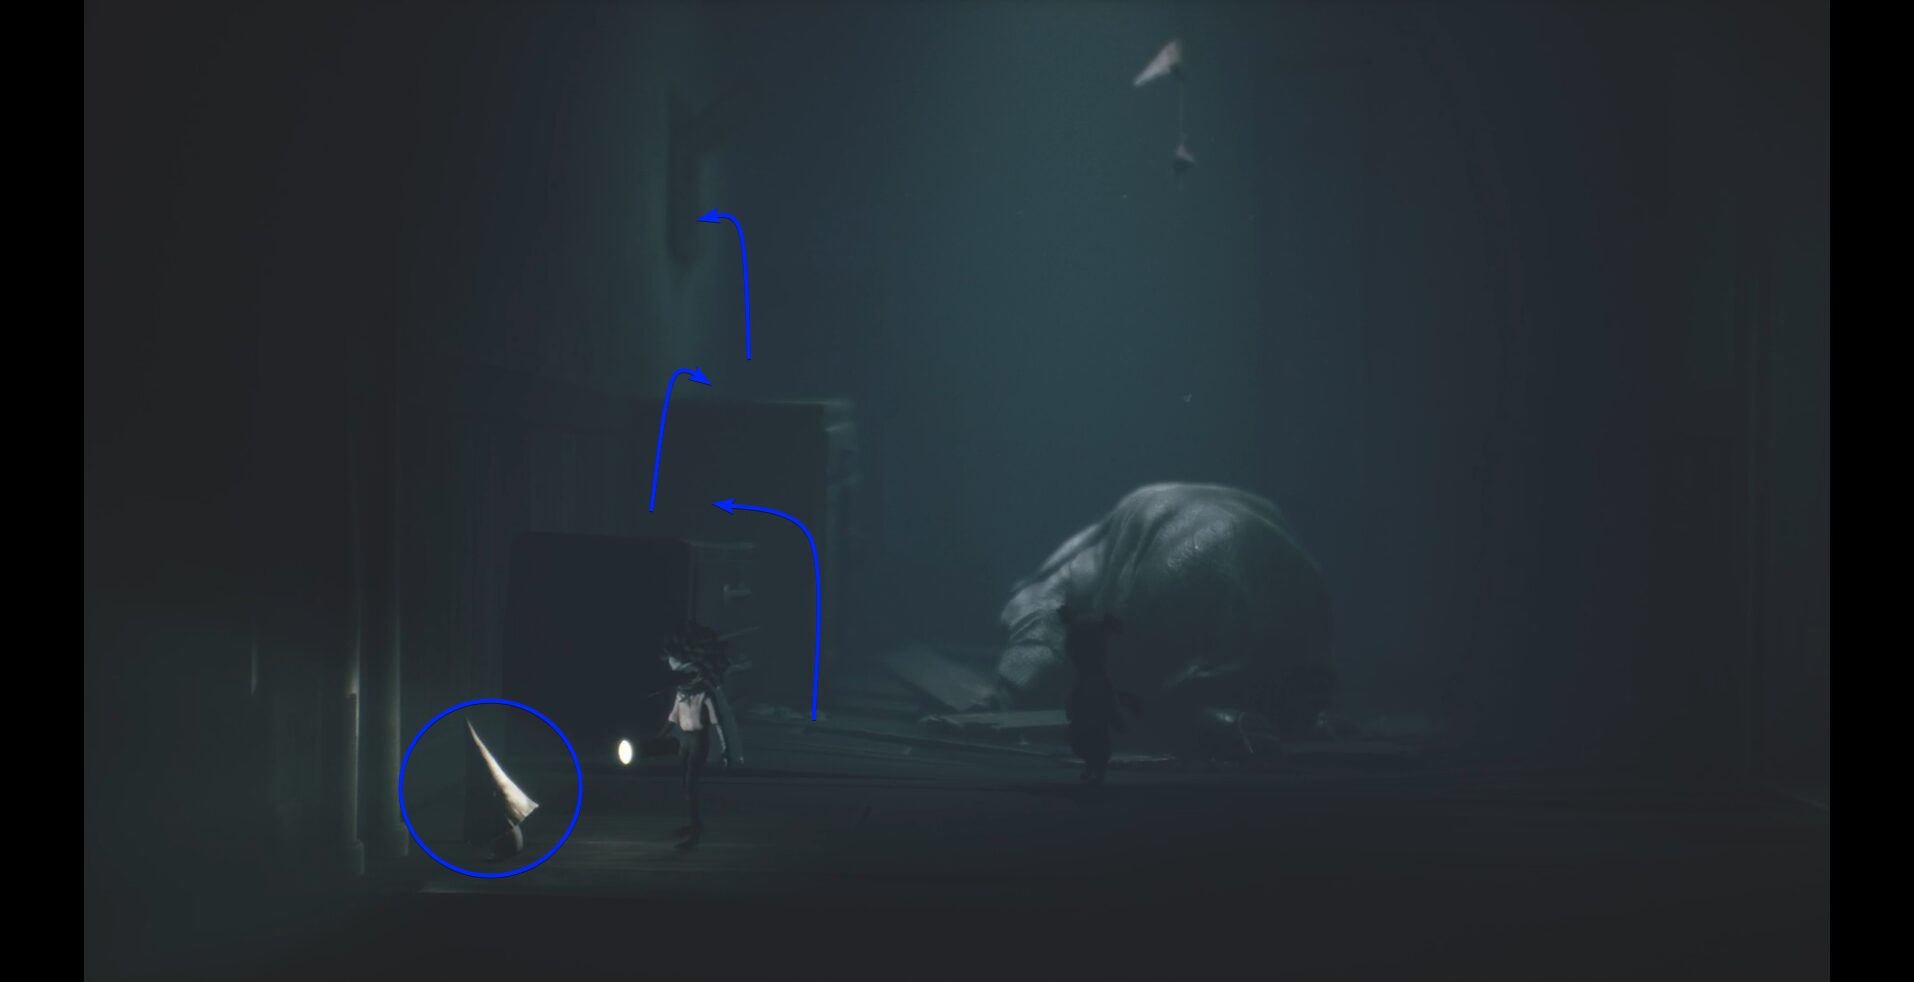
In the room where a man is lying face-down on the floor, you’ll find the sixth Nome in the front-left corner. If you haven’t missed any up to this point, you should unlock the achievement here.
Then use the shelves as footholds to reach the small window above.
⑪
Shoot the bound Doll with your bow to knock off its head, then smash the head with your wrench to reveal a key.
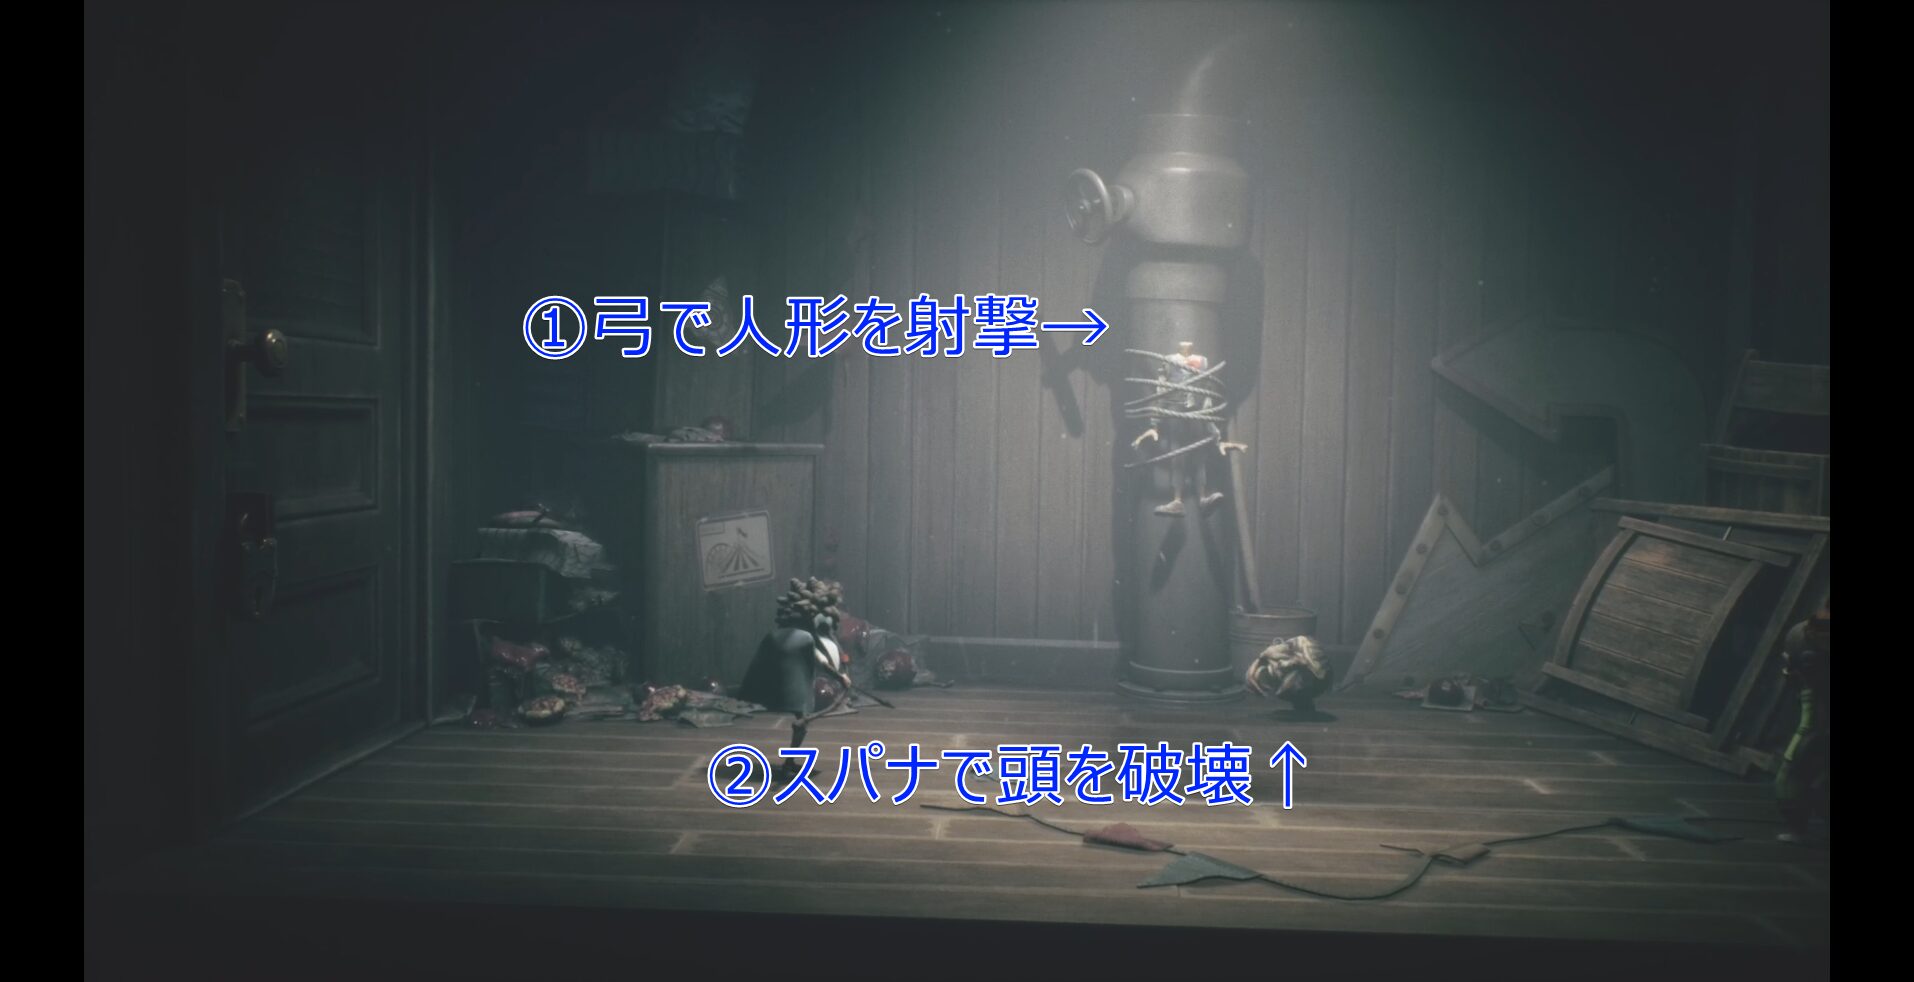
①Shoot the doll with the bow→
②Destroy the head with the wrench↑
⑫
In the engine room, activate the machinery by following steps ①②③. The pistons will start moving up and down, allowing you to climb higher.
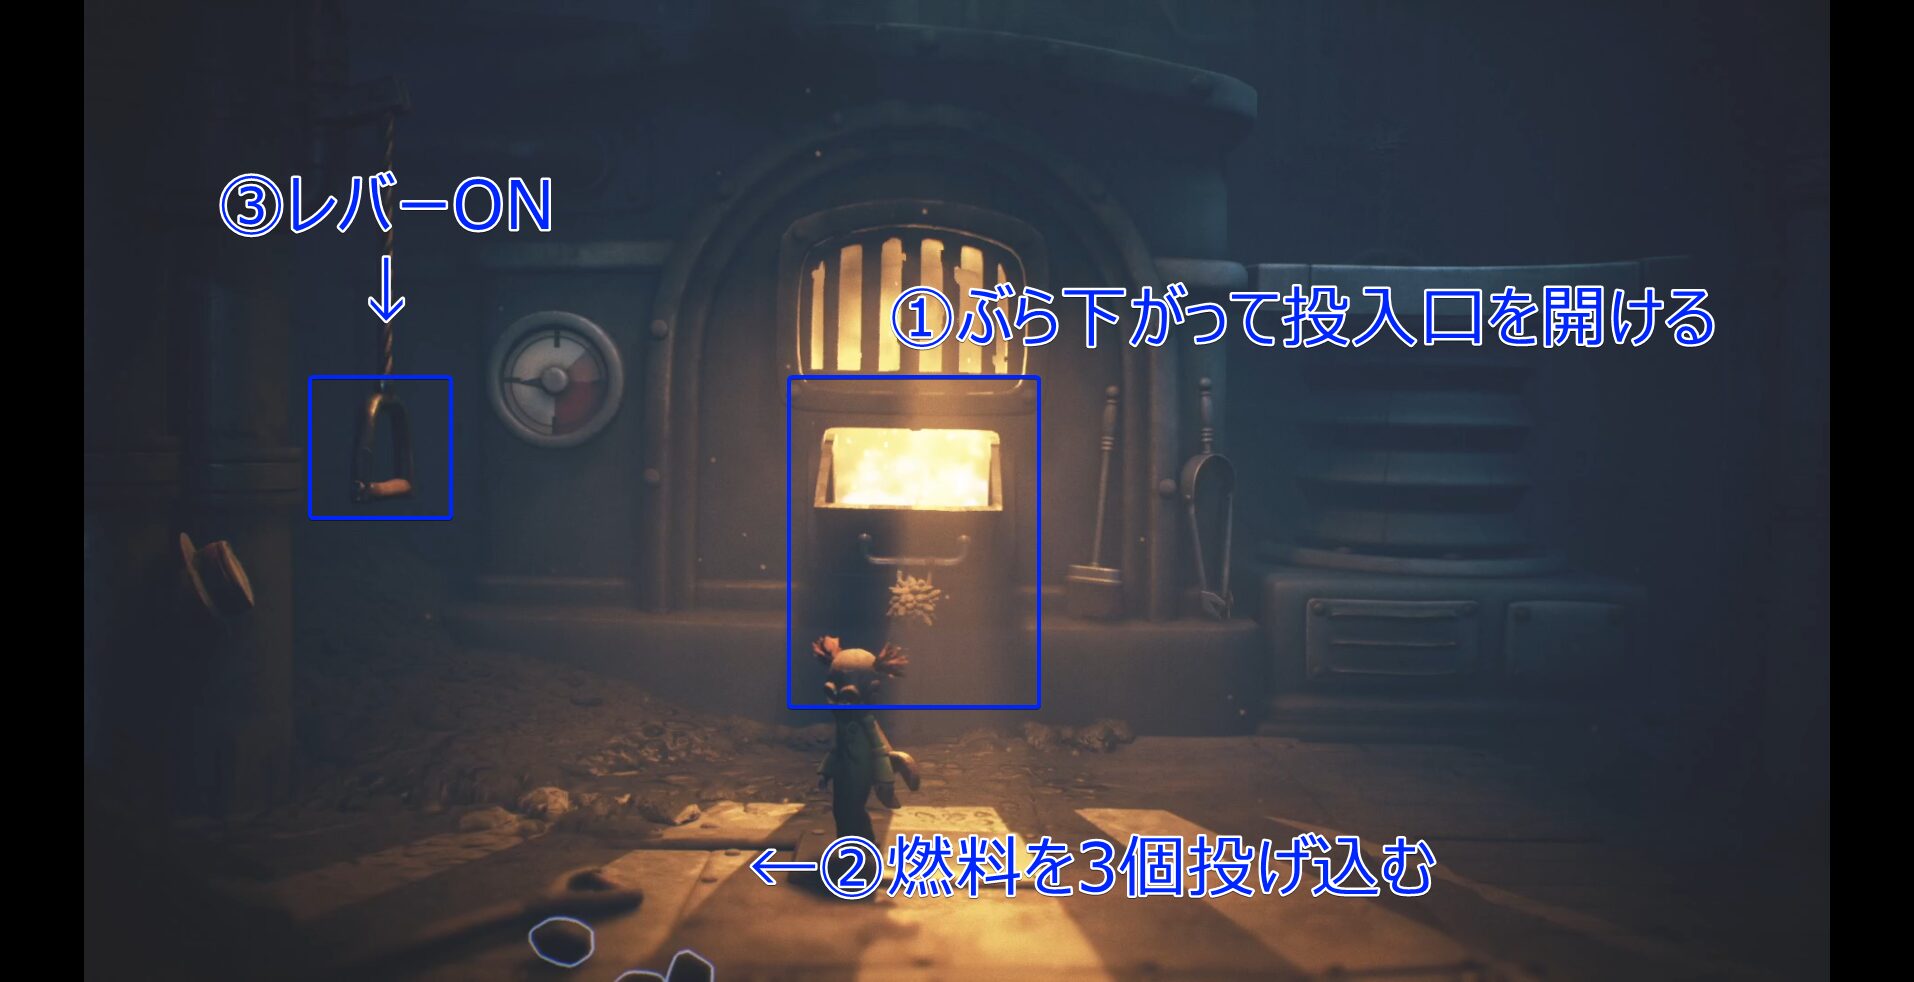
①Hang to open the chute
←②Throw in 3 fuel cans
③Lever ON
⑬(Doll Point)
Once you’re out on the rooftop, before heading along the main path, move from the near side toward the back to reach a room where a Doll is placed. Make a quick detour to pick it up.

←Doll this way
Main route→
⑭
After moving forward for a while, you’ll reach a locked door. Pull the lever to turn on the lights, then use your bow to cut the rope holding up the lowered board.
Jump onto the lowered board, cling to it as you climb up, then move left.
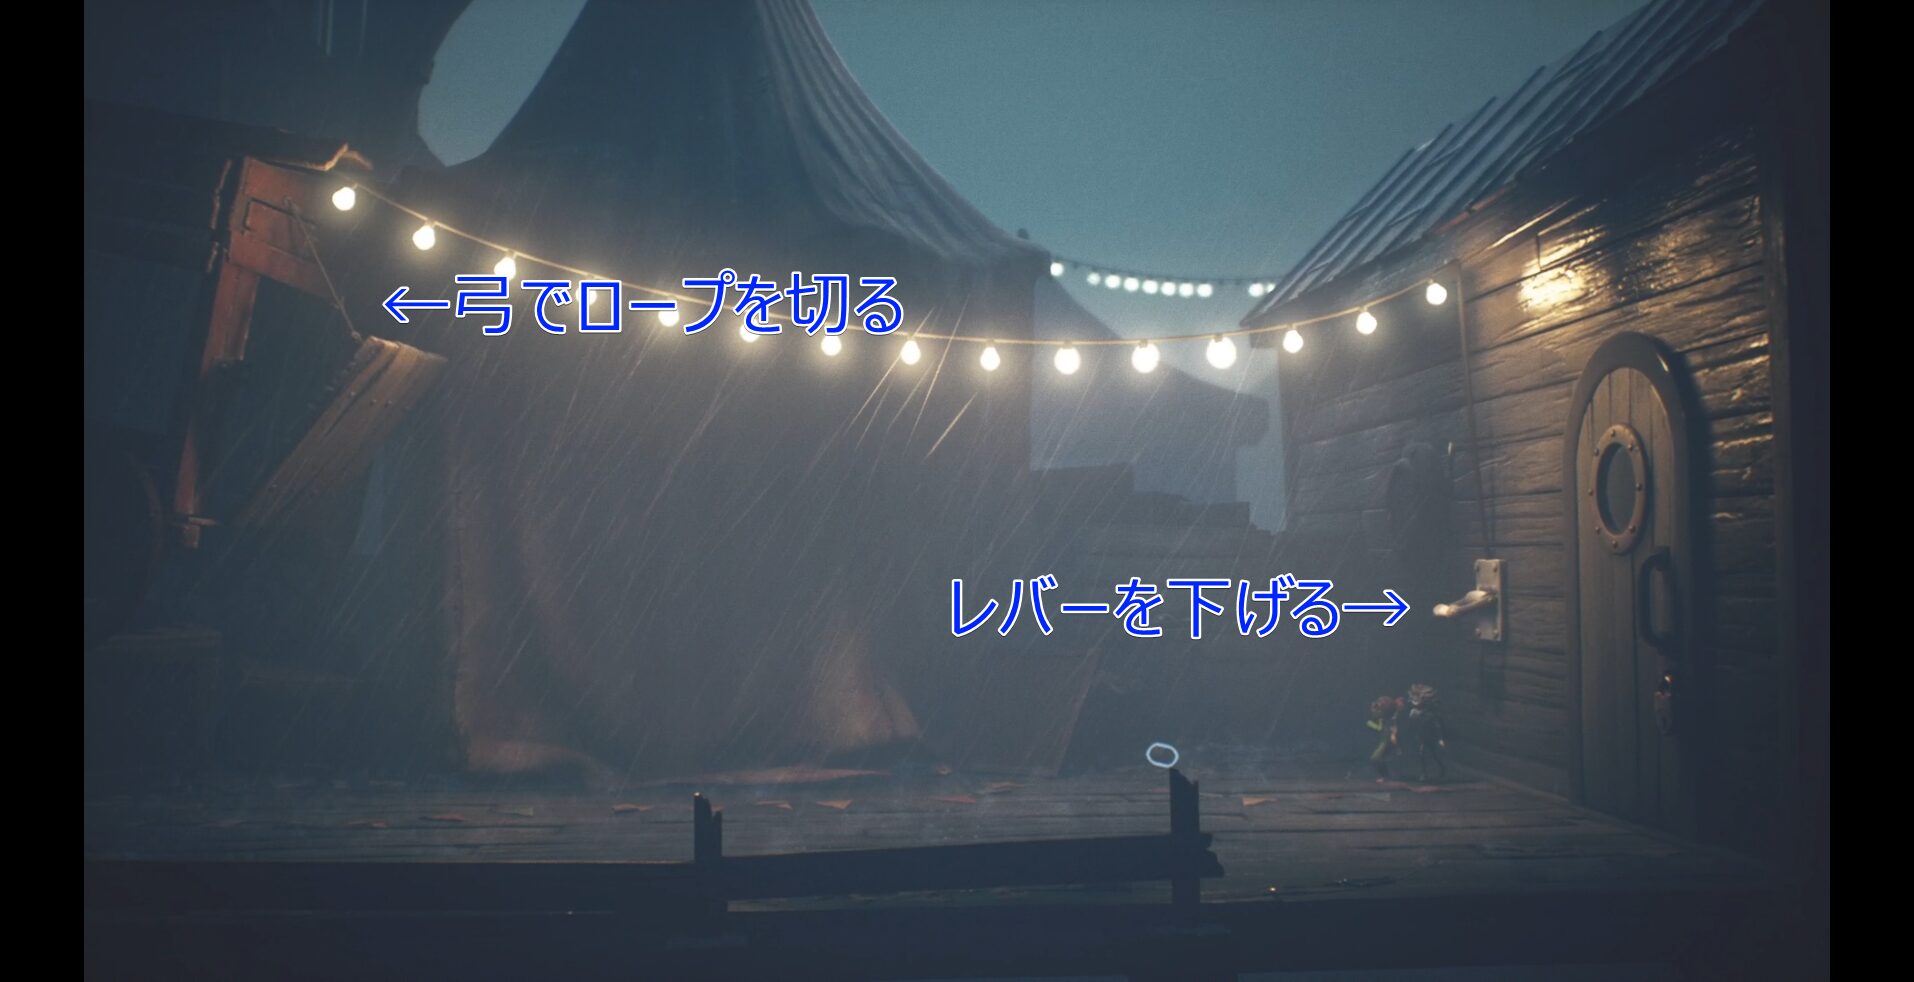
←Cut the rope with the bow
Lower the lever→
⑮
After using a boost jump to get over the desk, push the cart at ① to open a path and regroup the two of you.
At position ②, perform another boost jump to climb up, then hang from the locked board at ③ to knock it down.
After that, return to the locked door at ⑬ and unlock it.
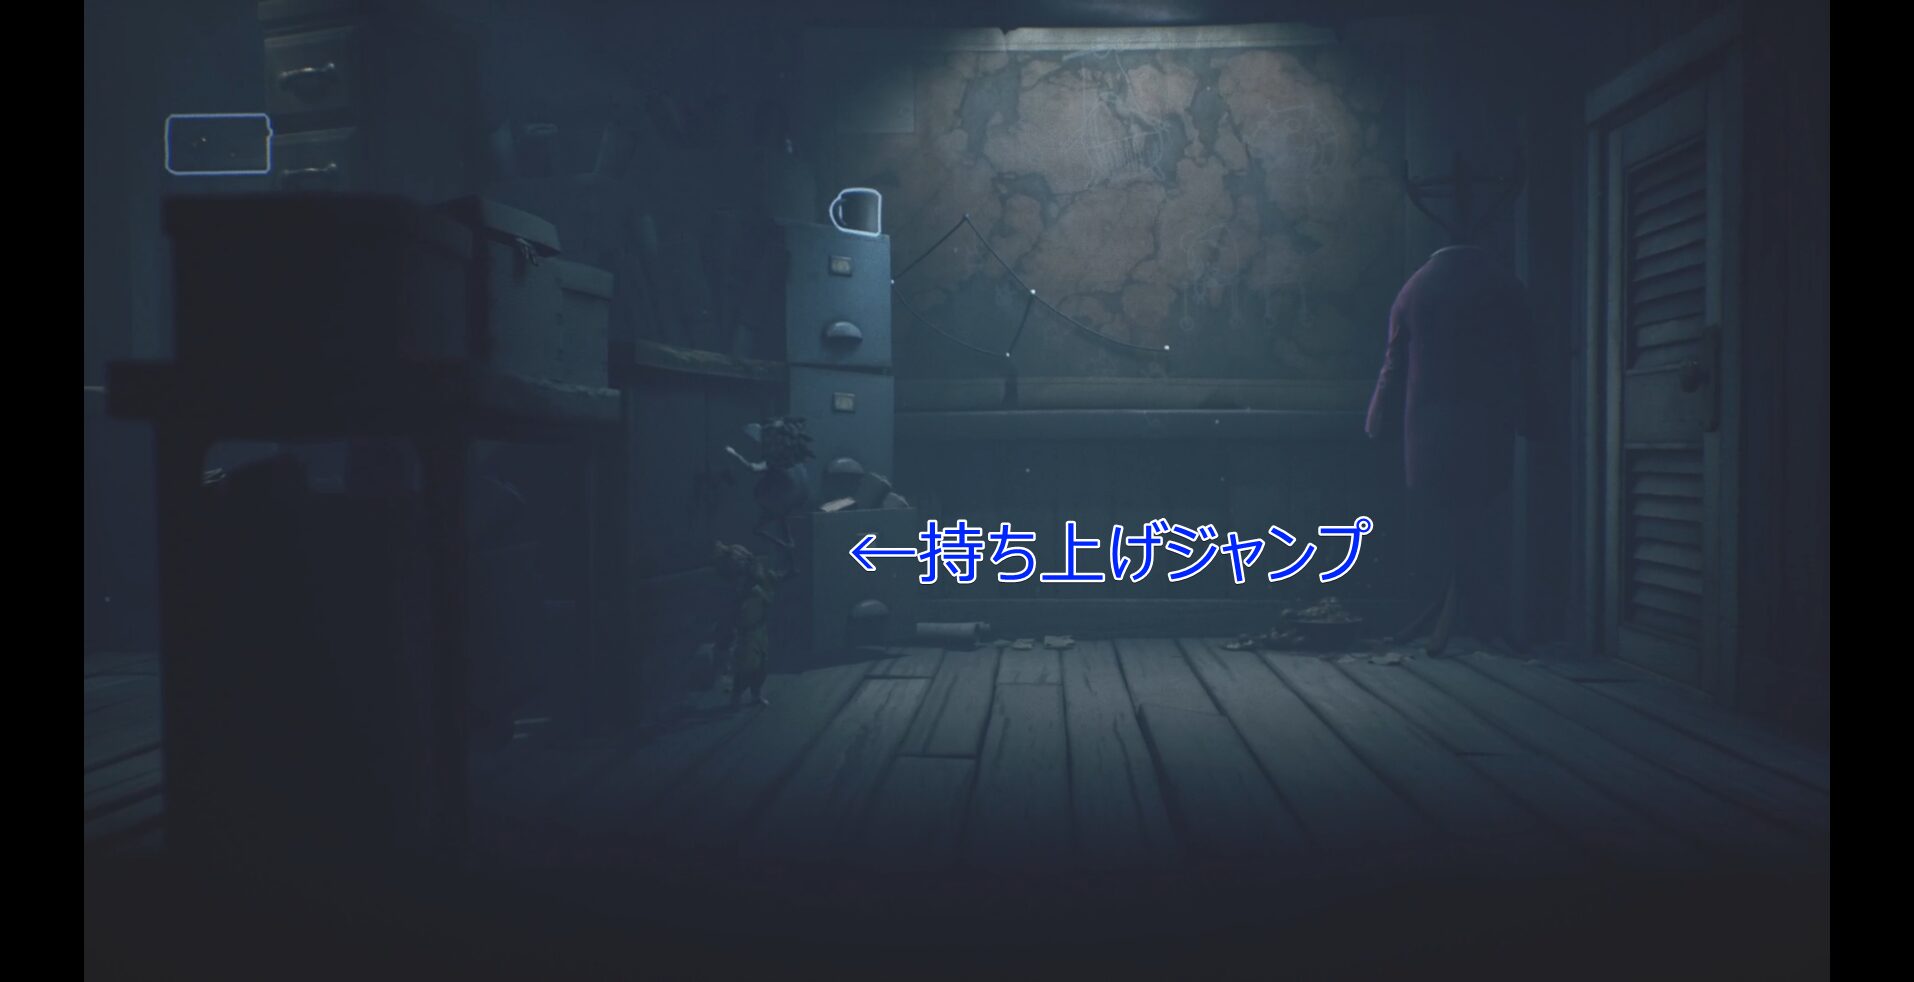
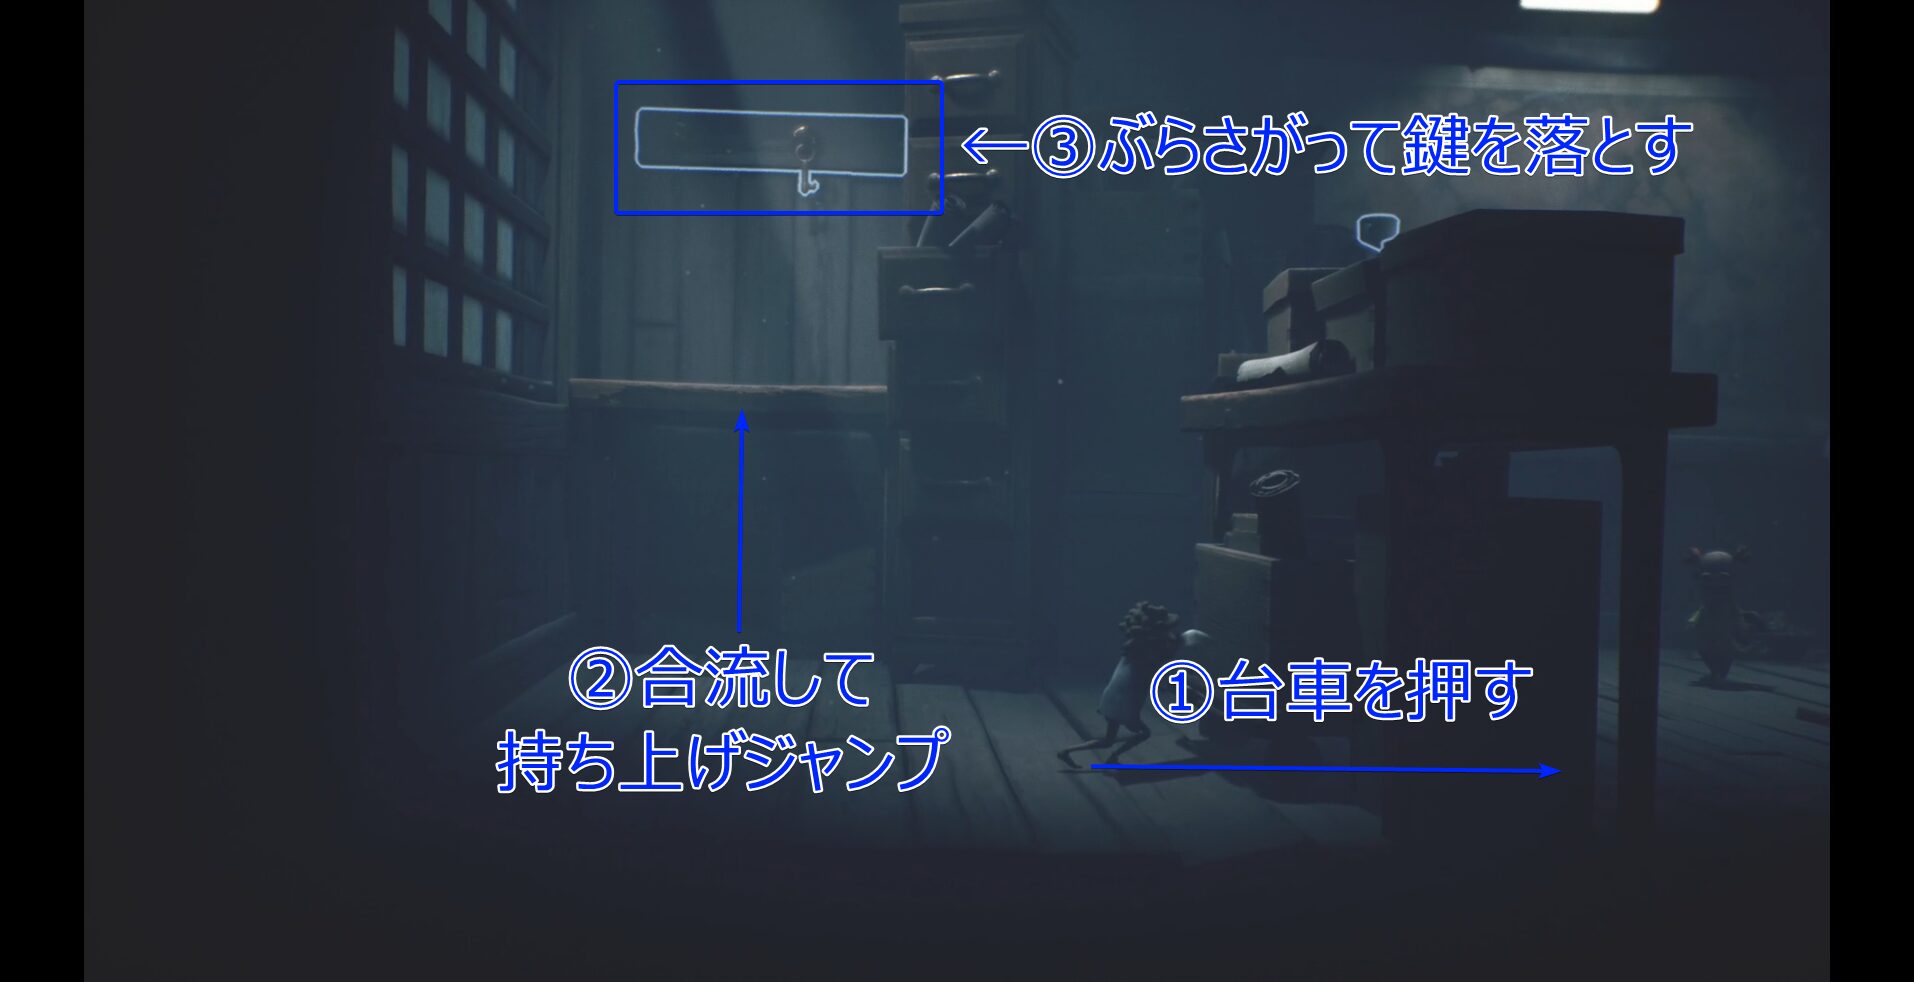
①Push the cart→
②Reunite and perform a Lift-Up Jump
←③Hang and drop the key
⑯
During the fight with the Dolls, have ① Low shoot off the Dolls’ heads with her bow, then put some distance between you and run away.
② Meanwhile, have Alone smash the fallen heads with her wrench. Repeat this a few times and you’ll be fine.
Once you’ve taken them all out, time your jump onto the trapdoor in the front-right part of the floor to drop down to the lower level.
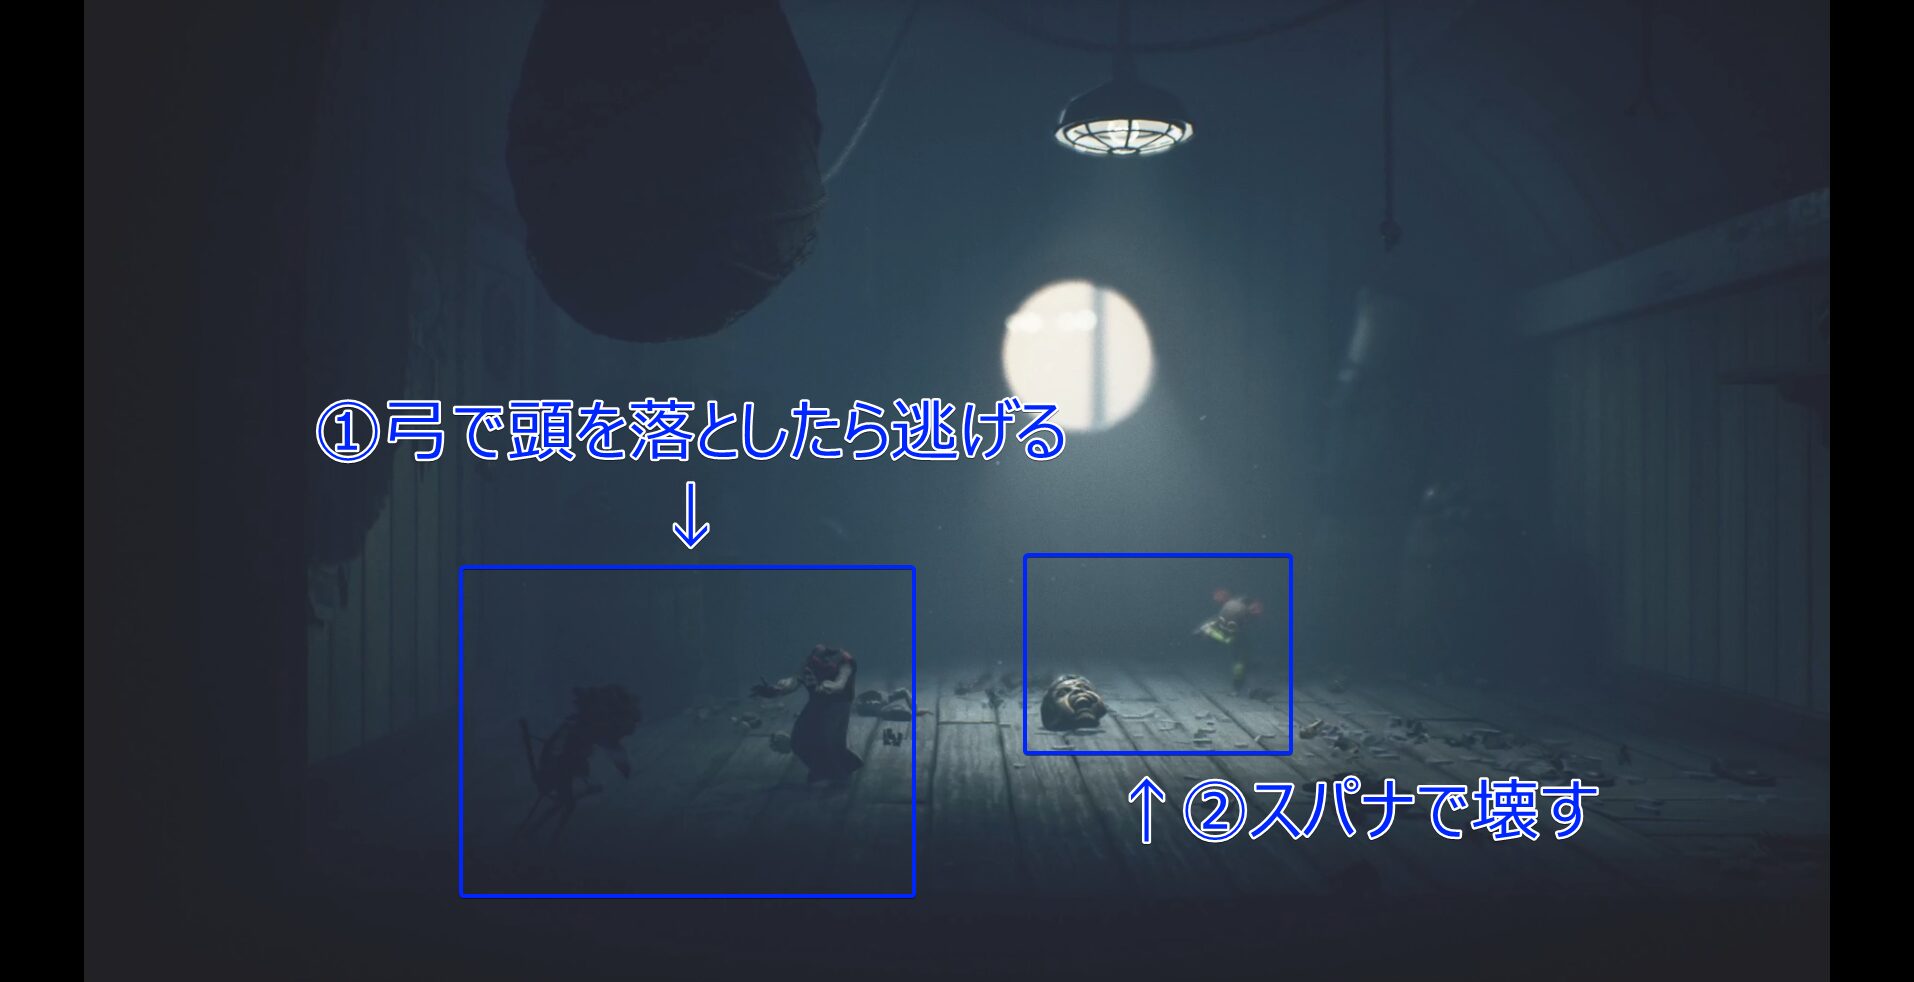
①Shoot off the head with the bow, then run away
↑②Destroy it with the wrench
⑰(Doll Point)
After the battle, you’re supposed to crawl under the floorboards to exit to ground level, but if you go the opposite way to the left, you can pick up a Doll.
You’ll find it after climbing up the planks you’re using as a ladder, but jumping straight down to get back is dangerous, so climb back down via the plank ladder instead.
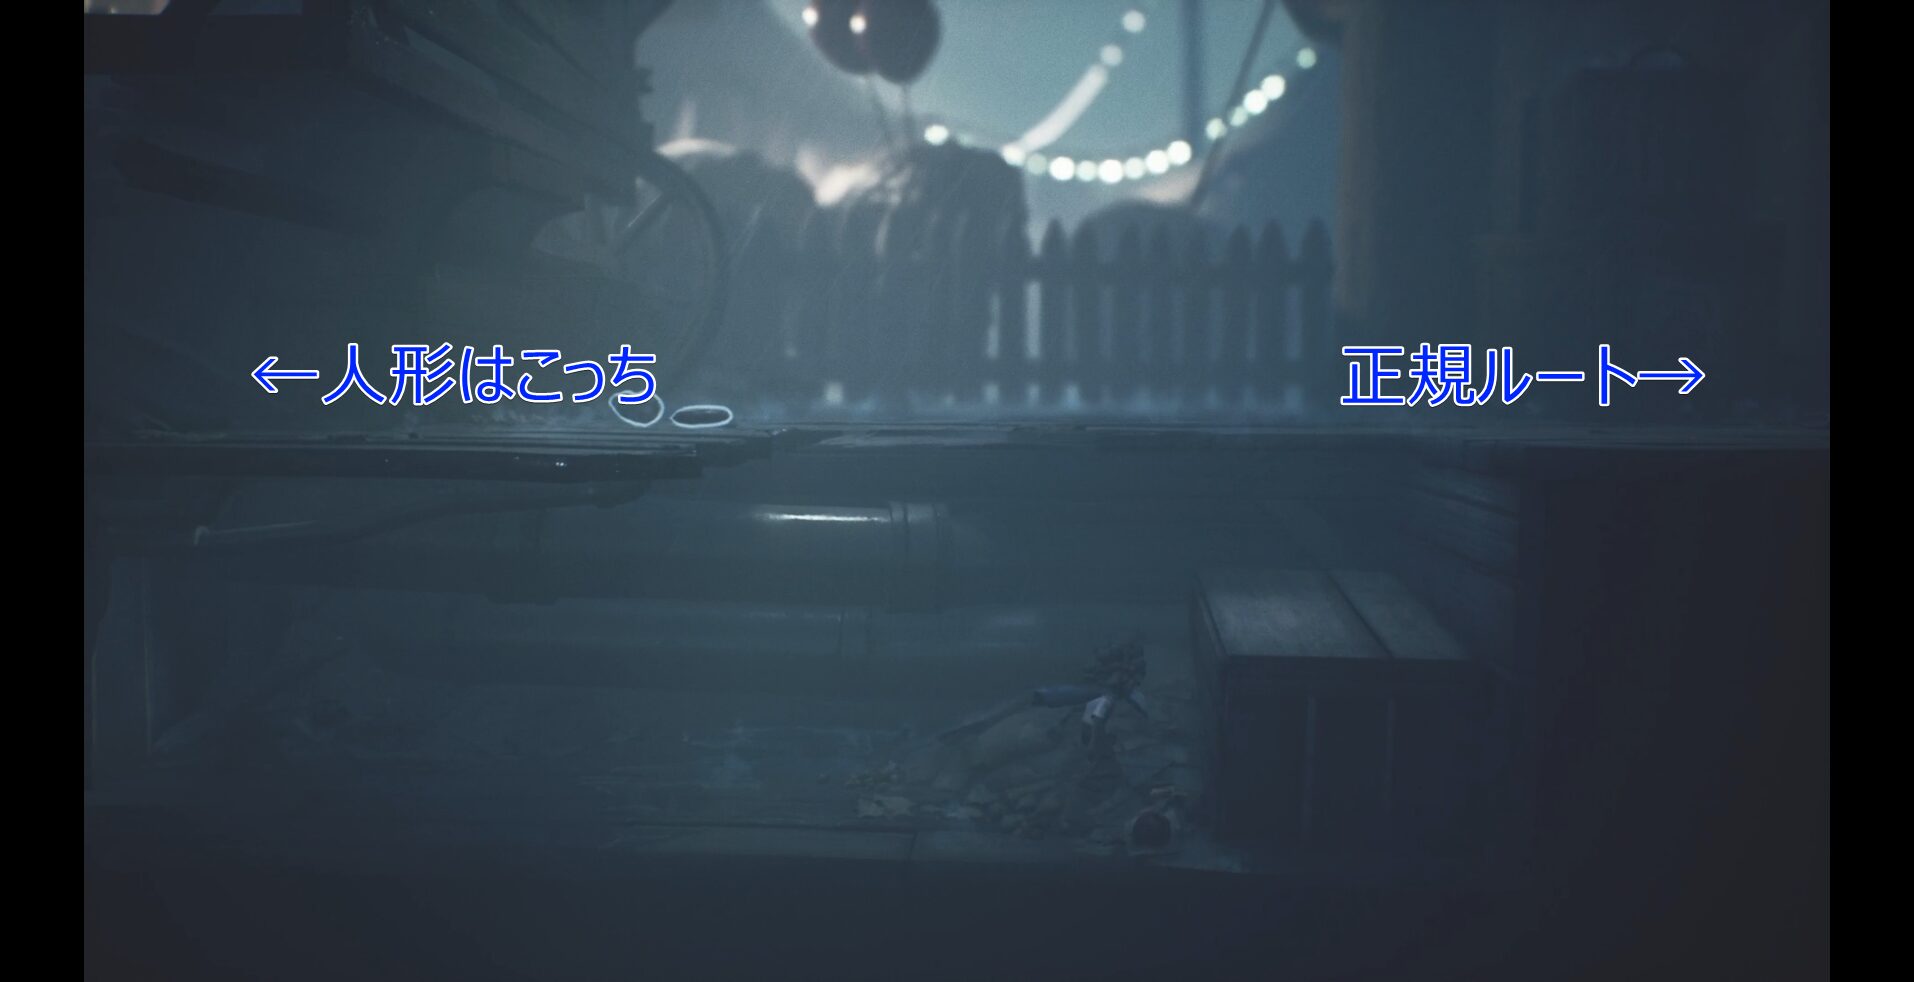
←Doll this way
Main route→

| ←PREV Candy Factory (Late) | NEXT→ Carnevale (Late) |
Related Guides
Here’s a collection of my other Little Nightmares III guides. Feel free to check out anything that catches your eye.