This page provides a detailed walkthrough of Ebisugaoka, covering puzzles, optional routes, obtainable items, triggered events, and boss strategies with images to help you progress smoothly.
Use this guide to assist you throughout your playthrough.
| ←PREV | NEXT→ Shrine Path |
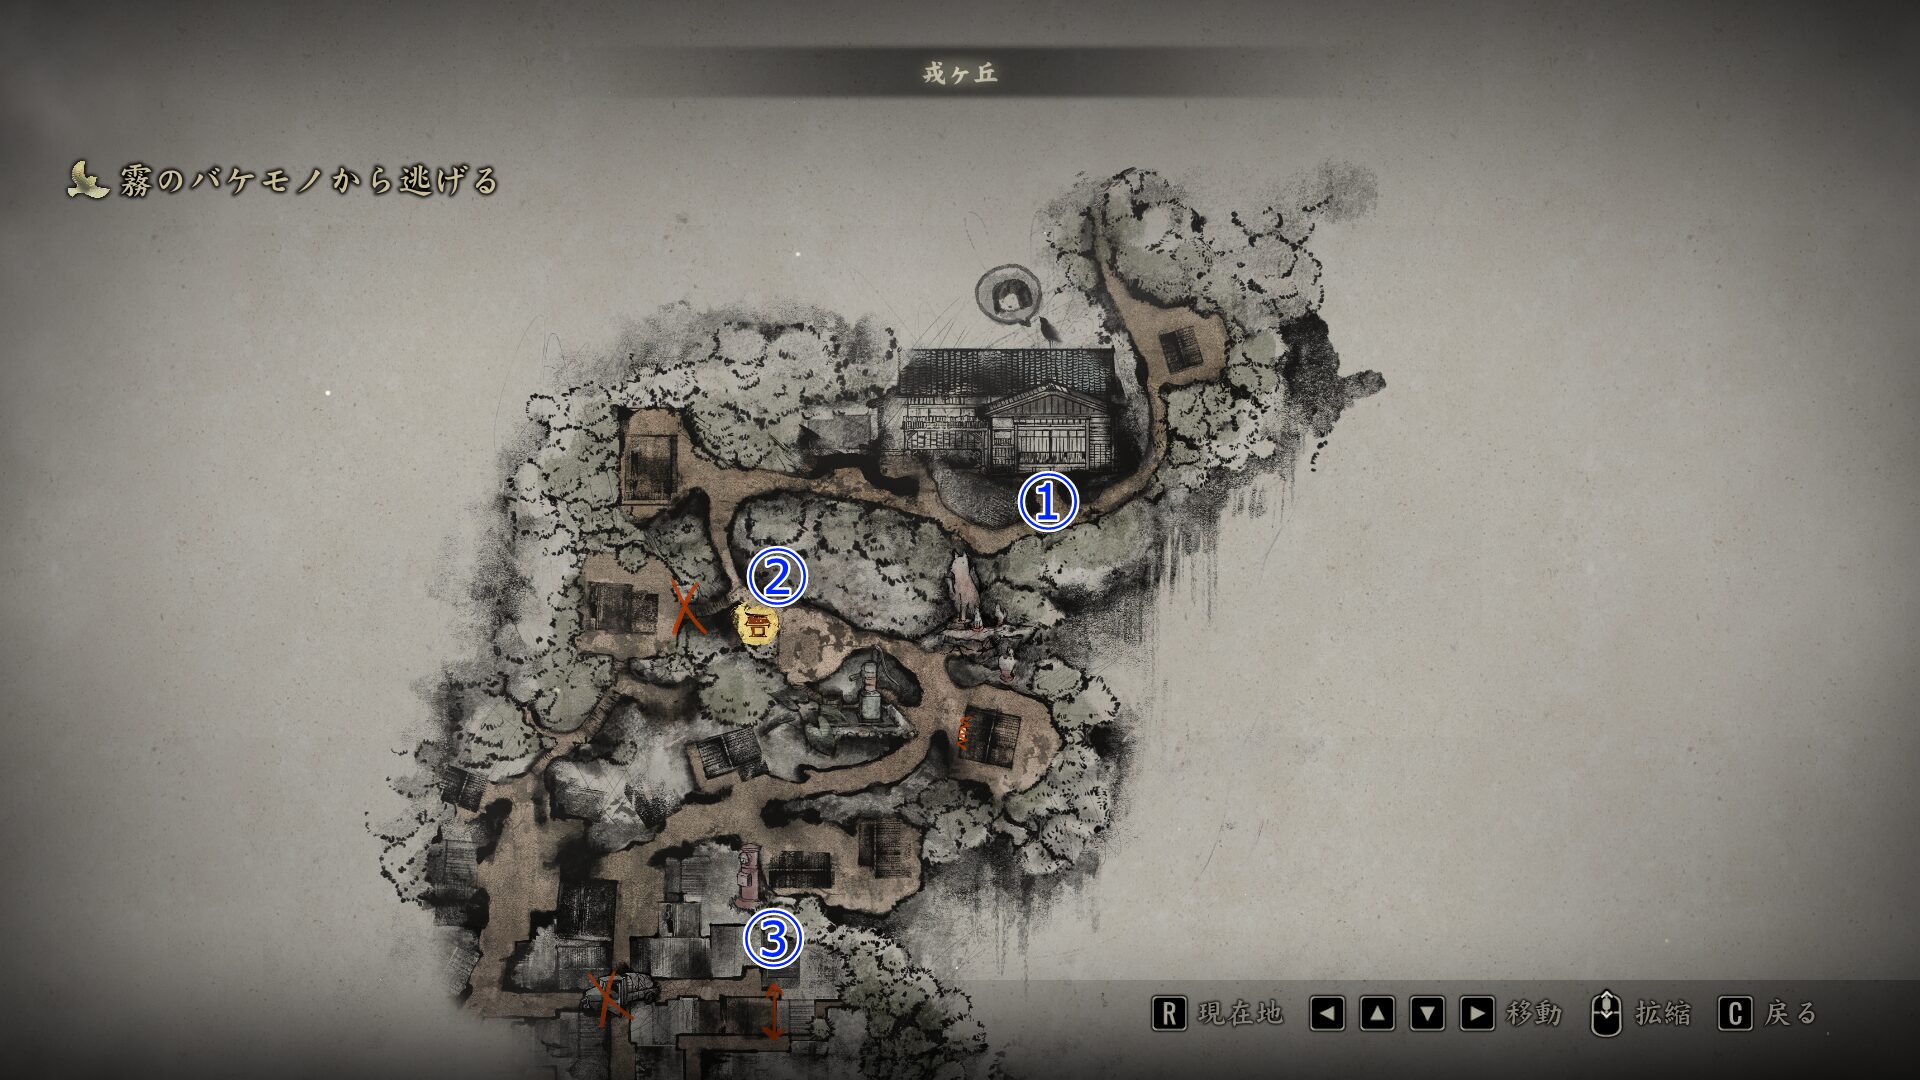
Ebisugaoka – Early Section
There are only a few journals here, so you don’t need to explore the area extensively at this point.
 ┗① Start from here. You don’t have time to sit through parental lectures right now. ┗② Make a save at the Hokora. You still can’t claim any edition bonus items other than your uniform at this point. ┗③ Slip through the gap from here. |
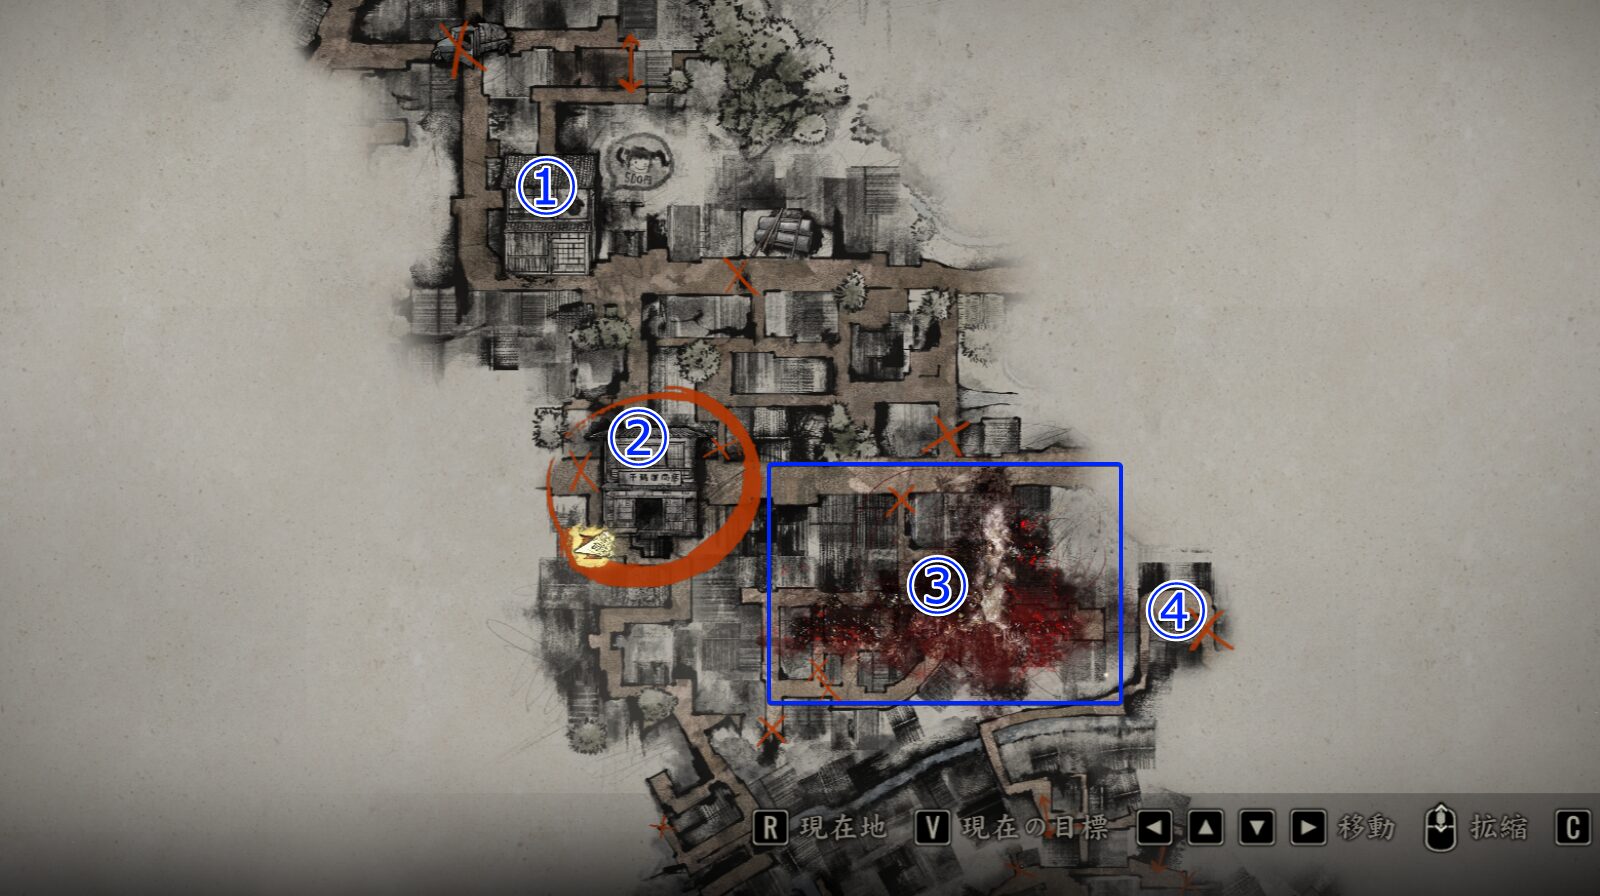
Ebisugaoka – Mid Section
 ┗① Talk to Sakuko here. Her journal portrait is absurdly cute. ┗② The lighthearted school vibes end abruptly as you enter the ③ blue-framed area, triggering a tense escape sequence. ┗④ Reach this point to survive. | |
| Things to Know | |
| [Escaping the Fog Monster] Your goal is the location marked with ④, but you don’t need to consciously aim for it while fleeing. Just sprint through any path that looks open, vault over fences, slip through narrow alleys, and avoid getting caught by the red tentacles emerging from the walls. Do this and you’ll naturally break through. | |
| [Achievement Tip] The red haze will damage you if you touch it during the escape. Avoid it entirely while making your getaway to unlock the achievement. |
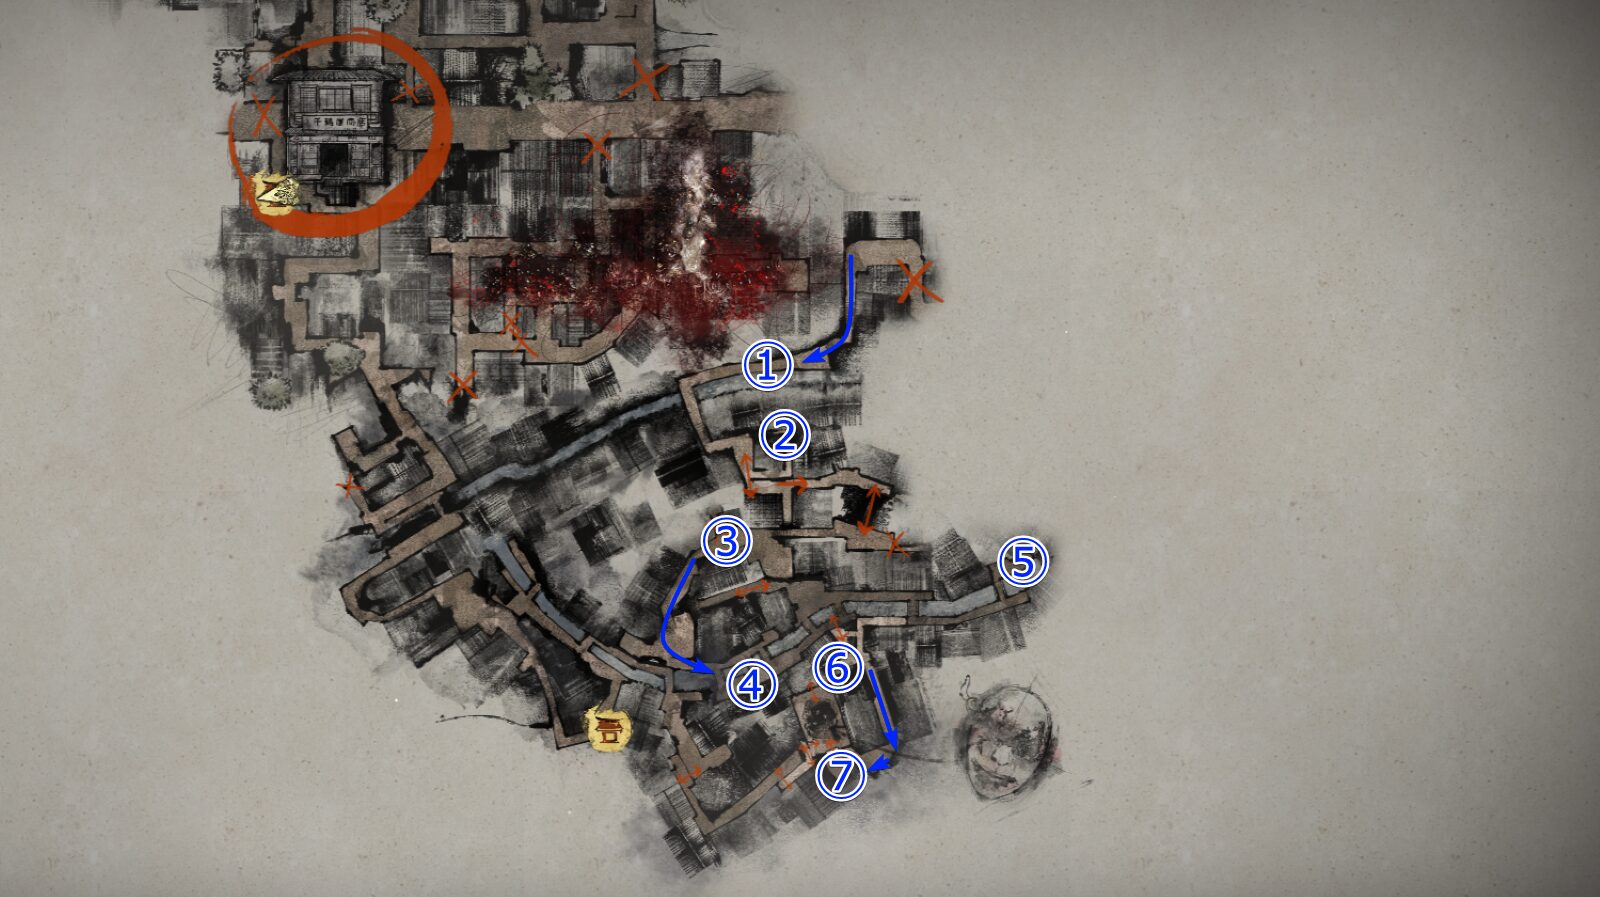
Ebisugaoka – Final Section
 ┗If you’ve taken damage, recover using a Red Capsule. A Bandage is located at ①, and you’ll find another Red Capsule at ②. ┗At ③, an enemy will grab you, but there’s no way to fight back yet—run away. Another Red Capsule is at ④. ┗⑤ is optional, but you can pick up a Red Capsule and a Journal Entry here. ┗There’s a Red Capsule at ⑥ right after climbing the ledge.This town is full of Red Capsules…since there are too many,I’ll stop noting them further. ┗Go around and enter the House at ⑦. | |
| Things to Know | |
| 【Exploring the House】 Obtain the Bloody Key from the grotesque mask on the second floor, unlock the opposite room’s door, and head outside. Among the items available here, be sure to grab the Yokan and the Omamori. The room where the Bloodstained Key is used has the Back Door Key. This key opens the door at the back of the first-floor living room, giving access to the backyard. Head down the slope by the riverbank to find the Omamori [Whale]. You’ll need to slip past enemies a few times, but since you’ll soon obtain a weapon, returning afterward is also a valid option. | |
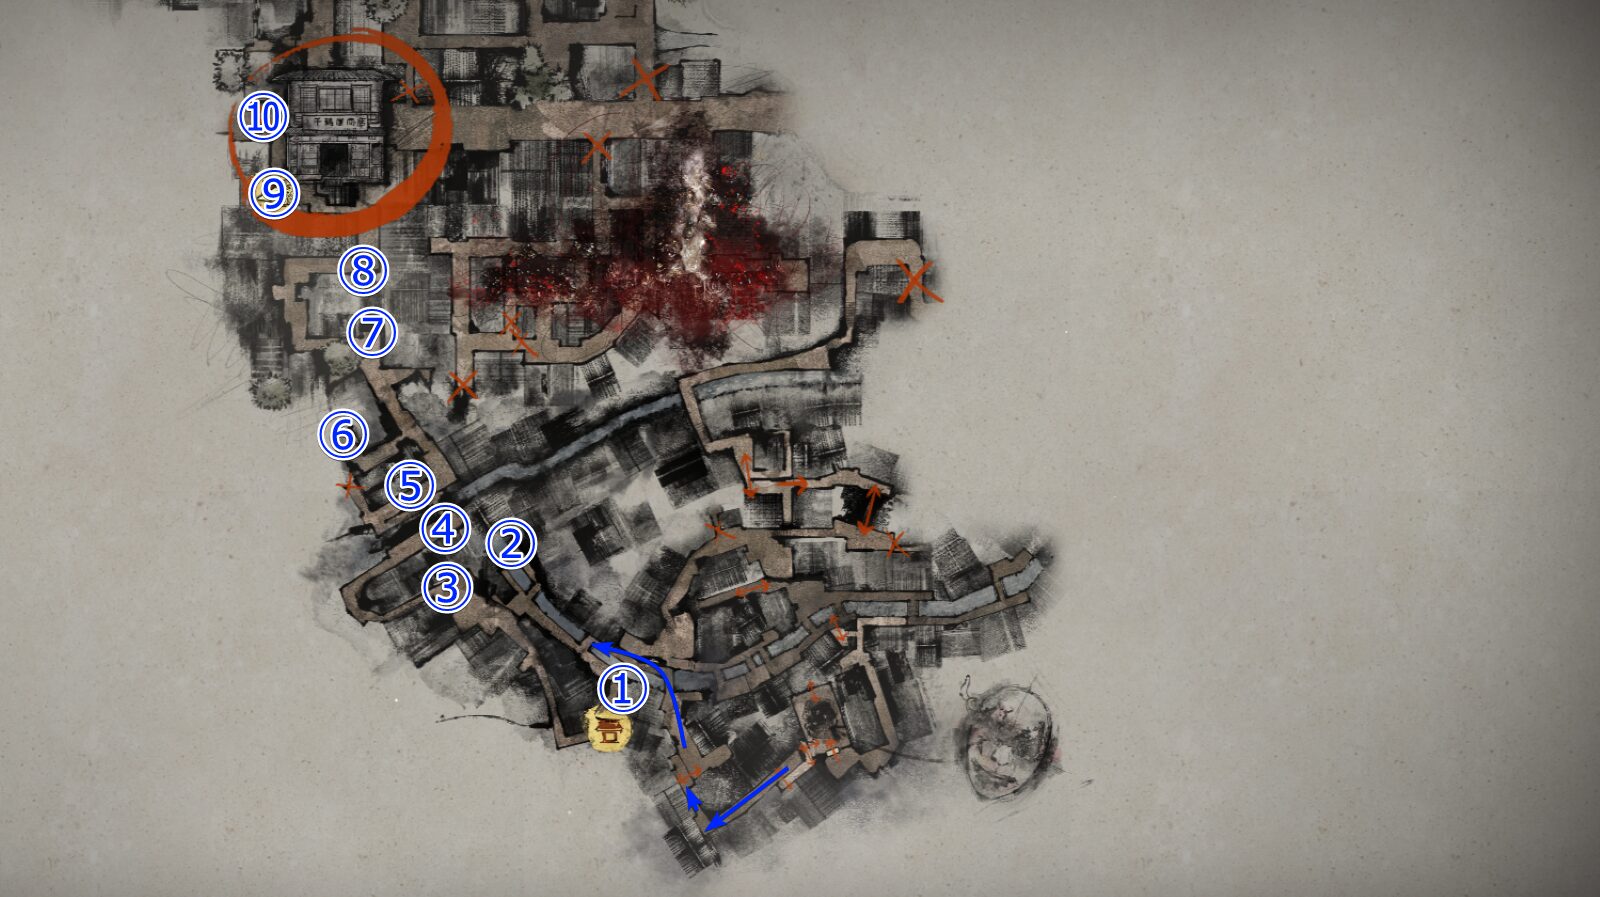
 ┗① Pick up the Offering [Antique Comb] here and save at the Hokora just ahead. ┗You can receive Edition Bonus Items at this Hokora. ┗You may spend Faith to draw an Omikuji. Although it appears random, the Amulet you get seems predetermined. ┗② A Bandage is here. ┗③ Obtain the Weapon [Steel Pipe] here to unlock combat. There’s also a Bandage nearby—pick it up afterward. ┗④ A tutorial battle for the combat system. ┗⑤ A Tool Kit is here. It restores weapon durability, but you won’t need it yet. ┗⑥ Ramune is here. It can be used as an offering, so pick it up. ⑦ has Yokan, and ⑧ has more Ramune. ┗⑨ There’s a Hokora and a nearby Weapon [Steel Pipe]. Head toward ⑩. |
| NEXT→ Shrine Path |
Related Guides
Here are my other SILENT HILL f guides. Feel free to check out anything that catches your eye.