This guide explains where to obtain the Omamori Cuckoo, its effects, practical usage tips, and recommended Omamori combinations that work well with it.
Please use this guide to assist you throughout your playthrough.
Related Guide → All Omamori – Effects & Locations
Cuckoo: Effects & Location
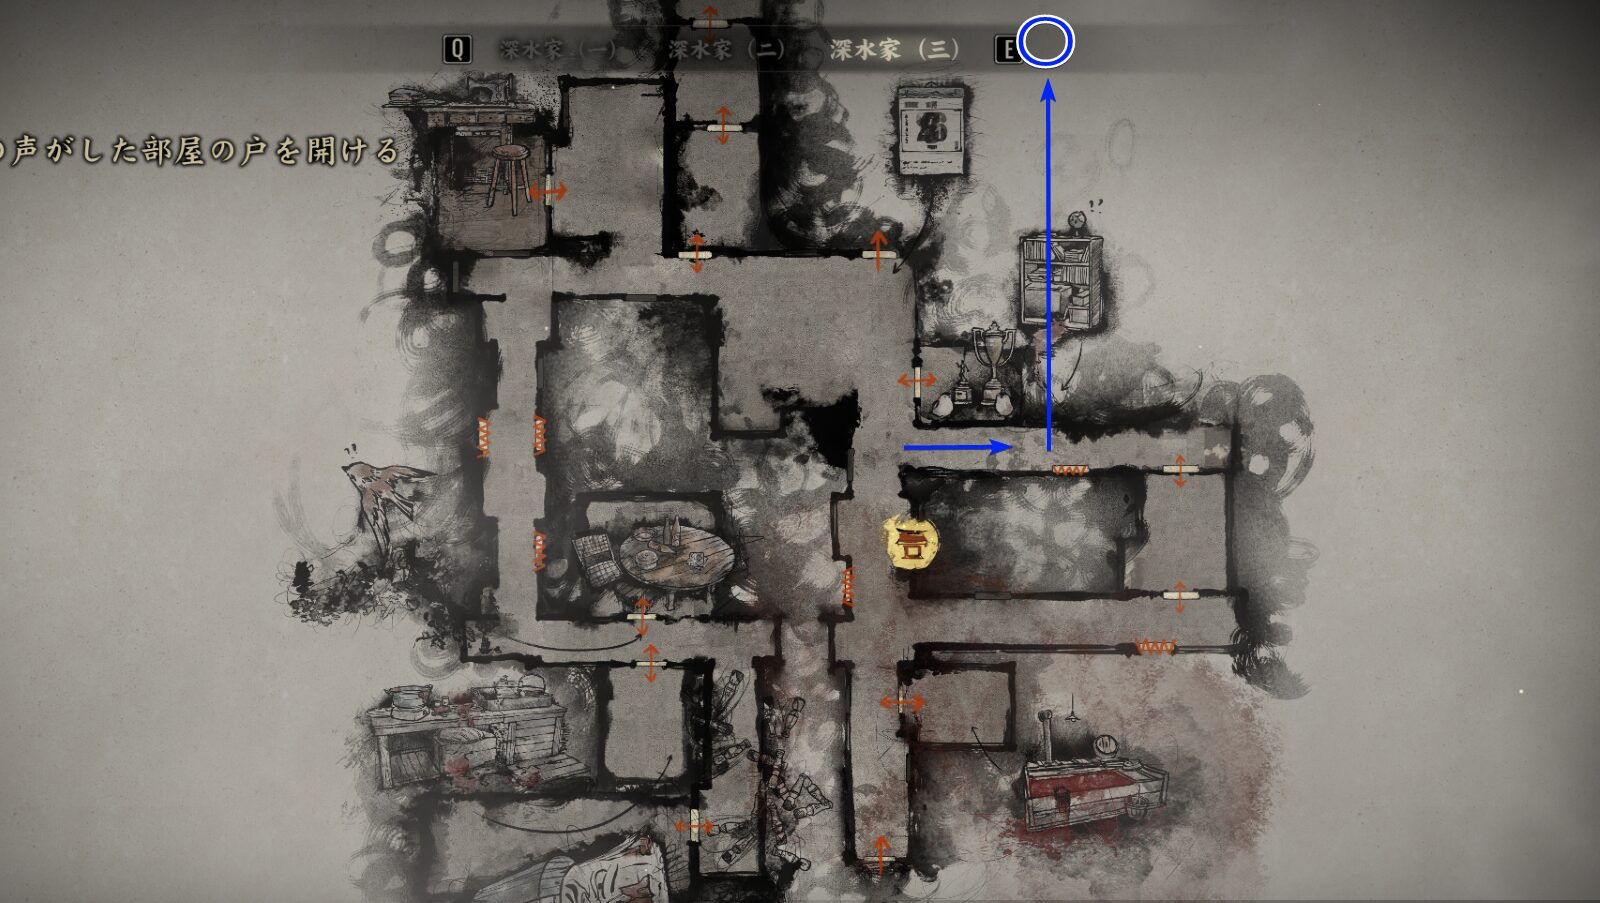
【Cuckoo】Location: Shimizu Residence
Greatly increases damage dealt while at critical Health.
When Cuckoo Is Most Useful
Damage Greatly Increases While at Low Health
A “low Health” state refers to when the screen edges turn red and Hinako holds her arm as if in pain.
Hinako’s damage increases in this state, but naturally, the risk of death also skyrockets. Under normal circumstances, you’d hesitate to equip Cuckoo. It’s realistically a choice for either the “I never get hit” type of player who’s absolutely confident in their dodging, or for a desperation build when you have zero healing options. There is a workaround, though.
It’s still quite awkward to use. Since Omamori cannot be swapped during combat, you must decide beforehand—while out of combat—to intentionally remain at low Health. Otherwise, there’s simply no sensible timing to equip Cuckoo.
In other words, you cannot conveniently drop to low Health mid-fight and then equip Cuckoo on the spot.
Recommended Omamori Combinations
Tanuki
【Tanuki】
Converts incoming Health damage into Sanity damage.
From Draw Omamori
And that workaround is this: by lowering your maximum Sanity to intentionally stay in a near-death state, you can create a situation where taking damage still allows you to keep fighting normally.
Shrew Mole
【Shrew Mole】Location: Shrine Path (New Game+)
Dodging while at critical Health does not consume Stamina.

If the Daisy below feels a bit too extreme, the fallback option is Shrew Mole.
While in a Near-Death state, dodging will not consume any Stamina.
Daisy
【Daisy】
Stamina and Sanity become unlimited, but any damage taken results in instant death.
From Draw Omamori
This recommendation applies to Action Difficulty Hard or Lost in the Fog. At these difficulties, it’s very common to get one-shotted while in a Near-Death state.
If you might die in one hit anyway, then why not pair it with Daisy — which also kills you in one hit but gives you absurd benefits in return?
You gain infinite Stamina and Sanity. You can fire off Focus Attacks as much as you like. The risk–reward balance technically lines up… more or less.
Related Guides
Here are my other SILENT HILL f guides. Feel free to check out anything that catches your eye.
