This guide explains Sanity and the Focus state.
It summarizes mechanics you’ll want to understand during combat,
so use it to assist you throughout your playthrough.
Sanity and Focus Mechanics
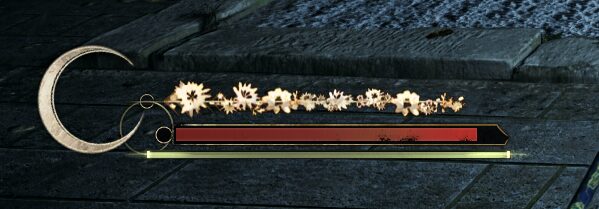
The bar above your Health is the Sanity gauge. The crescent icon represents your weapon’s durability, while the glowing outer rim can essentially be considered your Focus gauge.
To put it another way, Focus is Hinako’s engine, and Sanity is the fuel that keeps it running.
Sanity is consumed to maintain Focus
A normal Focus state extends the duration of the Counter visual cue.
On top of that, when the crescent gauge is fully illuminated—putting you in a Focus MAX state—you gain a buff that increases the damage of all your attacks. The effect resets after one use.
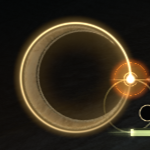 ← Focus MAX state
Additionally, a Light Attack performed during Focus MAX becomes a 【Focus Attack】, which deals heavy damage and has a high chance of inflicting stun on normal enemies. It also comes out quickly and has long reach, making it difficult for enemies to punish.
In short, entering a Focus state gives Hinako the means to fight more effectively, and Sanity is the resource required to sustain it—so managing it carefully is essential.
The Difference Between Sanity and Max Sanity
Let’s review the meaning of “Max Sanity”, which appears occasionally throughout the game.
Actions that consume Sanity
Maintaining a Focus state consumes Sanity. This is its primary use.
Releasing the button immediately stops the consumption, but the Focus gauge resets back to the beginning.
Consumed Sanity regenerates over time—even during combat—until it reaches its upper limit.
Actions and elements that consume Max Sanity
Once the upper limit decreases, Sanity will only regenerate up to that reduced threshold no matter how much time passes.
The following actions and elements reduce the upper limit:
・Using a Focus Attack
・Taking damage from enemy attacks (on Action Difficulty Hard or higher)
・Damage from event sequences (such as the red-screen phenomenon in the Approach Path or Corridor)
There are three main sources in total.
If your Max Sanity runs dry, maintaining Focus becomes much harder, and you won’t be able to make full use of it unless you limit all-out attacks and avoid taking damage on higher difficulties.
How to Restore Your Max Sanity
Max Sanity does not recover naturally, but any amount you've lost can be restored. The increased maximum you gained through Pray is permanently retained.
Recover at a Hokora
On Action Difficulty 【Story】, simply opening the Hokora menu fully restores it. On 【Hard】 or 【Lost in the Fog】, you’ll need to use the “Clear Mind” option in the menu to recover it completely.
However, restoring Max Sanity consumes Faith, so if you rely on Clear Mind too often, you’ll have a harder time saving Faith for Pray upgrades or Draw Omamori.
Recover with Items
You can recover Max Sanity using items such as Ramune, Divine Water, or Kudzu Tea.
You can generally enshrine all of them, but if you’re playing on 【Hard】 or 【Lost in the Fog】, it’s safer to keep a few bottles of Ramune on hand.
Ramune only grants 20 Faith when enshrined, so if your Max Sanity is low, it’s perfectly fine to use it immediately after finding it.
Recover through Omamori
【Hound】Location: Treasure Hall
Restores a small amount of Max Sanity when defeating enemies.
Guide →Treasure Hall Walkthrough
No map image
Area with the Black Sparrow Crest
There are other Omamori that offer recovery opportunities during combat, such as 【Dolphin】. 【Daisy】 prevents Max Sanity from decreasing altogether, but it comes with a major drawback—taking even a single hit results in instant death.
When the Real World and the Dark Shrine Stages Swap
This isn’t something you should rely on, but in practice, your Max Sanity does get fully restored when this happens.
Related Guides
Here are my other SILENT HILL f guides. Feel free to check out anything that catches your eye.