This guide explains efficient ways to take down Tumor Woman, key things to know, and its attack patterns.
Use this guide to assist you throughout your playthrough.
※For clarity, this guide applies unofficial labels to bosses whose official names have not been disclosed. These names are used solely for reference purposes.
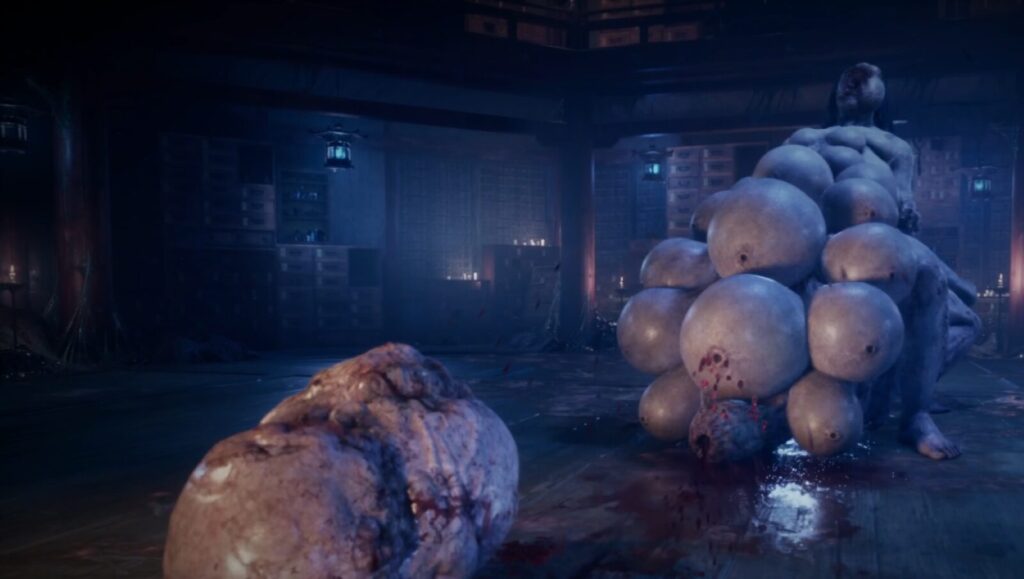
Boss Strategy: Tumor Woman
Where This Boss Appears: Worship Hall Walkthrough
Its movements are slow, and its attacks are not particularly overwhelming. However, things get troublesome once the small enemies spawned from its cocoons join the fight, so make sure to take down the cocoons before they hatch.
After that, simply wait for openings and chip away with light naginata attacks to wear it down and win.
Even on [Hard], this battle is surprisingly easy. The [Priestess] fight is actually tougher.
Attack Patterns
① Vomit Spray
Blood spurting from its face is the signal. You’ll get used to it quickly and be able to dodge it with ease.
② Double Charge
It covers a fairly long distance in a straight line, so evade to the side. Occasionally, an effect appears indicating a counter opportunity—don’t miss it.
③ Minion Summon
Once it produces a cocoon, destroying it becomes your top priority.
The minions actually deal more damage than the Tumor Woman herself, and fighting a 1-vs-2 can get overwhelming fast.
④ Roar
If you keep attacking recklessly, it will unleash a roar that deals area-of-effect damage.
If you feel you’ve gotten too close, keeping some distance is a valid way to manage the risk.
Boss Strategy: Tumor Woman (Rematch)
Rematch in the Main Hall
Where This Boss Appears: Main Hall Walkthrough
Action [Hard] When you enter the room, you’ll see a small enemy hanging from the ceiling at the back. This makes the fight even more troublesome than the one in the Worship Hall.
The key is to eliminate this enemy first. If it teams up with the Tumor Woman, that combination becomes the primary cause of failure—stop it at all costs.
If you manage to keep the fight to 1 vs 1 + α, it shouldn’t be too difficult. Once you take it down, don’t forget you can absorb its soul.
Subsequent Rematches
In place of its charge attack, it now creates blue cocoons.
These blue cocoons explode when you get close, so simply keep your distance to avoid the blast.
Your priority remains the same—focus on destroying the cocoons that spawn lesser enemies first. It also feels like the vomit projectile animation has become slightly faster.
Additionally, because cocoons are already placed at the start of the fight, forcing a 1-on-1 situation is harder this time. Since the fourth encounter takes place in a wide area, lure the adds away one at a time and take them down individually for a safer approach.
From the fourth encounter onward, ignore it entirely if doing so is possible.
Related Guides
Here are my other SILENT HILL f guides. Feel free to check out anything that catches your eye.